How To Trace Over A Picture In Photoshop
Are you looking for a perfect Photoshop tutorial to learn how to trace over a picture in photoshop? Then read through the article, and I bet you will become a pro at doing this. Why would you need to trace over an image? Well, tracing over a photo, shape, or line helps you have complete control over your image or design. So you can do image editings like background removal, image resizing, color correction, and many more with ease.
Whether you have an image, shape, or line, you can easily trace and draw over them using simple Photoshop tools and tricks. In this article, we will be showing you some easy but effective methods of image tracing. So be with us.
Table of Contents
Trace An Image In Photoshop Using Pen Tool
You can trace an image in Photoshop using the pen tool, and it is one of the most commonly used methods. The pen tool allows you to create paths by which you can easily trace an image or shape. Photoshop experts often use this tool and perform clipping path techniques to edit pictures professionally. Follow the below steps to learn how you can DIY this process easily.

Step 1: Open your image in Photoshop.
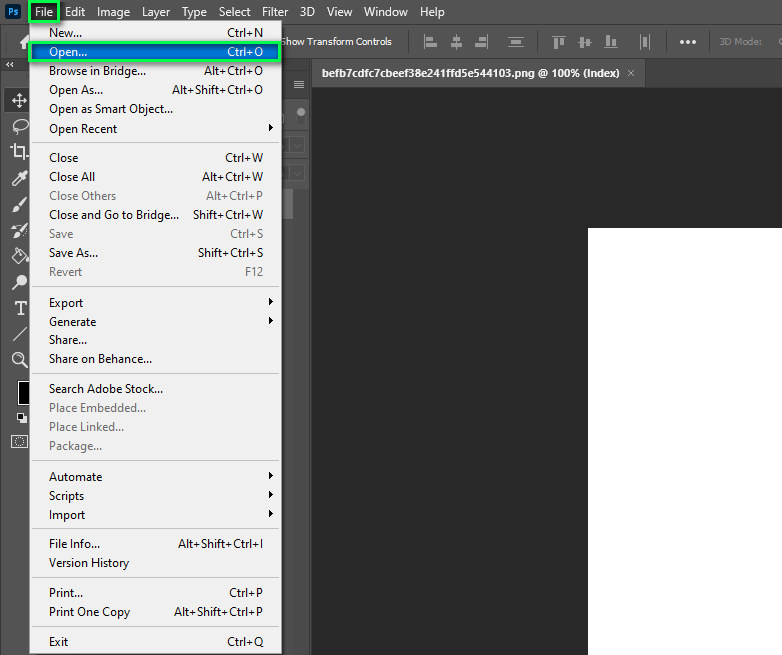
Start with inserting the image you want to trace in the adobe photoshop cc on your pc. You can drag and drop the image onto the artboard. Or you can go to the menu bar, click on the File menu, click on the Open option, select the image you want to trace, and click on Ok/Insert.
Step 2: Create A Duplicate Layer
After inserting the image, if you check the right side of the dashboard, you will see the original layer in the layer panel. We will duplicate it and create a duplicate layer. Go to the menu bar and click on the Layer menu.
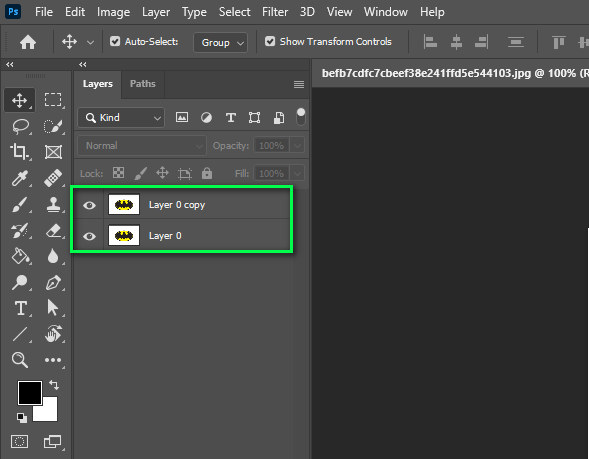
From the dropdown menu, click on the Duplicate Layer option and click OK.
Step 3: Set the Opacity
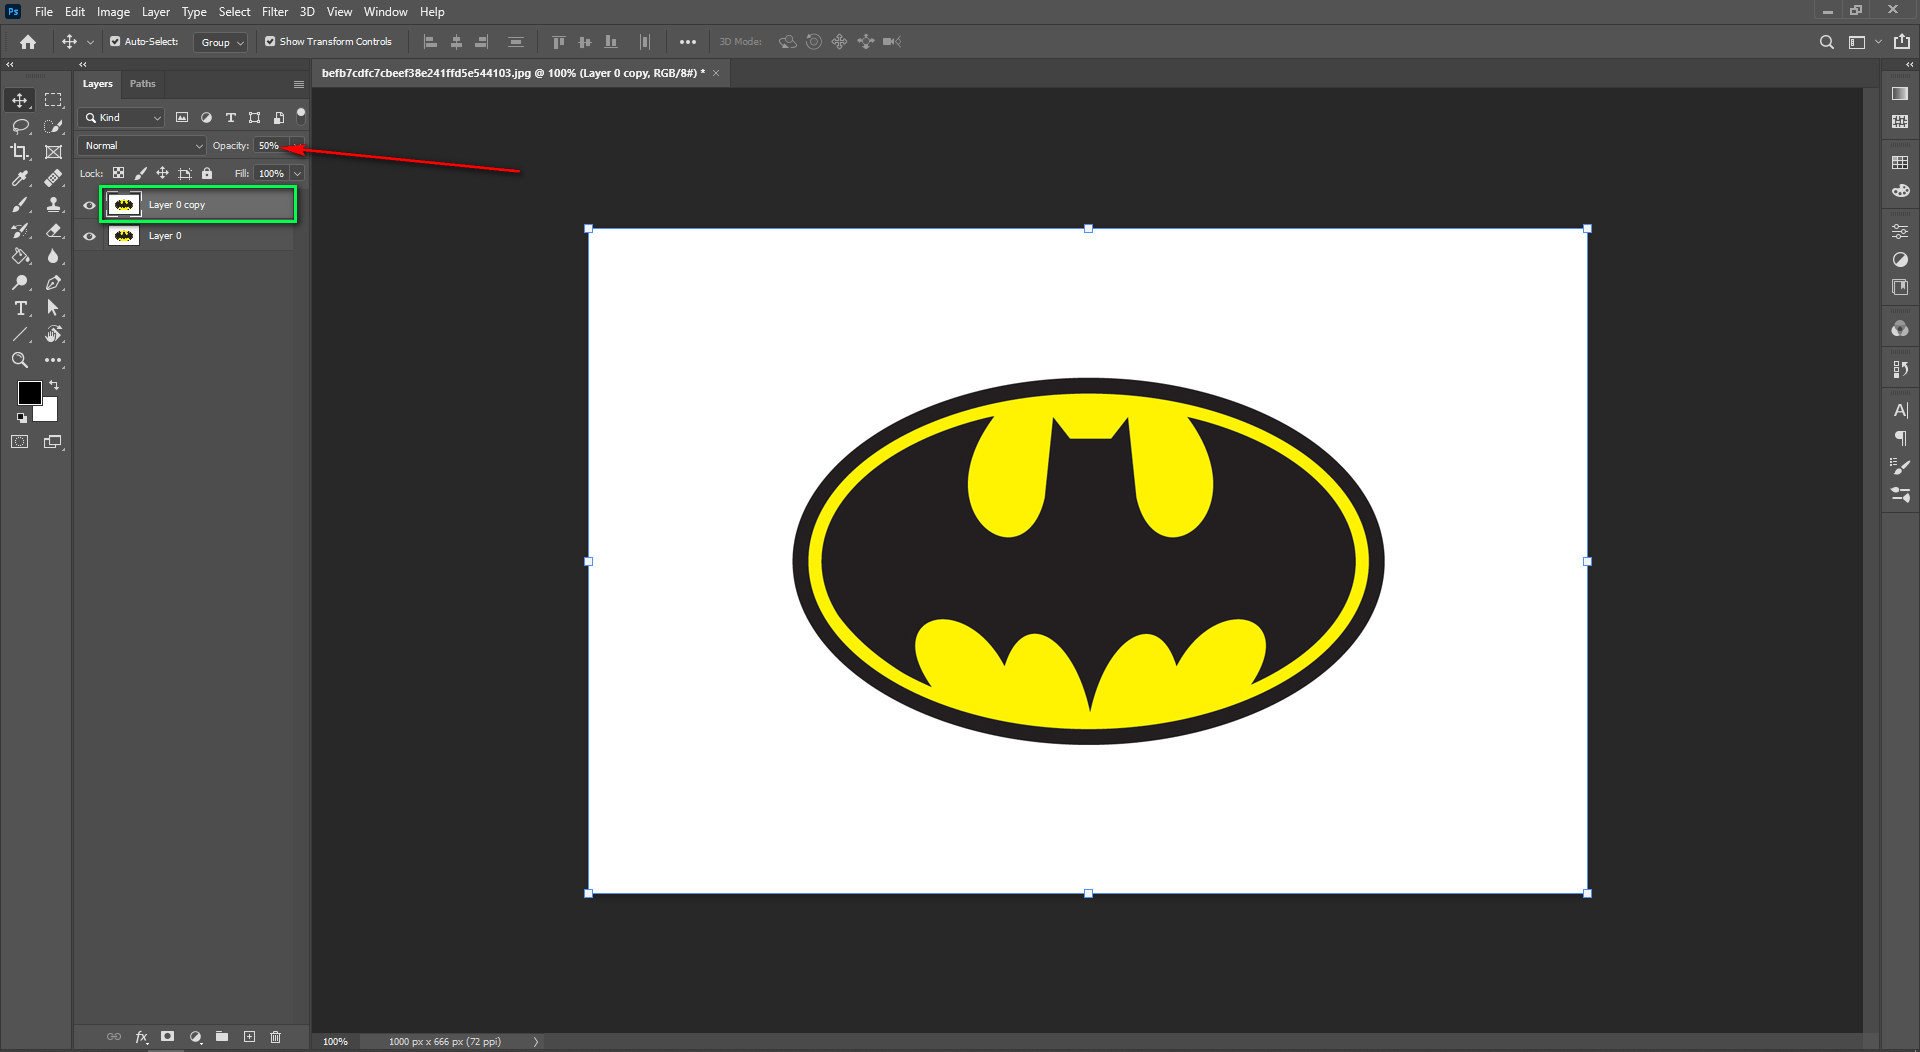
In this step, we will adjust the opacity of our recently created duplicate layer. Click on the duplicate layer, and from the Opacity field, set it to 50%. Lock the layer by clicking on the padlock icon near the opacity option.
Step 4: Create a New Layer
Now, create a new layer using the Layer menu from the menu bar. Set the name of the layer to “Tracing.” With that, we will have three layers in the layer panel. Before going into the tracing part, click on the last layer and press Ctrl+Backspace (PC) or cmd+Delete (Mac) to make it white.
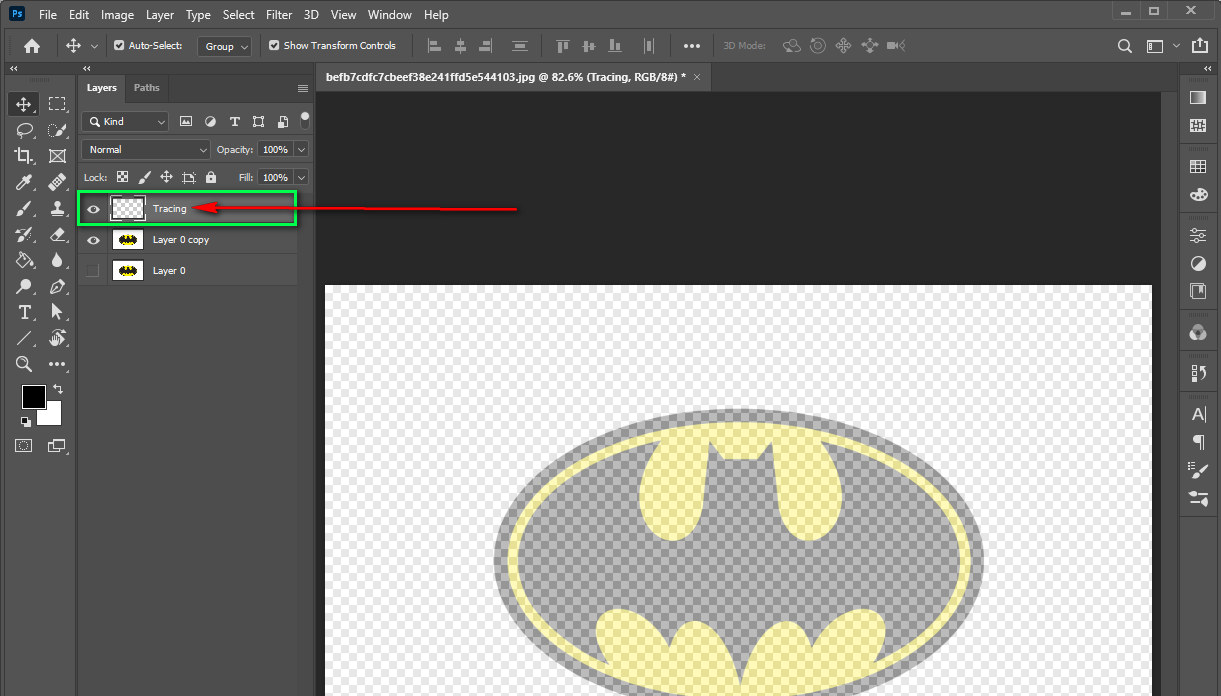
Step 5: Zoom in/out
Now click on the Tracing layer and select View from the menu bar. Click on the 200% option from the dropdown menu and make your image look big. Use the Zoom In and Out option from that dropdown menu to make the image viewing more comfortable for you.
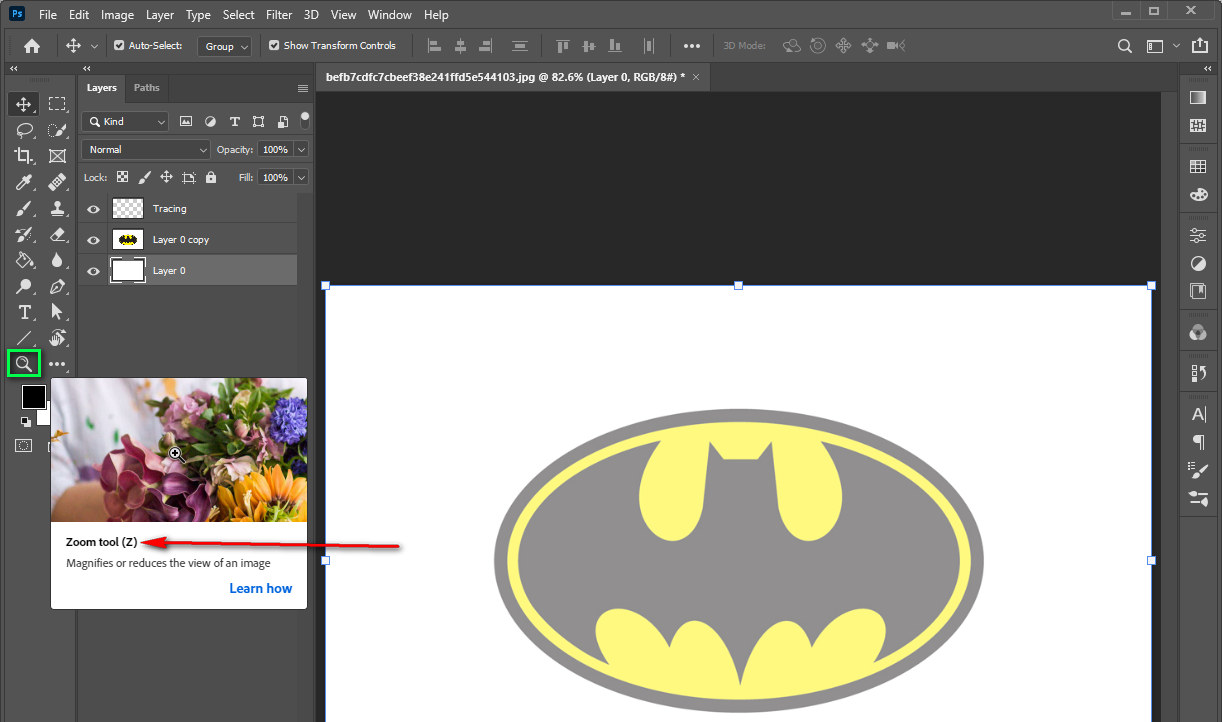
Step 6: Choose the color to trace
Choose a color using the color menu option above the layer window on the right. Click on the overlapping squares and select a color. Click on the squares again and select the same color again.
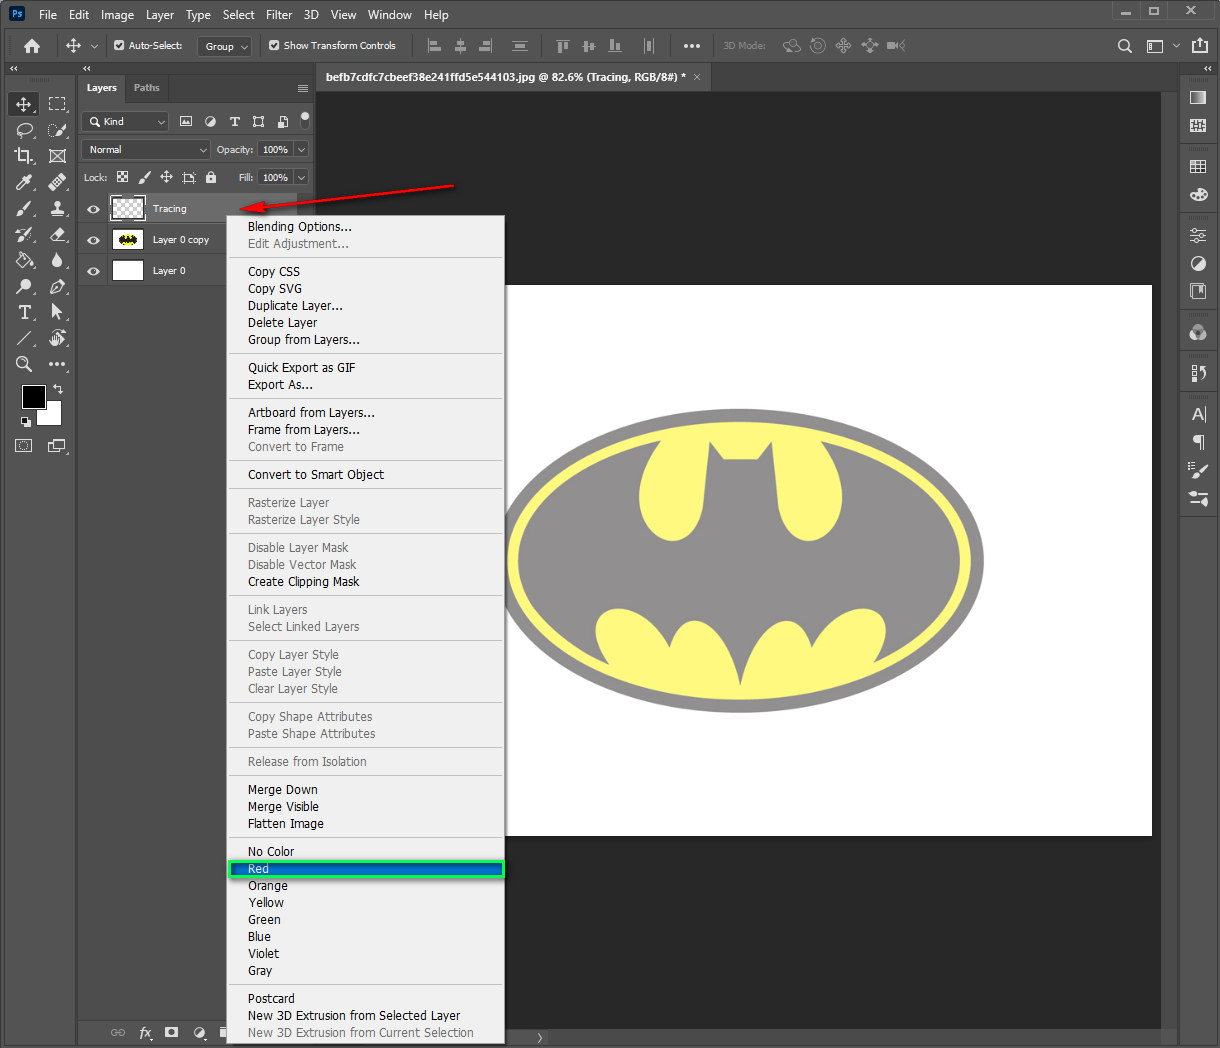
Step 7: Select the pen tool
Now, select the pen tool from the toolbar to create paths around the edges and trace the image.
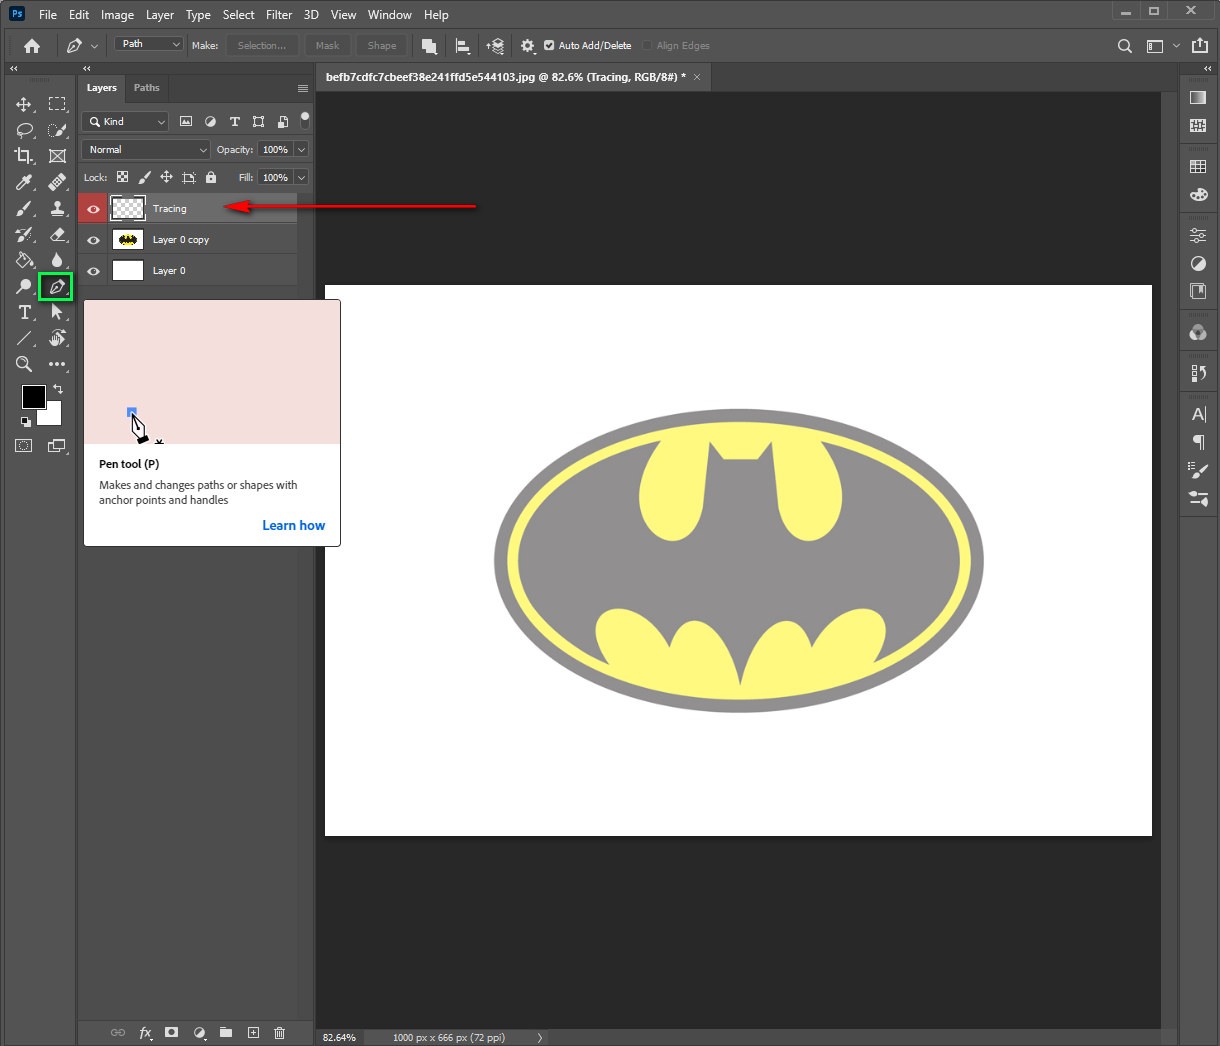
Step 8: Adjust settings
After selecting the pen tool, go to the top, and you will see some pen tool settings right under the menus. Set the settings to the path from there.
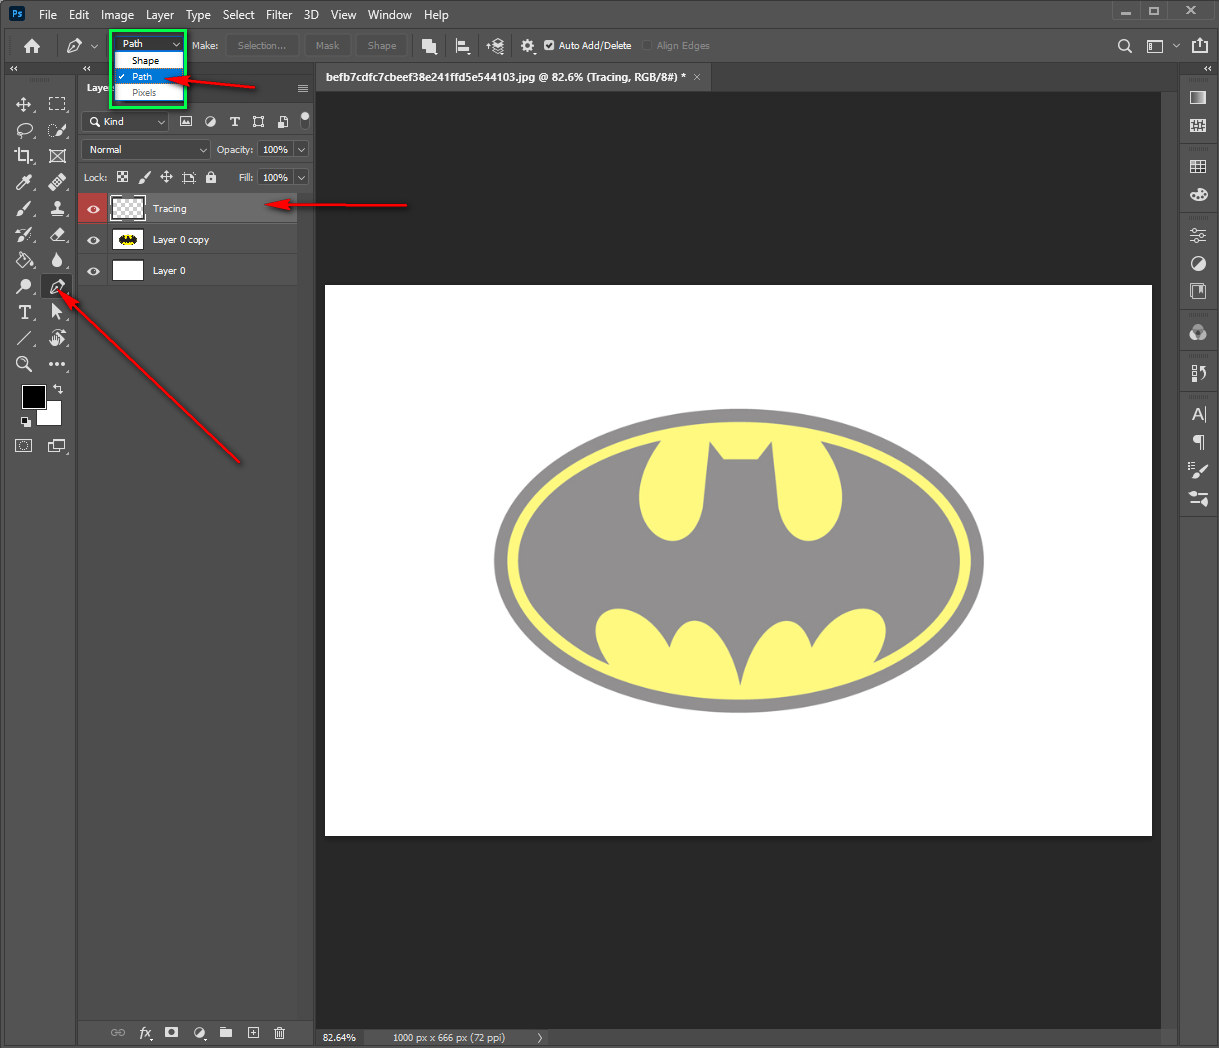
Step 9: Start Tracing
To trace the image, you have to create paths around the edges of your subject. You need to use anchor points in the pen tool to create paths. So start creating anchor points around the edges, and paths will be created automatically. The more curves your subject as you need to use more anchor points to get it perfect.
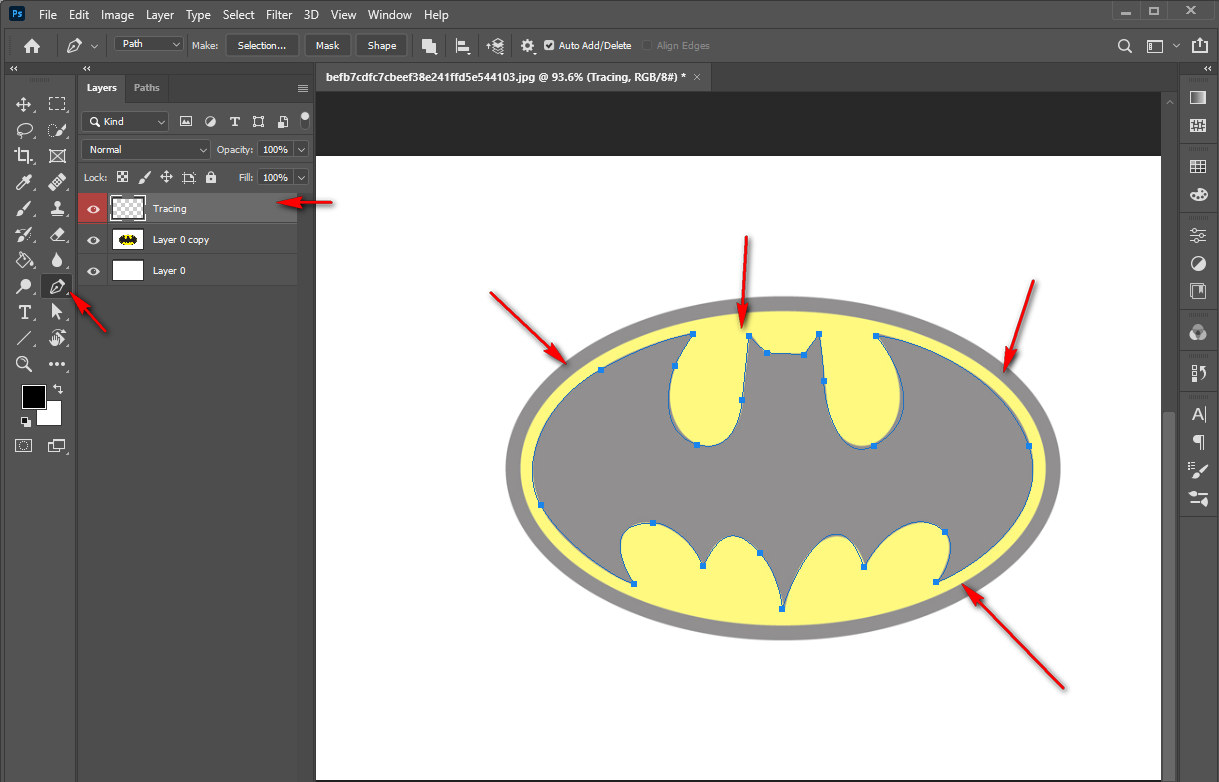
Step 10: Save your image
After you complete creating paths over your image, set the image size to 100% from the View option. And when you feel you have got precisely what you want, save the image.
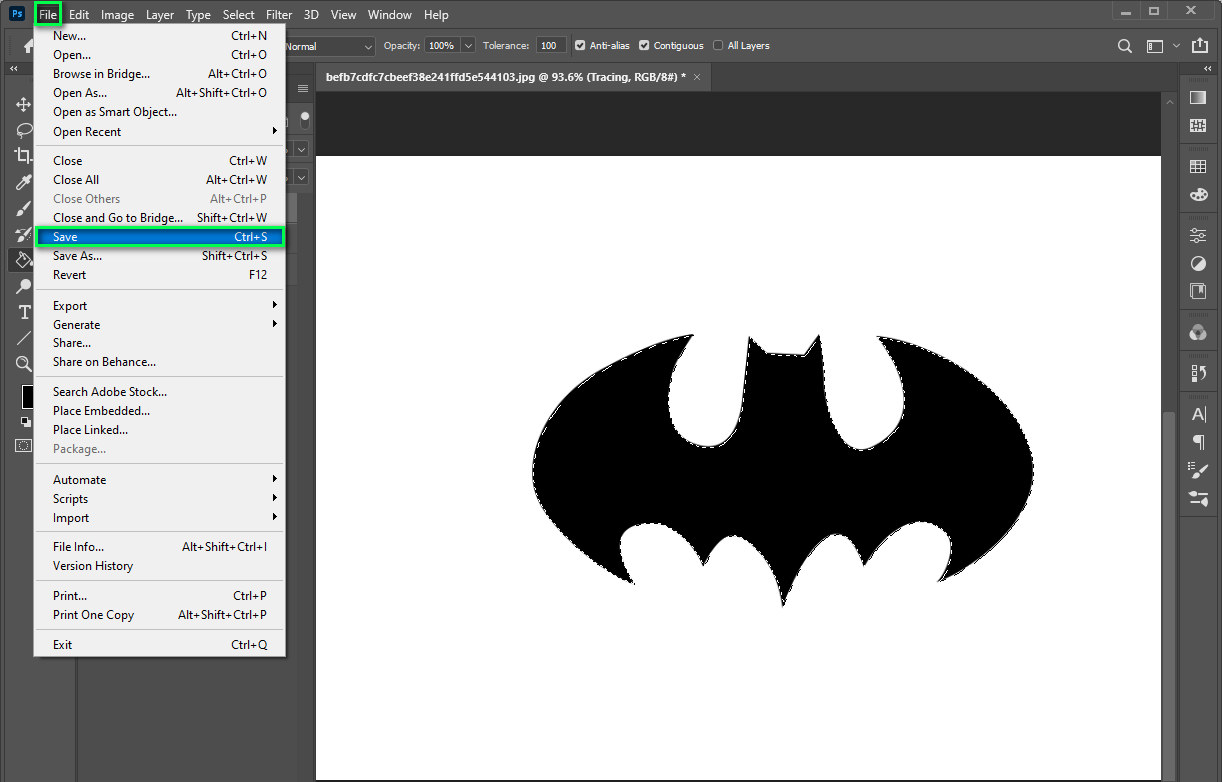
Go to the menu bar, click on the File menu, and select Save As. Choose the place where you want to save your image, and then click on the Save button.
How To Draw Over An Image In Photoshop
Sometimes you might need to draw over an image in Photoshop. In that case, the Photoshop pencil tool might be the best option for you. Let’s see how to draw over an image in Photoshop using the pencil tool with some easy steps.

Like the previous one, we will start by opening our image in Photoshop. Continue from Step 1 of the previous process and then continue from Step 2 below.
Step 2: Select the pencil tool
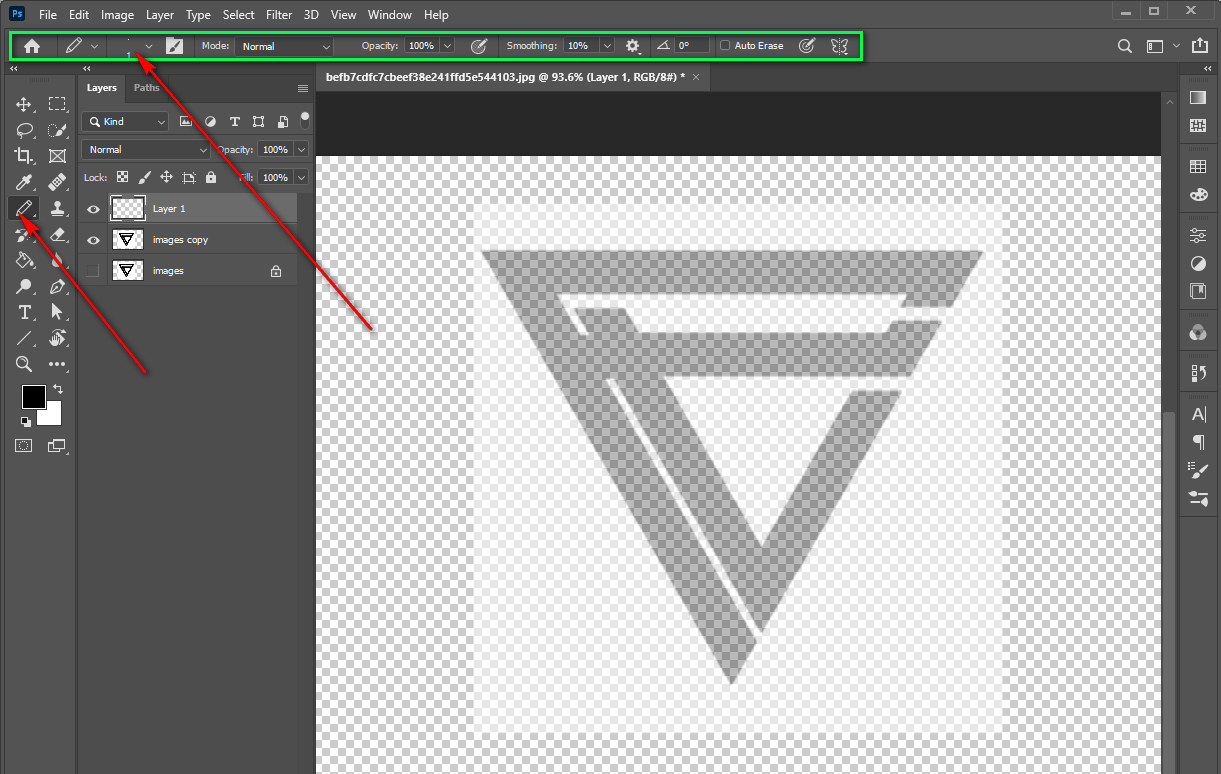
Go to the toolbar at the left and find a pencil-like icon. It can be embedded in the paintbrush option. Find it and click on it to select.
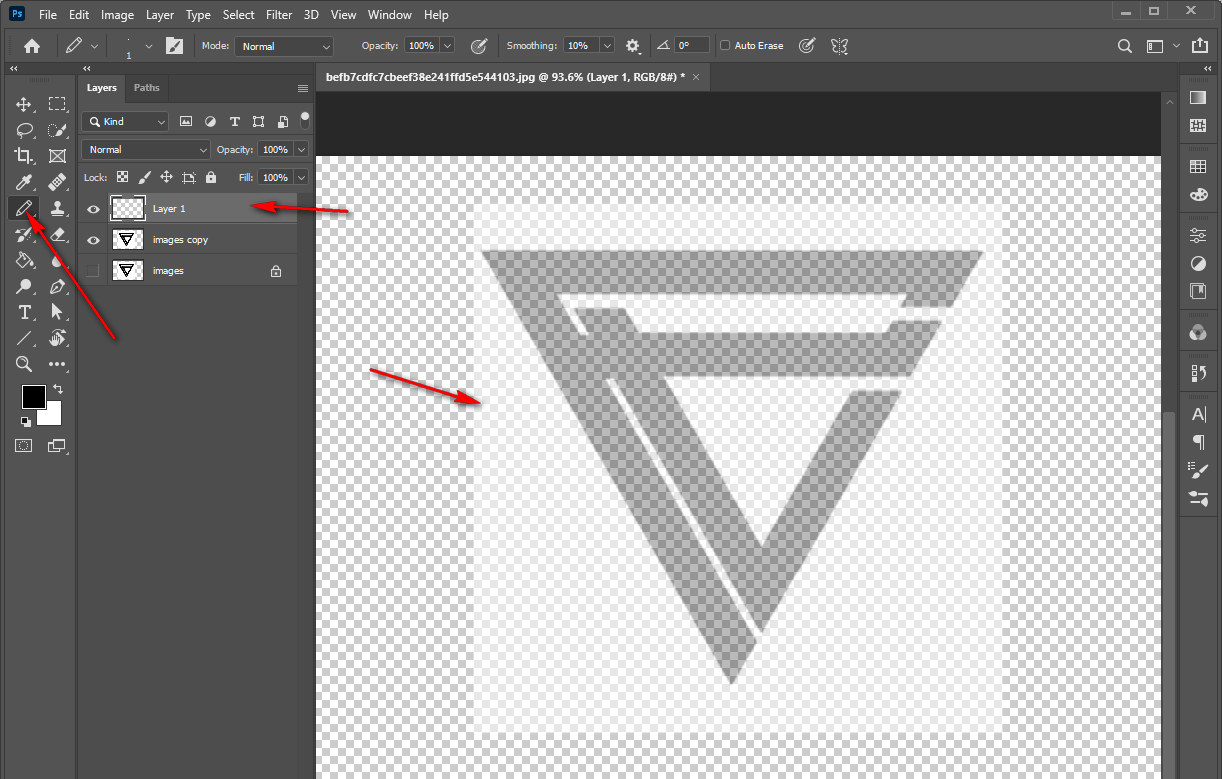
Step 3: Adjust the settings
After selecting the pencil tool, you will see some settings appear right under the top menu bar. From there, set the brush size and style according to your requirements.
Step 4: Select the color
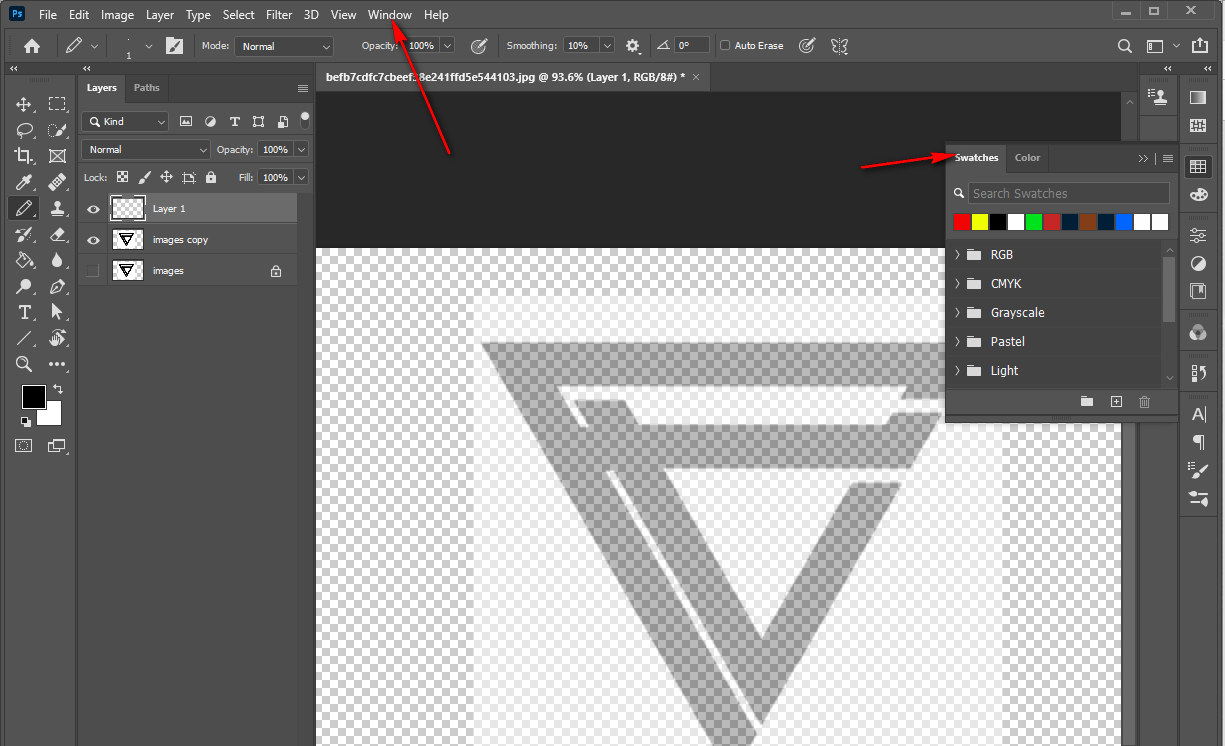
Now, click on the color swatch in the toolbar and select a suitable color from the color selector window using the rainbow-like sliders.
Step 5: Start drawing.
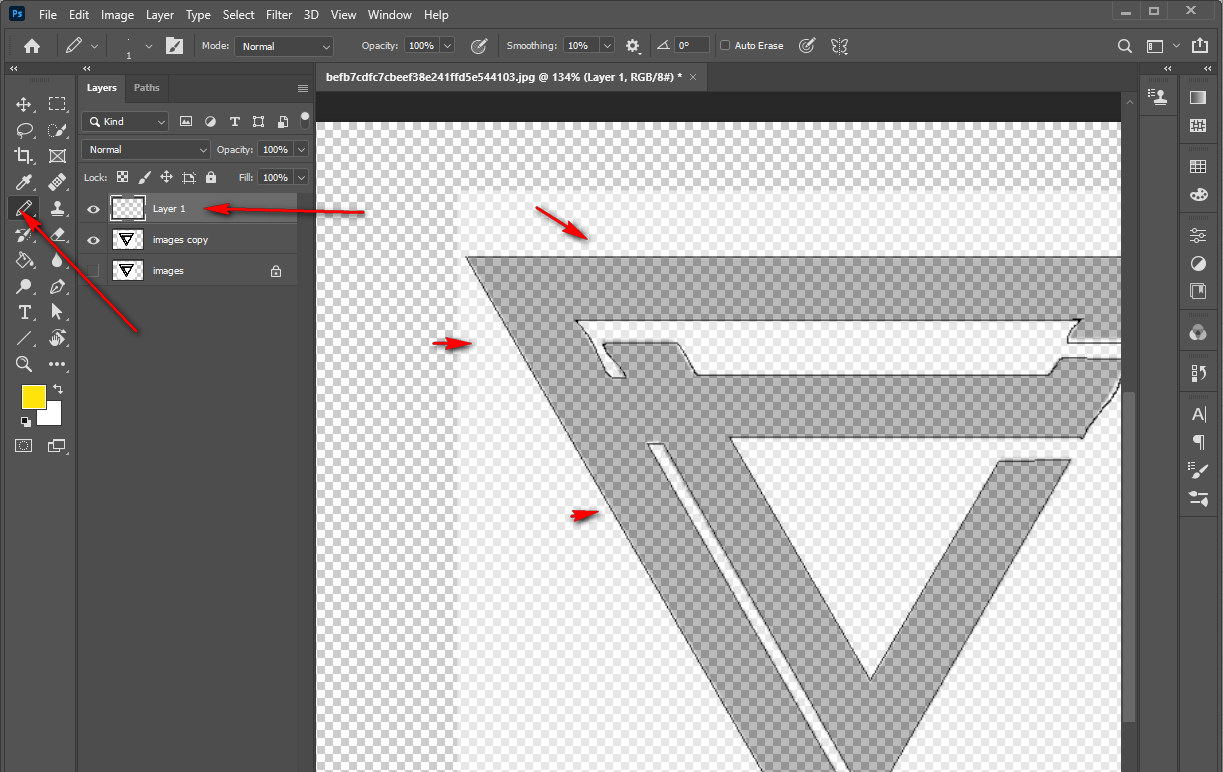
It’s time to start drawing over the image. So click on the image and drag the cursor to draw. You can drag over the photo and draw however you like.
Step 6: Save the file
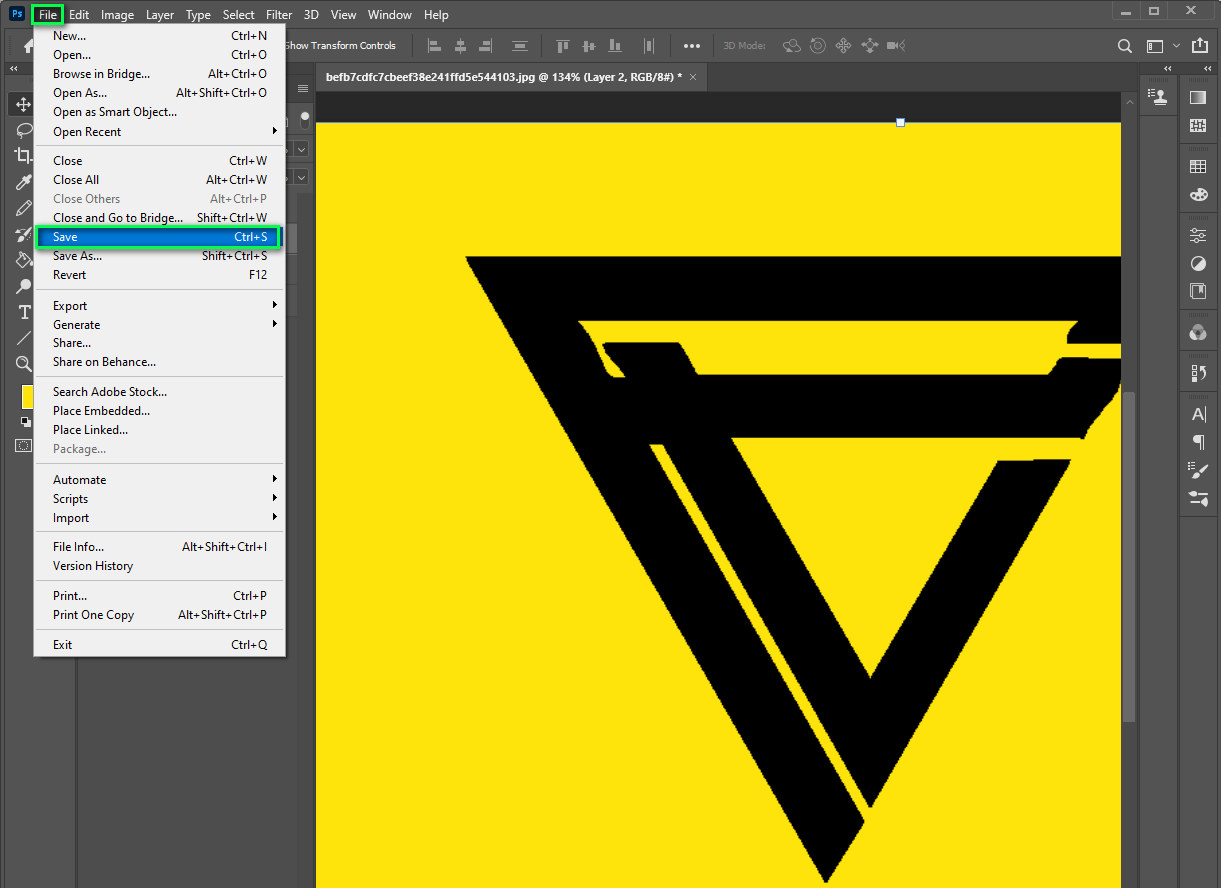
After you complete drawing over the image using the pencil tool, save the file by clicking on the File menu and then selecting Save As option from it.
Trace Lines or Shapes In Photoshop
In Photoshop, you can trace lines of any text or any graphical shape. Adobe Photoshop offers several editing tools for this image editing technique. You can use the Pen Tool, Pencil Tool, or Brush Tool to trace over the lines in Photoshop. We used the pen tool in the first tutorial of this article, so in this part, we will use the Brush Tool.
You can follow the first one up until selecting the tools without any hassle, so I will not be going through all the steps from the start. Follow that tutorial from Step 1 to Step 6, and then come back here to continue further.
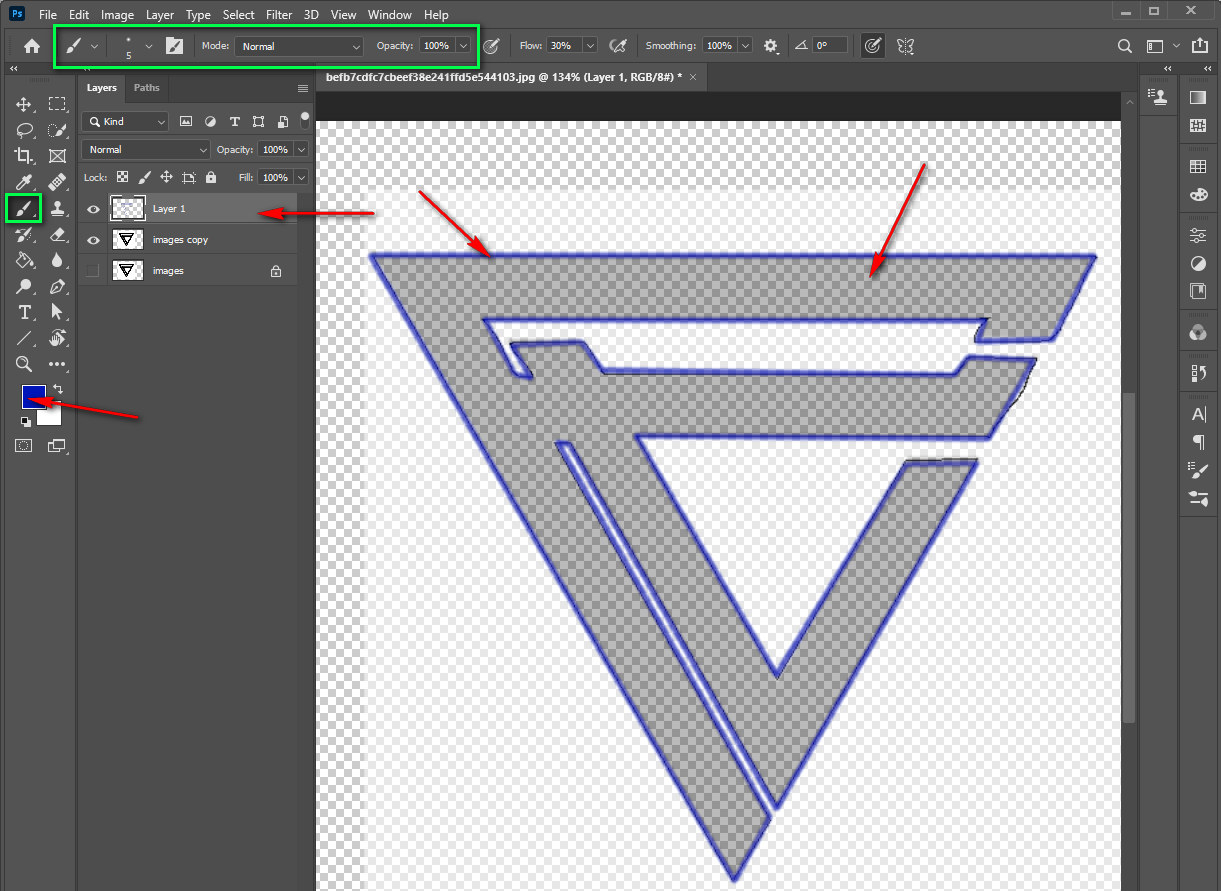
Step 7: Select The Brush Tool and adjust the settings.
You can find the brush tool in the Toolbar at the left. Click on it to select it and then adjust the settings according to your requirements from the option that will appear right under the menu bar after selecting the tool.
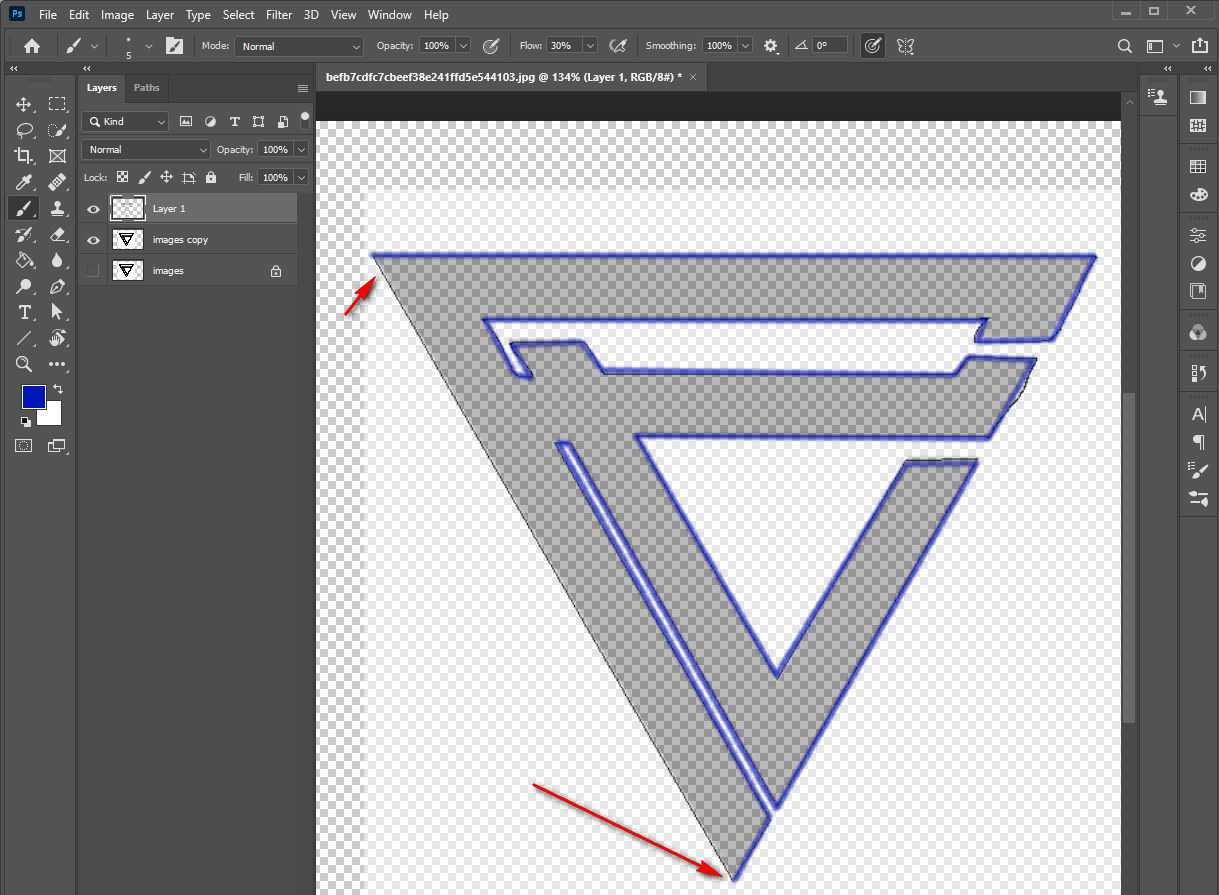
Step 8: Start Tracing
Now click on the lines or shapes you want to trace and drag the cursor to start tracing. Drag over the lines until you have completed tracing all the lines or shapes.
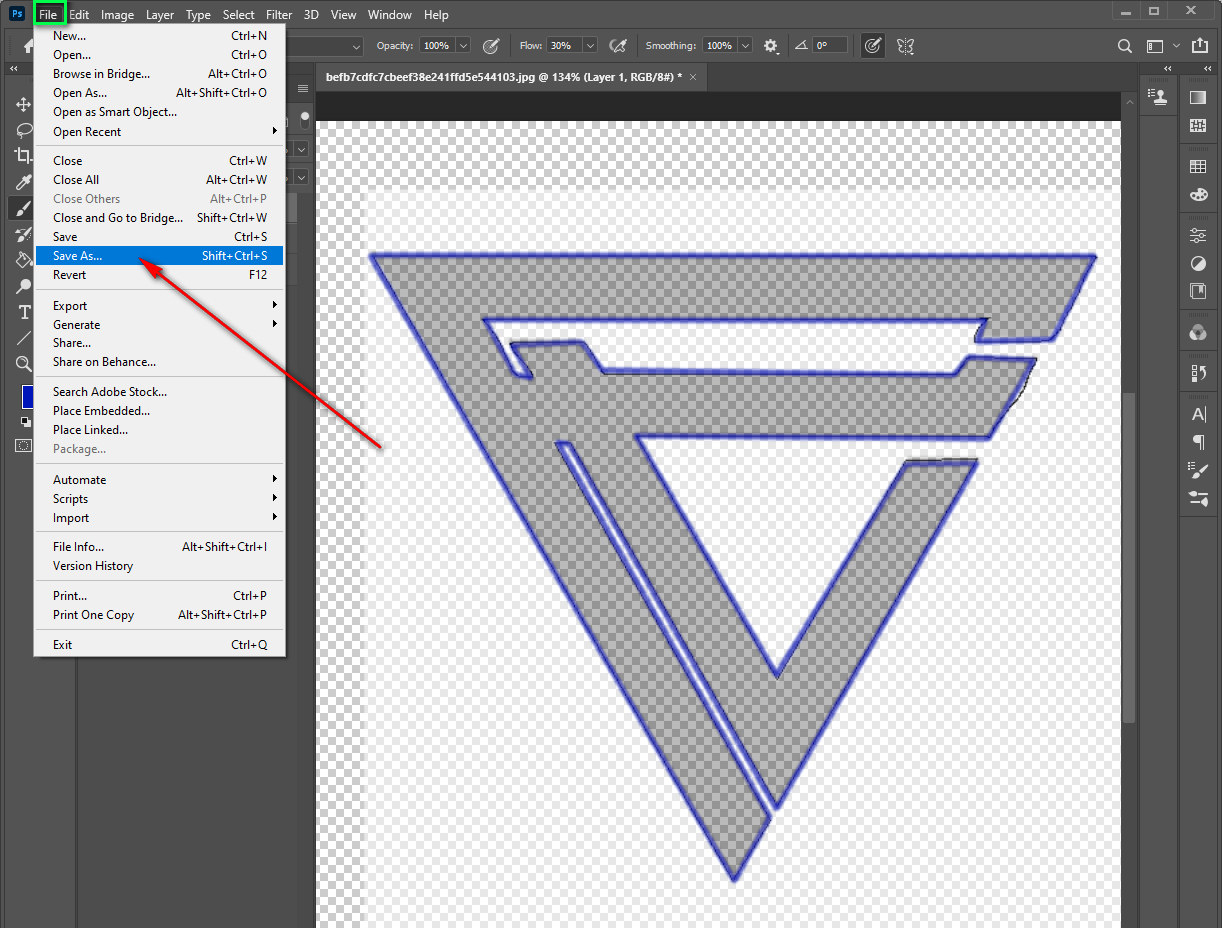
Step 9: Save the file
After you are satisfied with the result, save the file however you like. Use the File option from the menu bar to save the image.
Photoshop Trace Image To Vector
Vector images are the lossless format of raster images. It helps designers produce high-quality content for their clients. As you can see in this article, you can learn how to trace a picture in Photoshop.

But if you follow a couple of steps mentioned below, you will be able to change your raster images or shapes into vector format and make it inevitable. To get started, follow the image tracing process, and after you complete the tracing, you will have the entire subject of your image selected. After that, follow the below steps.
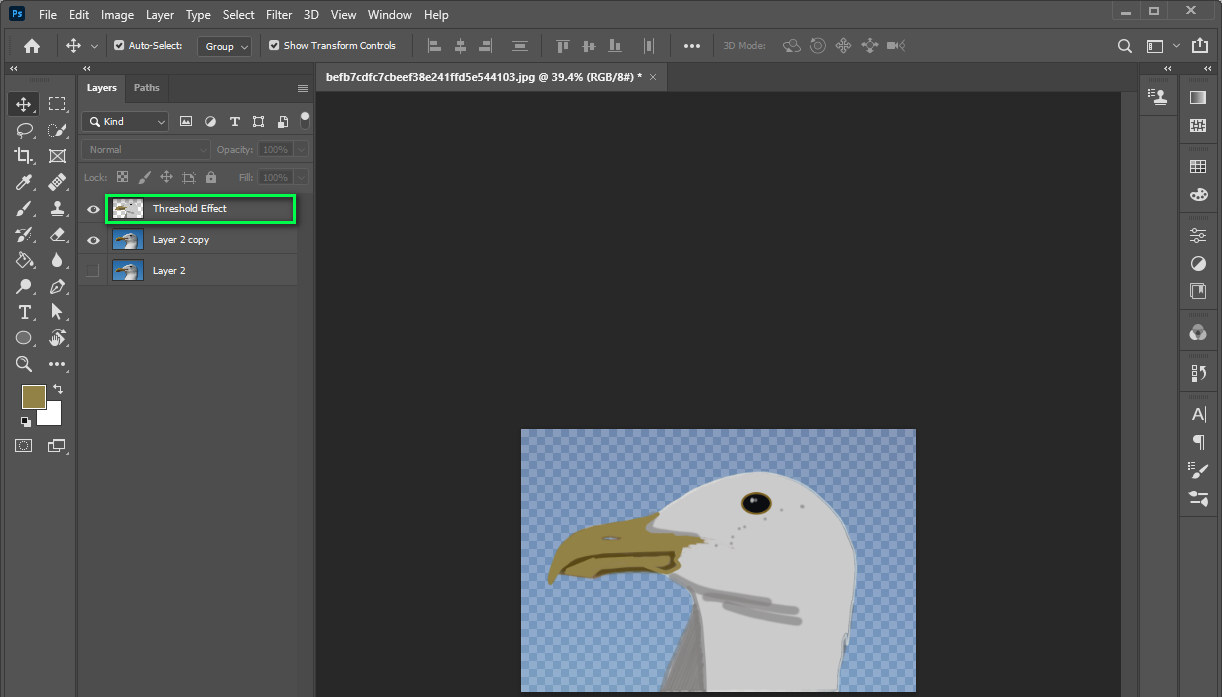
Step 1: Click on the create new fill or adjustment layer icon to create a Threshold Effect layer in the panel.
Step 2: Choose toned areas by using the color range command.
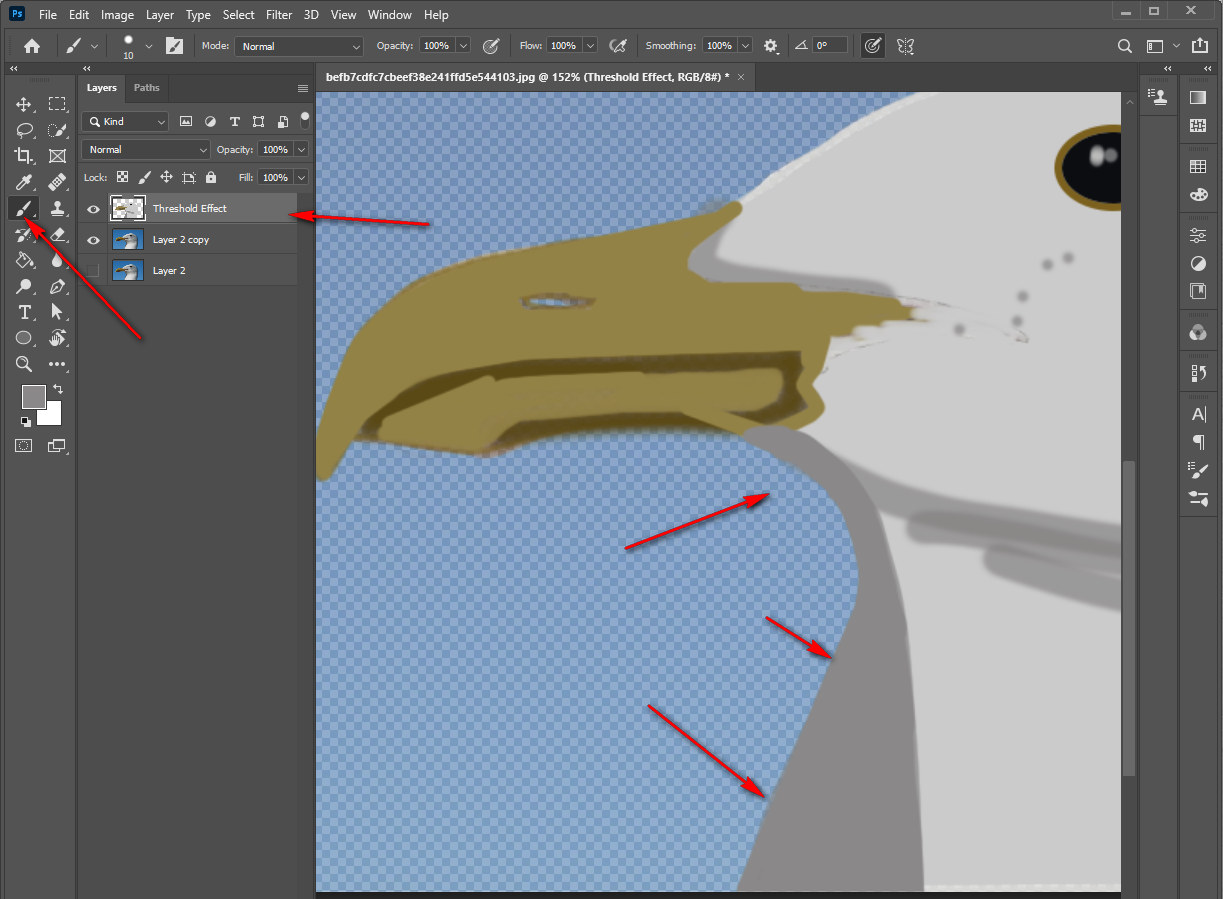
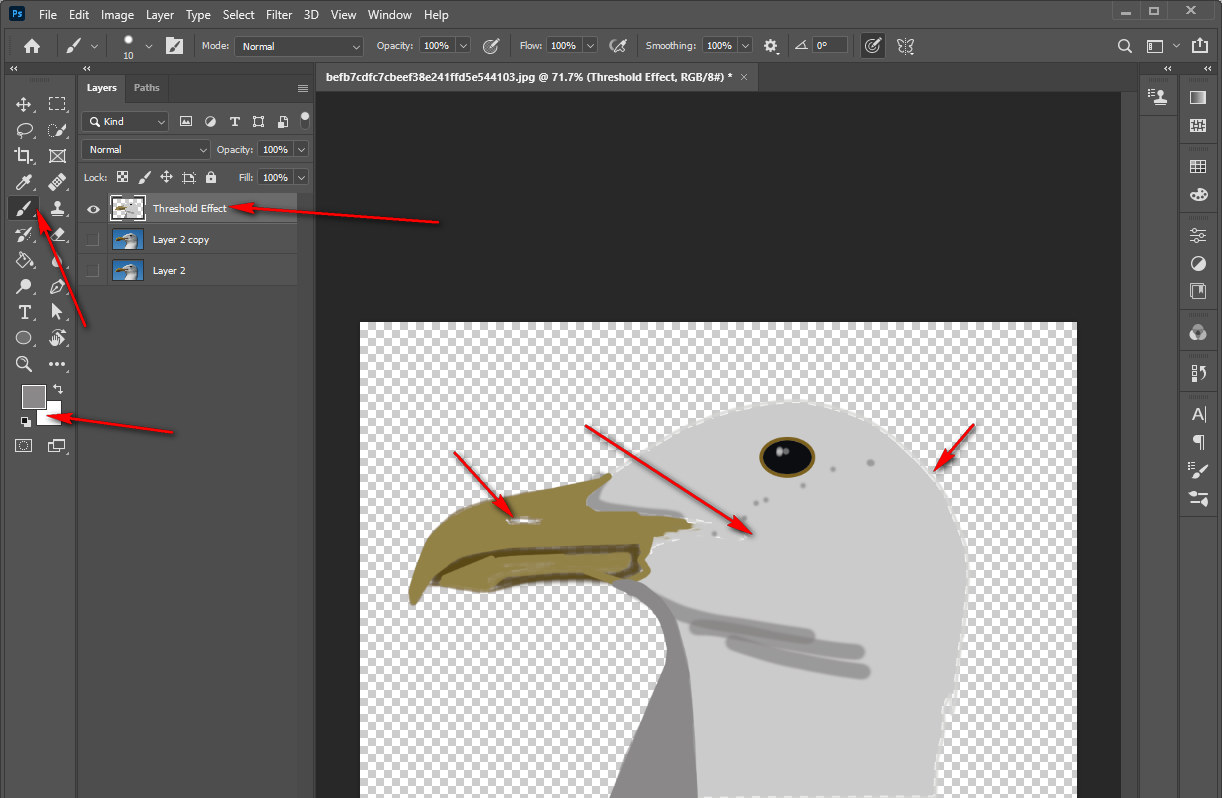
Step 3: In this step, adjust the tolerance value according to your understanding of the path you have created.
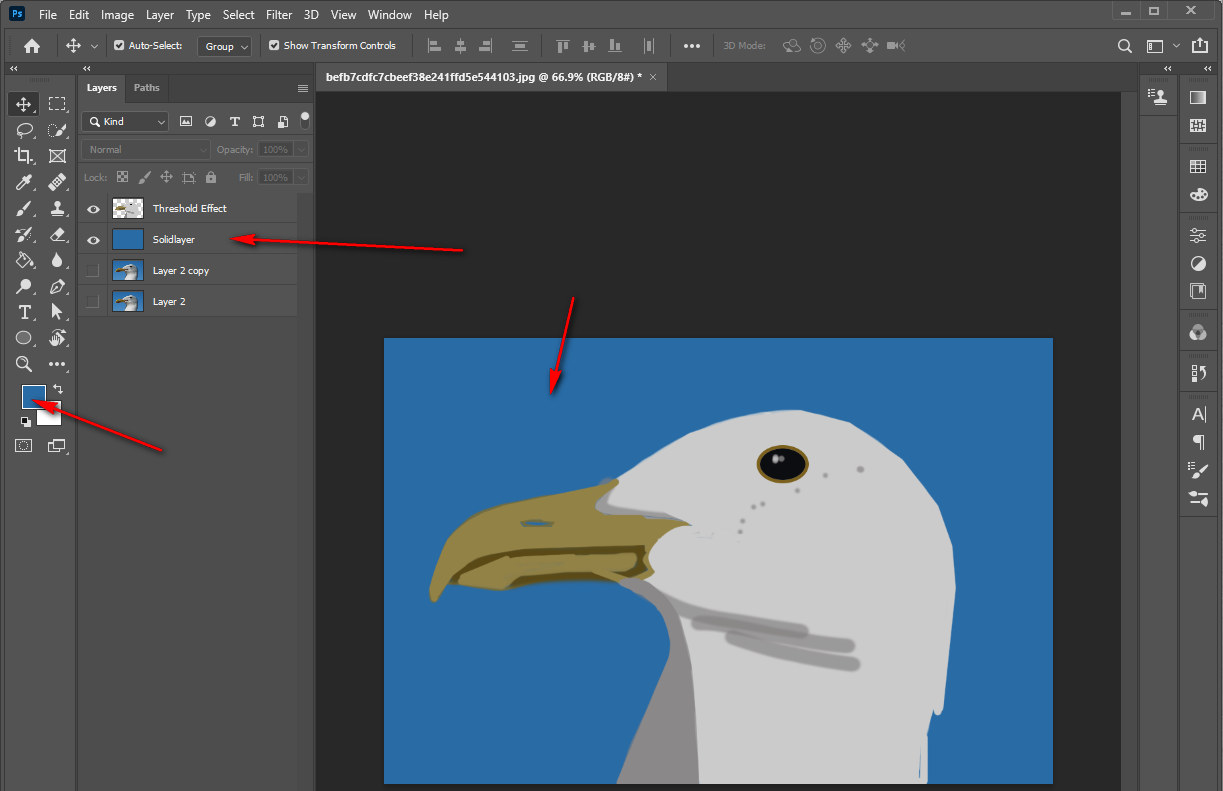
Step 4: Now, create a new solid color layer to fill the path, and with this, your image will turn into the vector format.
Step 6: Save the vector image as an SVG File.
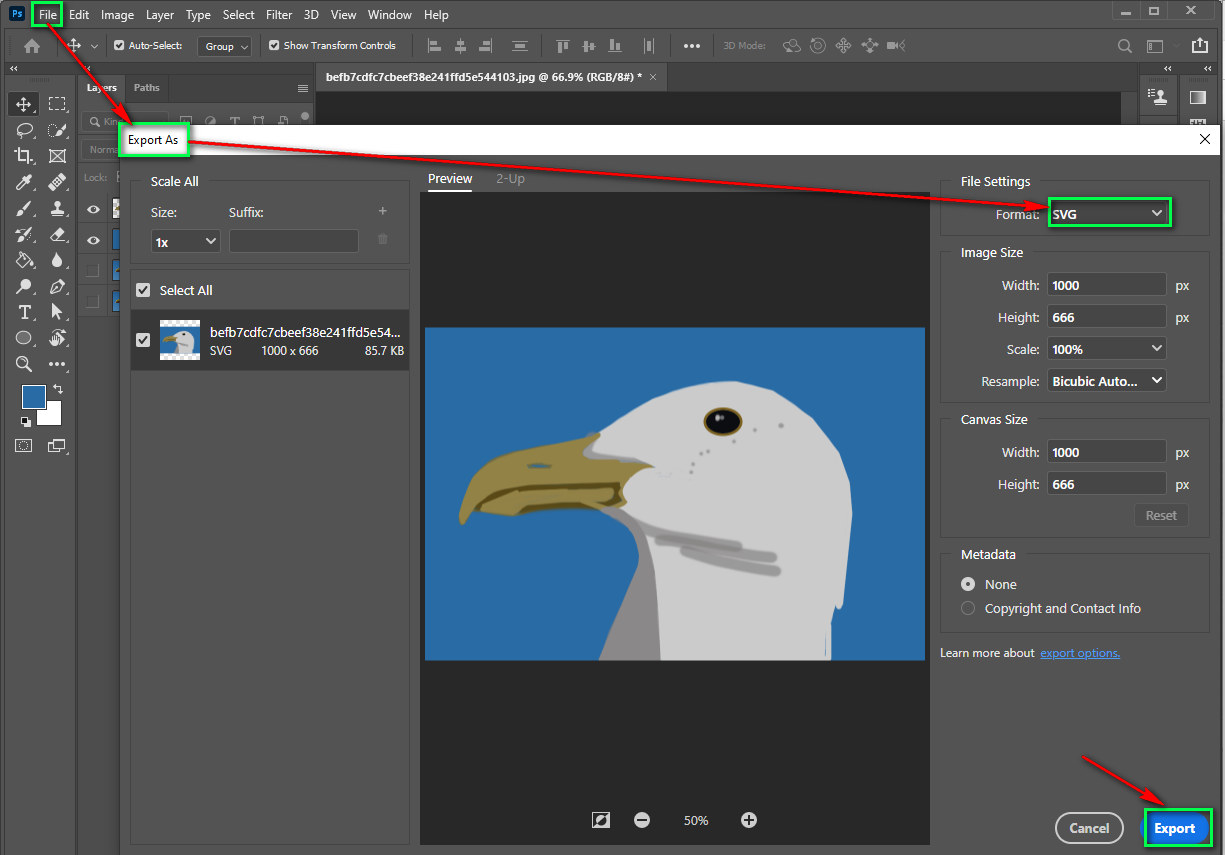
Well, with this, it’s a rap!
Conclusion
If you are a beginner and learning photo editing, knowing how to trace over a picture in photoshop will provide you with a unique set of skills. You will be able to edit images more professionally and make them more attractive to your clients.


