How to Batch Resize in Photoshop

In the dynamic world of digital content, the ability to efficiently manage and optimize images is paramount. Whether you’re a graphic designer, photographer, or content creator, the need to resize multiple images simultaneously often arises. Adobe Photoshop, a powerhouse in image editing, provides various features to simplify this process.
One way to resize multiple images in Photoshop is to use the Image Processor. To do this, open the Image Processor dialog box by going to File > Automate > Image Processor. In the Image Processor dialog box, select the images you want to resize, choose a preset, and specify the output folder. Photoshop will then resize the images according to the preset and save them in the output folder.
Today, we will talk in more detail about the process, and I will share how I do it with you. Then you all can do this simple task and never waste your time on it again.
Table of Contents
What Is Batch Resizing?

Batch resizing involves simultaneously altering the dimensions and resolution of a group of images. This method proves immensely efficient compared to resizing images individually, especially when dealing with a large volume of visuals. The advantages are manifold – it saves time, maintains consistency, and allows for better control over the final output.
How To Batch Resize in Photoshop
You don’t need to be a professional editor or seek professional photo editing help for batch image editing. The steps below describe the process in the simplest way you will find. Please go through it and DIY the batch image editing in Photoshop.
Step 1. Get Your Files in Order
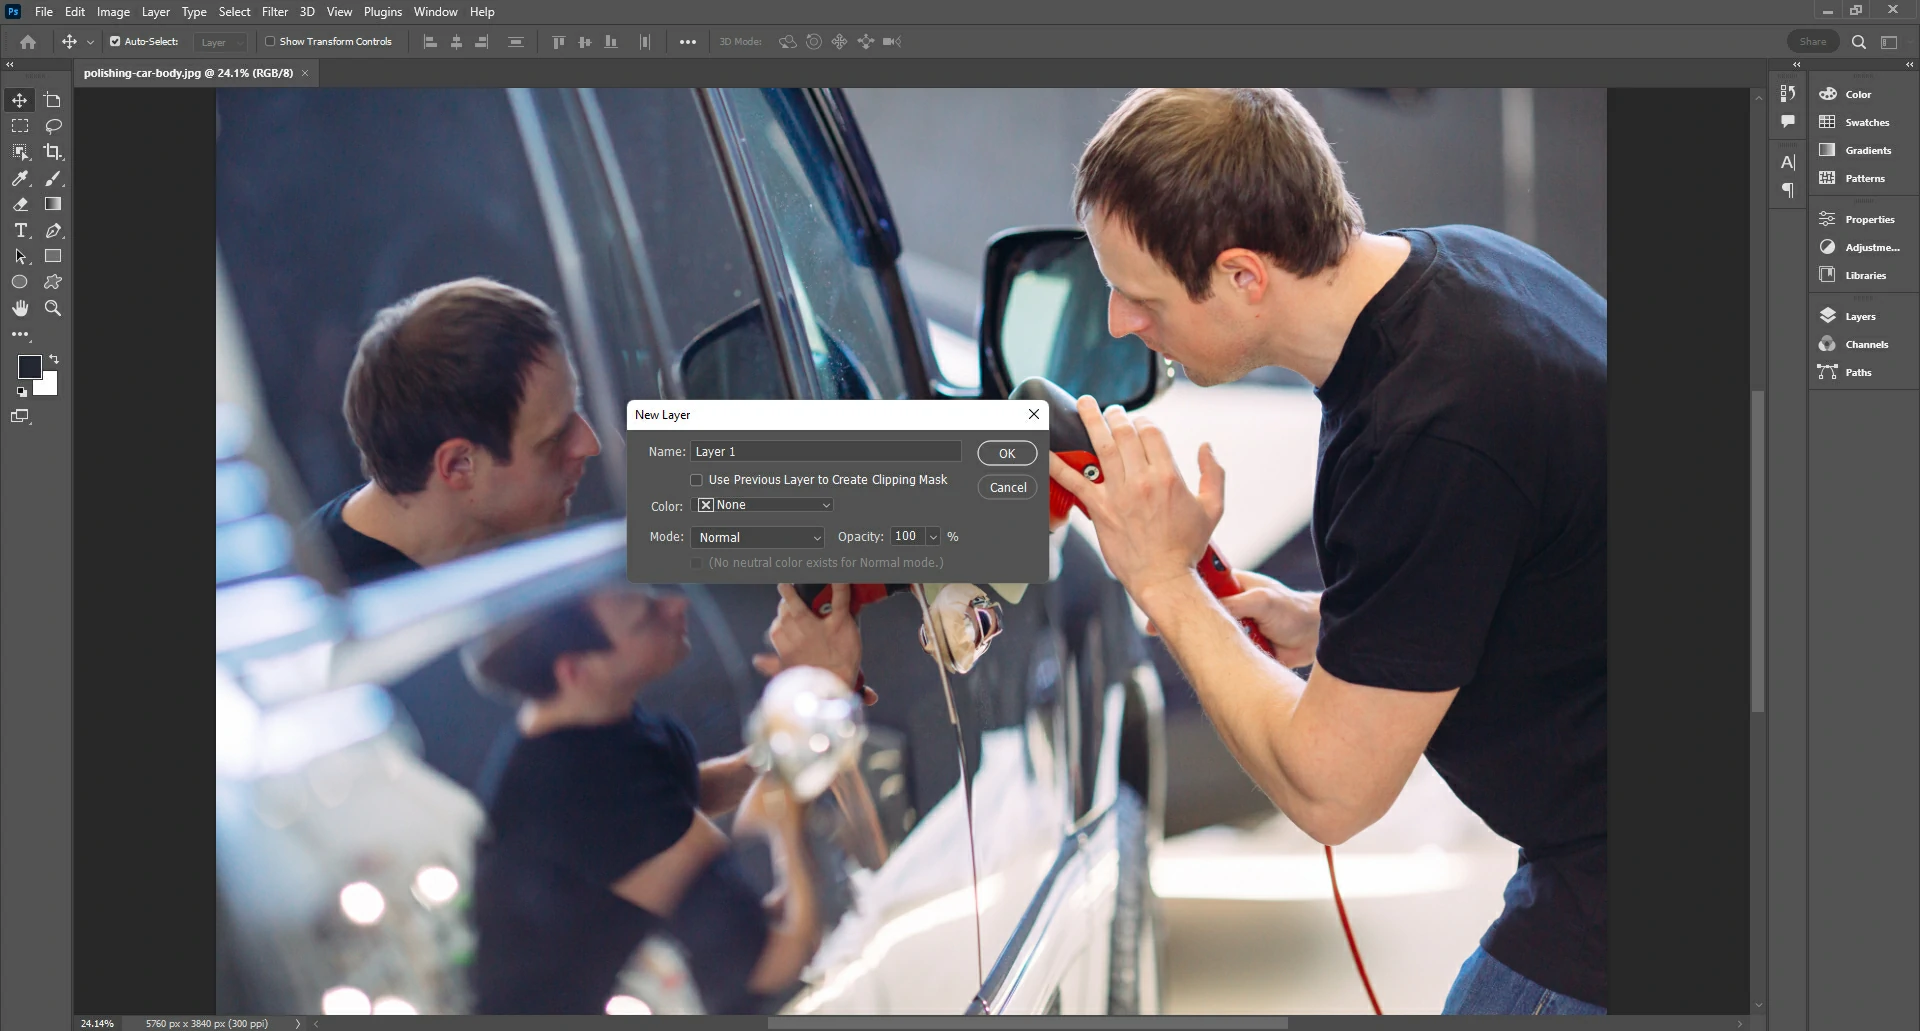
Before jumping into resizing, make sure all the images are in one folder. If they’re not, create a new folder and put them there. On Mac, go to File> New > Folder, or on Windows, press Ctrl + Shift + N in the desired folder.
Step 2. Open the Image Processor
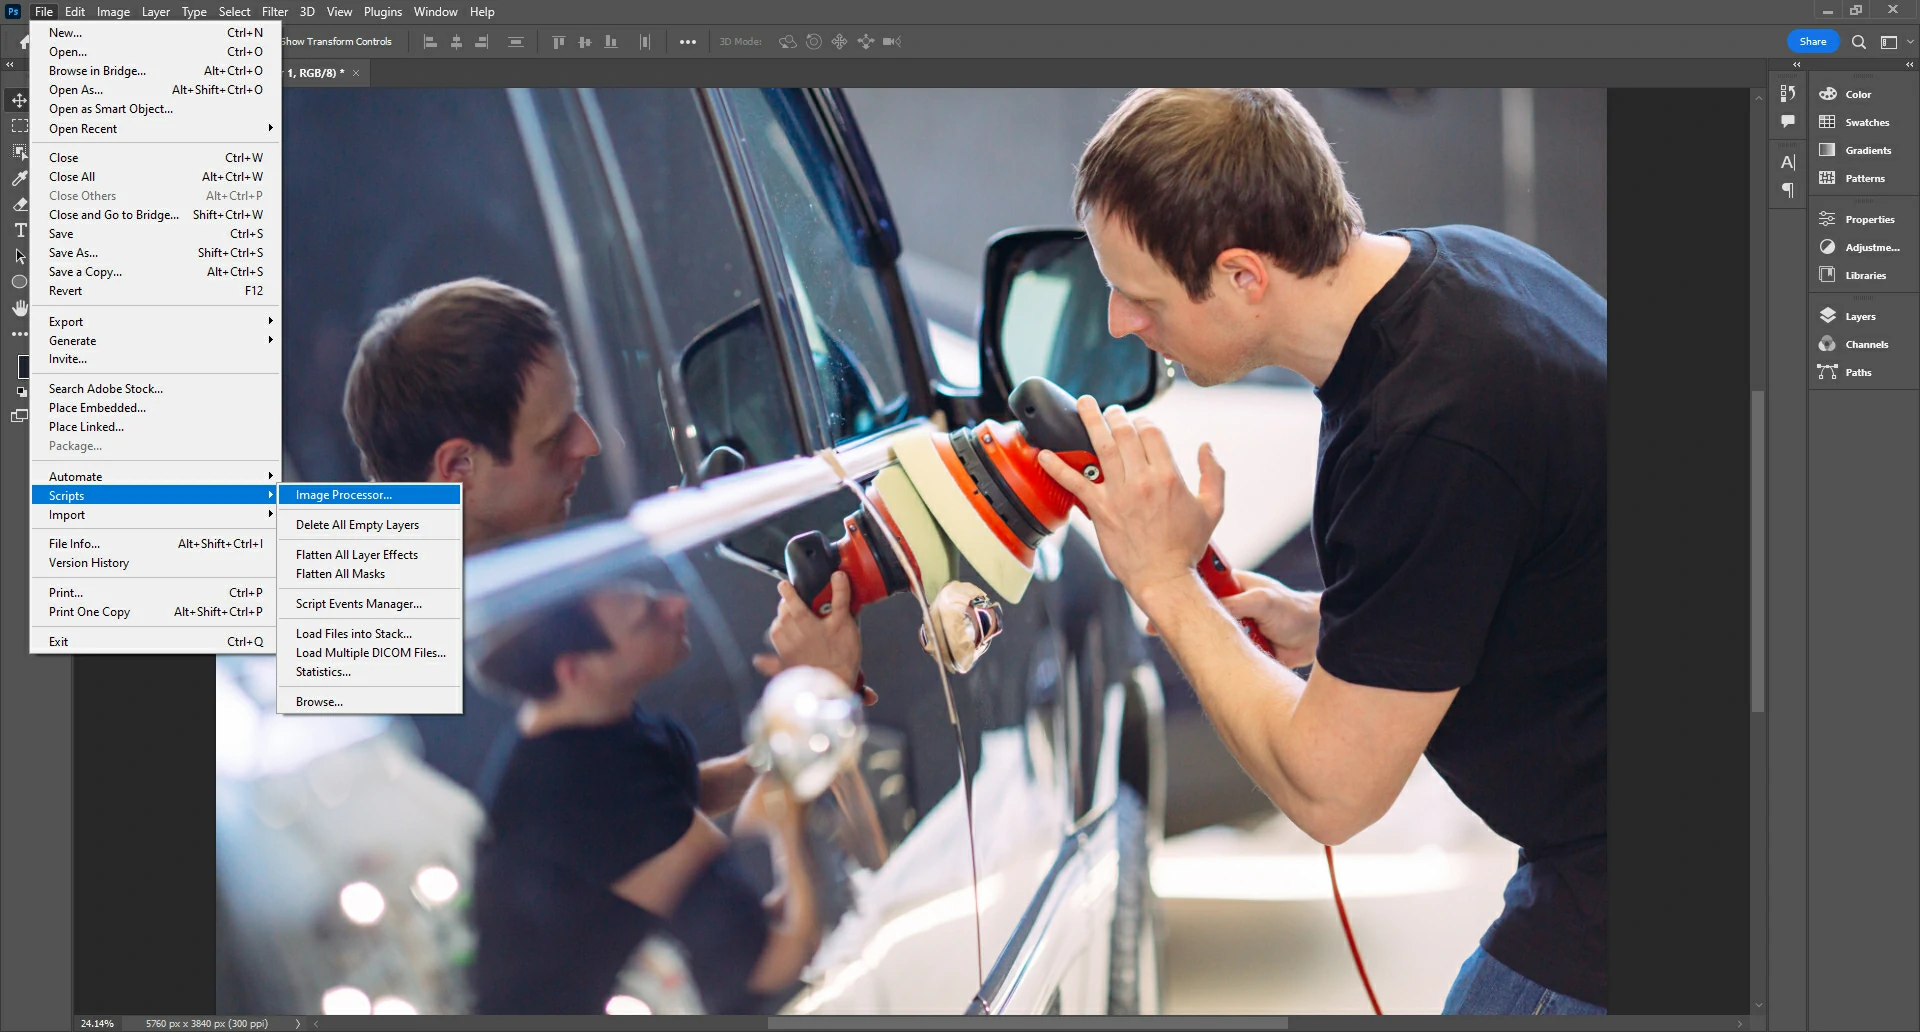
For today’s batch image editing/resizing tutorial, we will use Photoshop’s “Image Processor” settings. Go to the File menu. From there, select Scripts and then Image Processor.
This will open the Image Processor dialog box. You will see all the settings required to batch-process your images in this dialog box.
Step 3. Pick the Folder
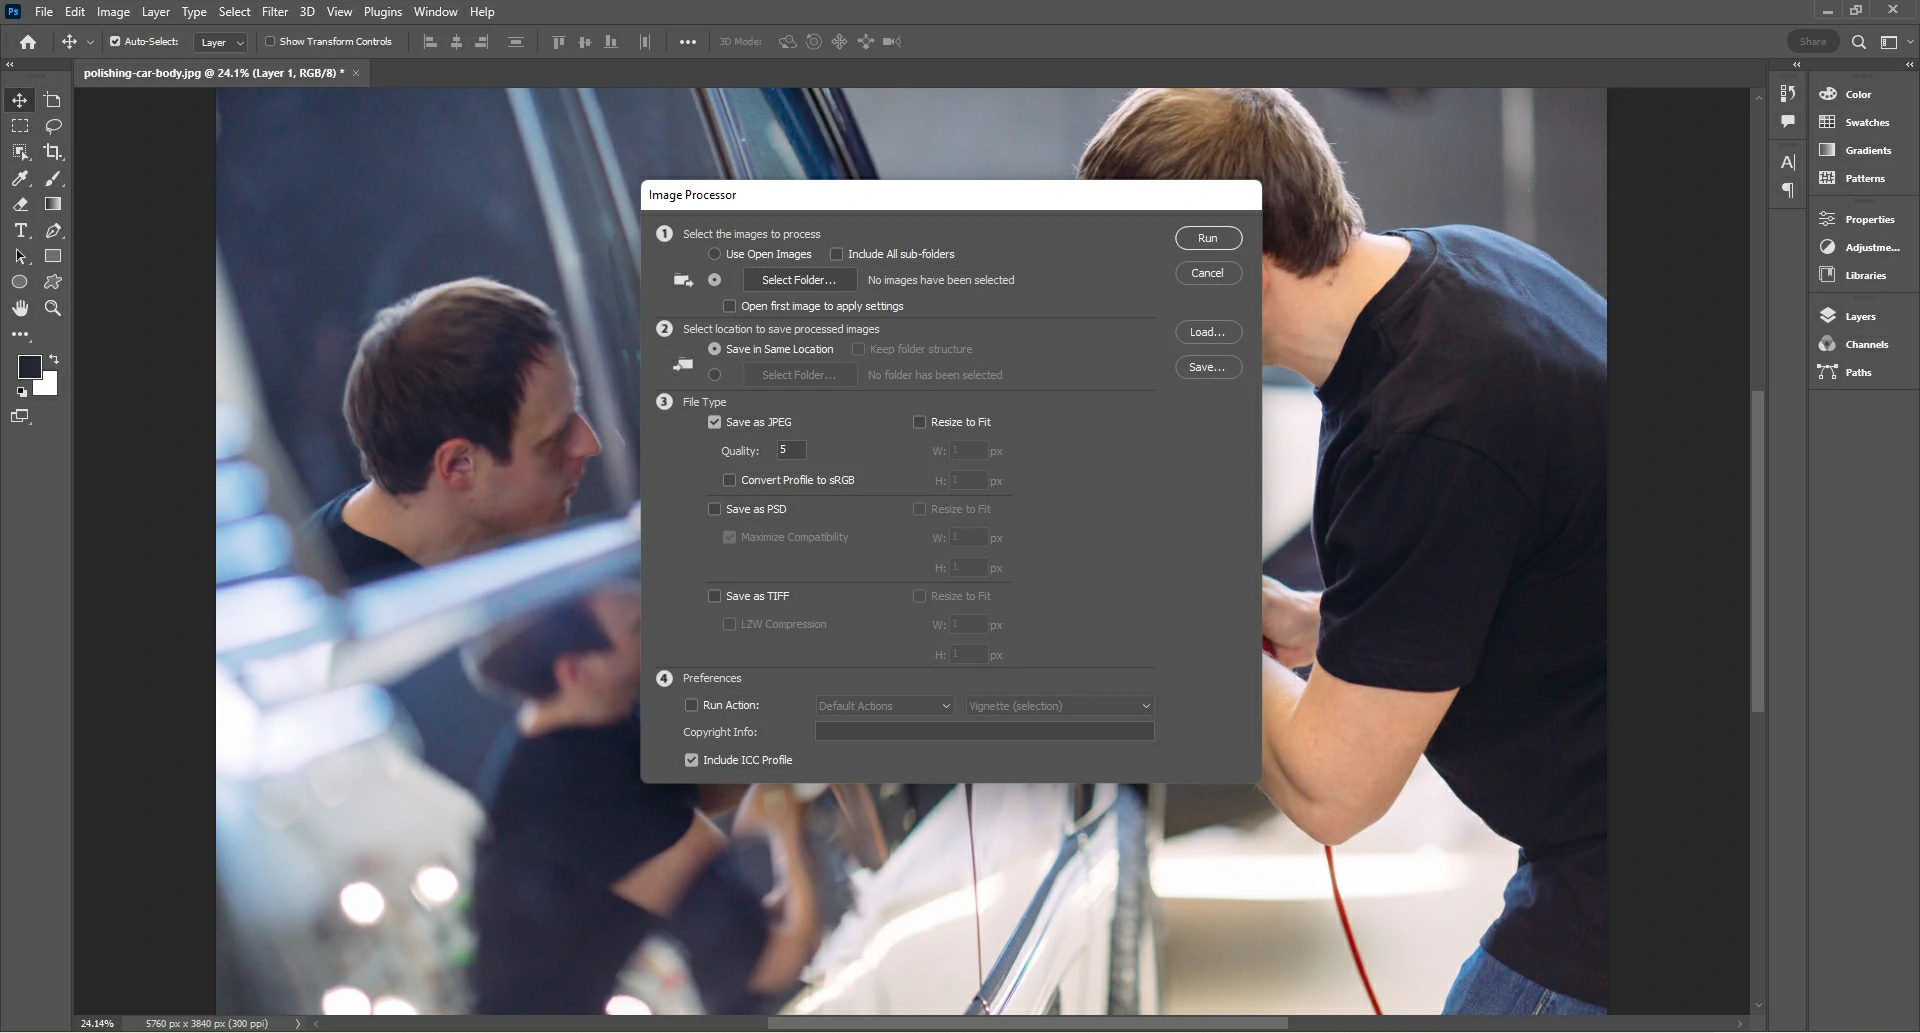
In the first part of the Image Processor, click ‘Select Folder’ and choose the folder where your images are. If they’re already open, check “Use Open Images.” For pictures in different folders, click “Include All sub-folders.”
Step 4. Adjust RAW Files
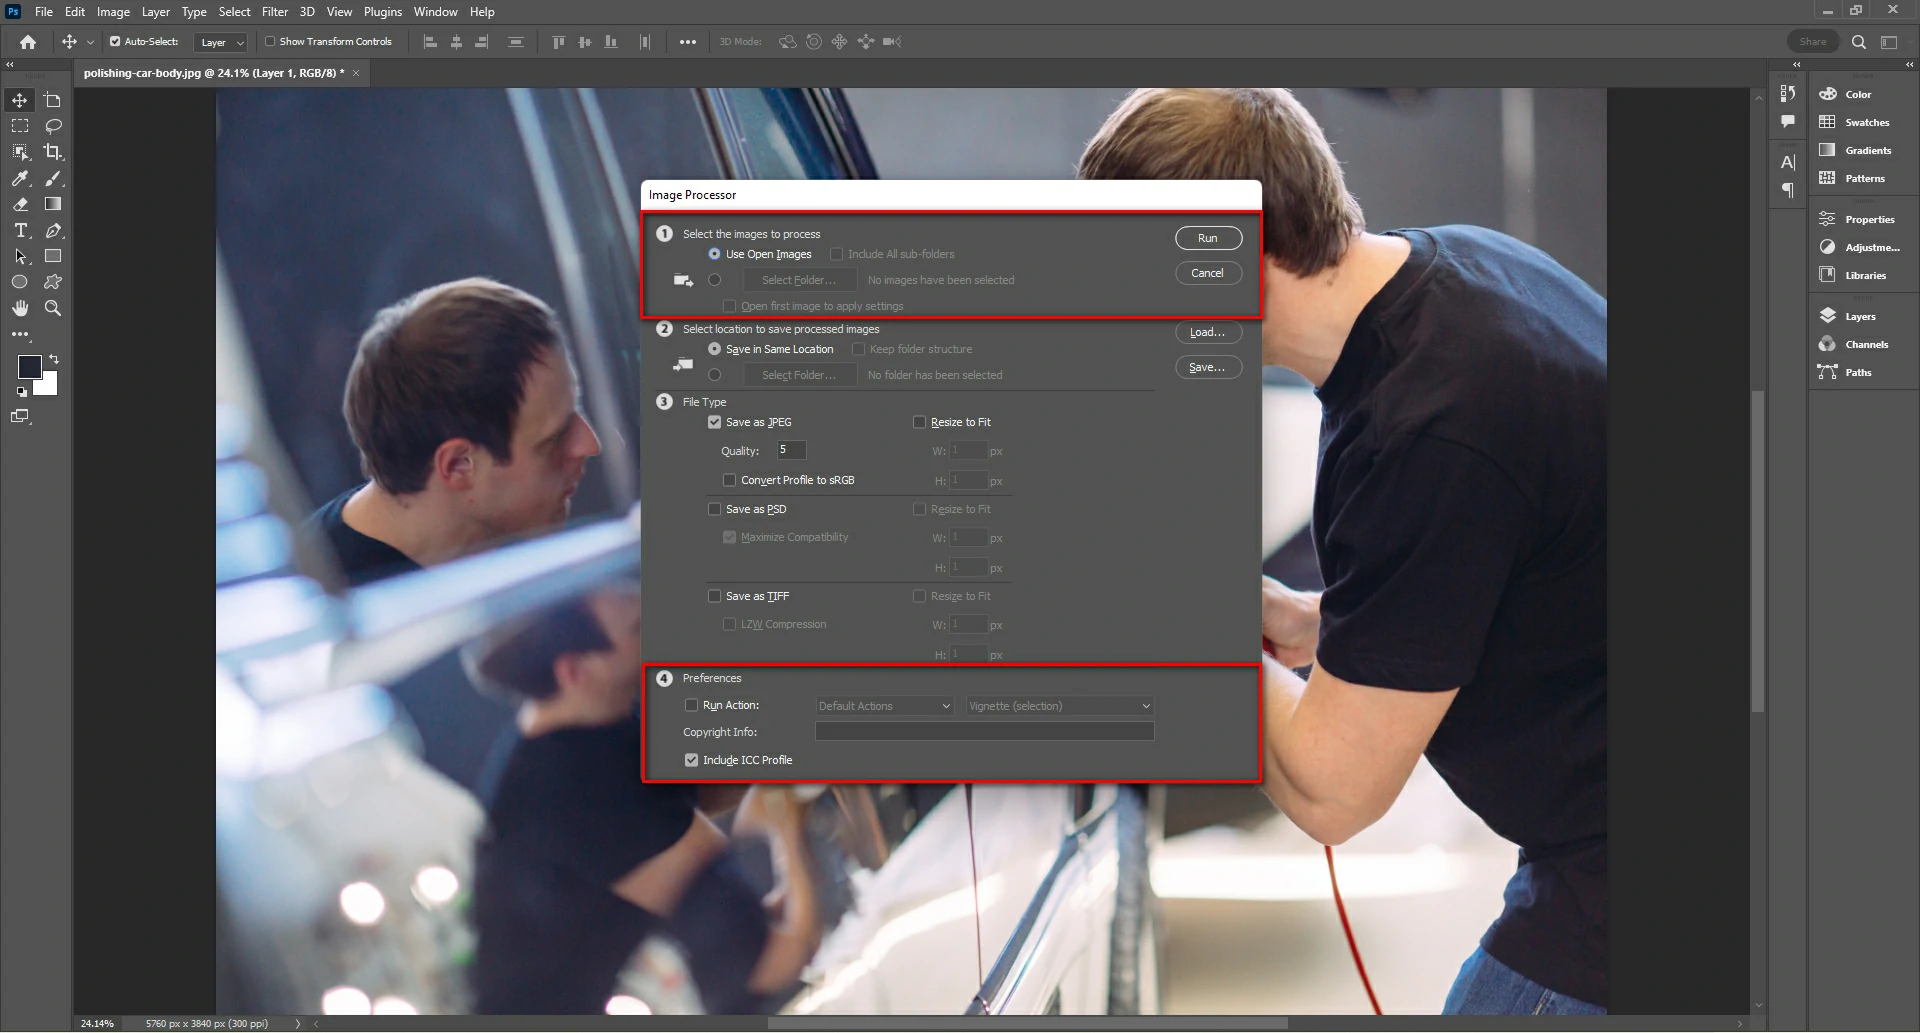
If dealing with RAW files, tweak one image first and apply those changes to all. Check “Open the first image to apply settings.” This works best when your pictures have similar lighting.
Step 5. Choose Where to Save
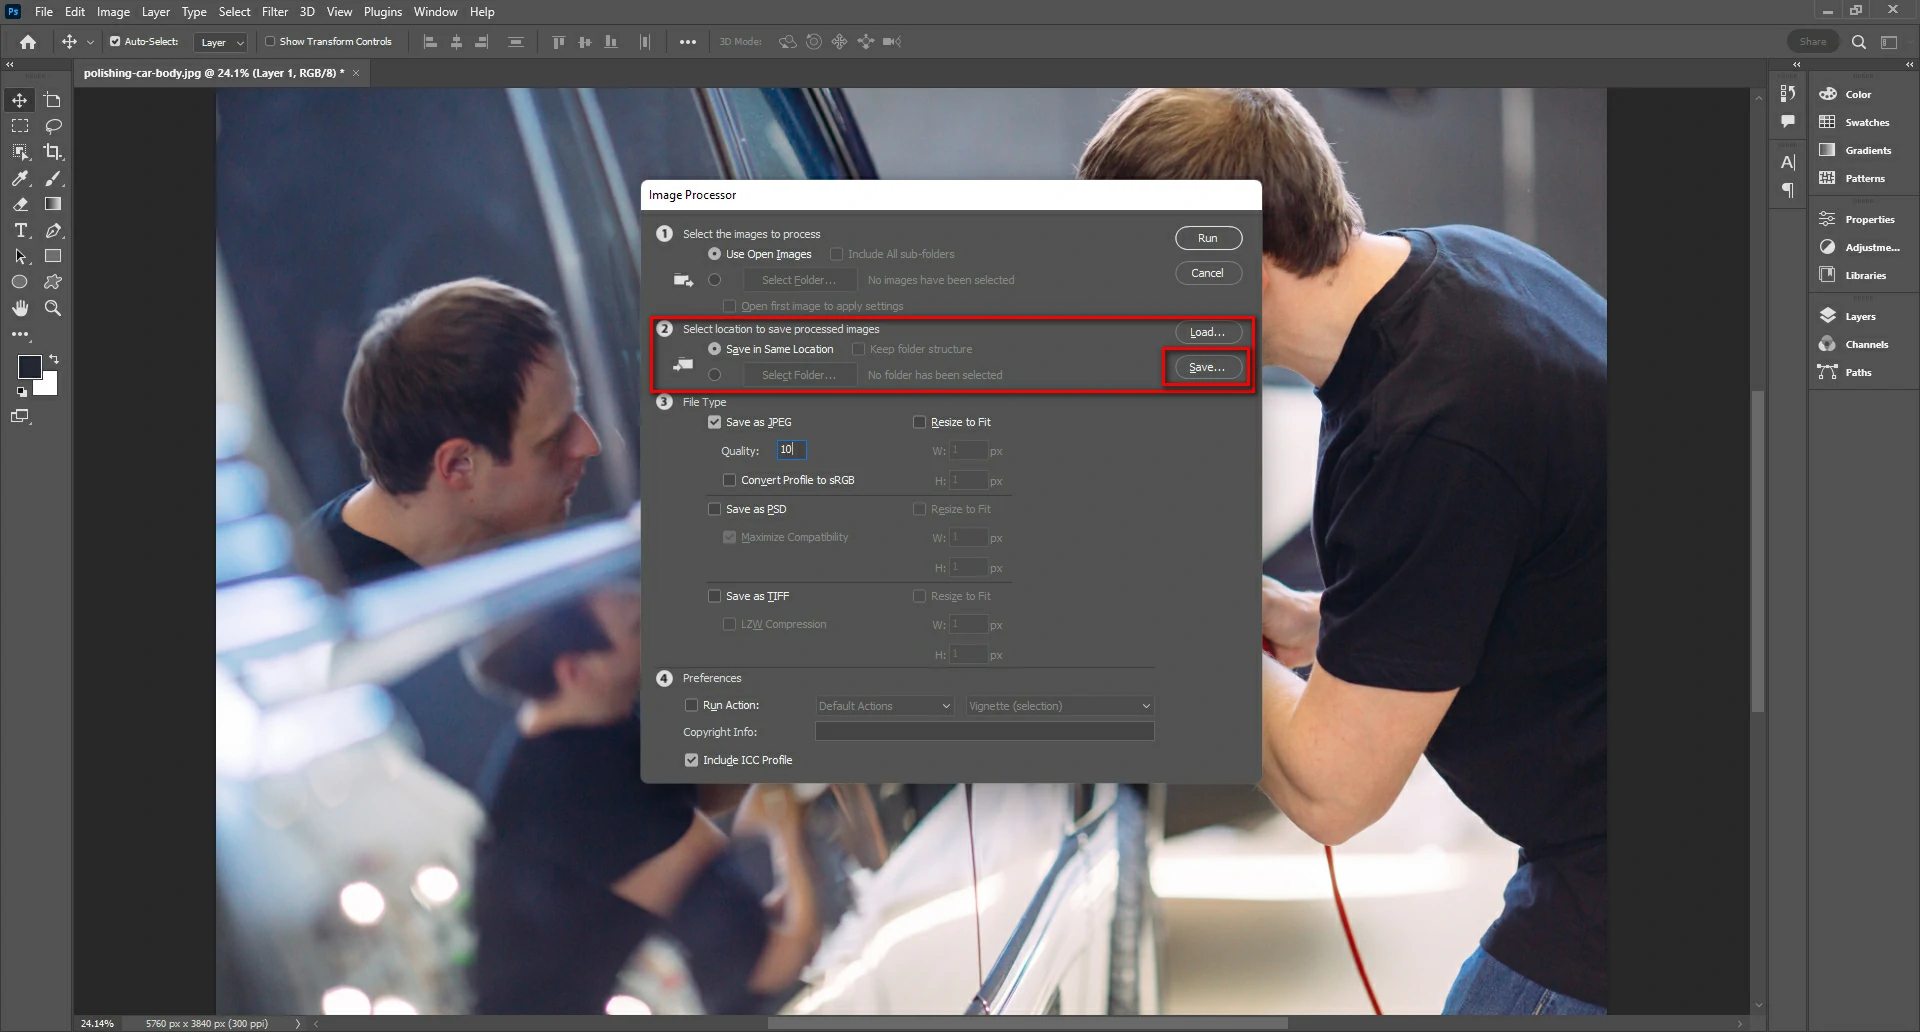
In the next part, decide where the resized images will go. Be careful with “Save in the same location” – it might overwrite your original files. I would suggest you choose a different folder to save the files.
Step 6. Select File Type
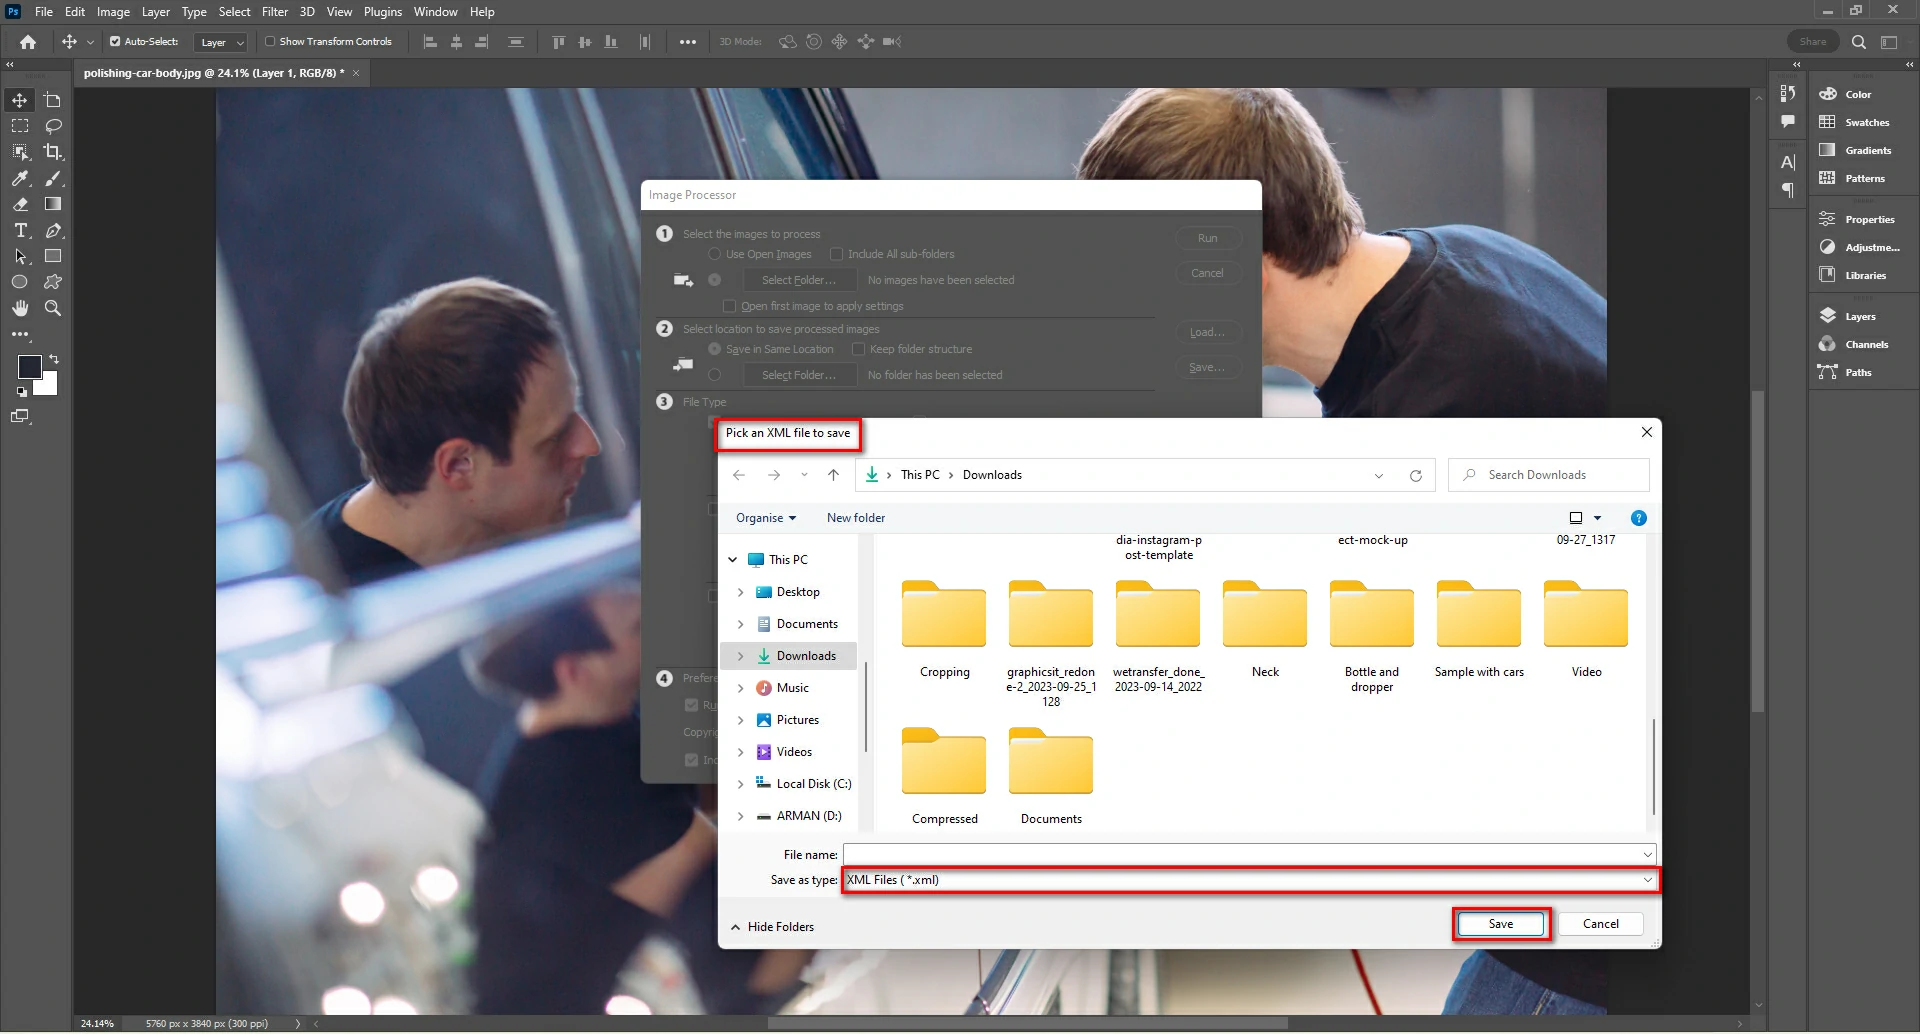
In the third part of the process, you must choose the file type for your image. The most common file type is JPEG, which is a compressed format that is ideal for photos that will be viewed online or printed. However, you may also want to choose a different file type for specific needs. For example, if you need an image in a high-resolution print, you may choose a lossless format such as PNG or TIFF.
Step 7. Set Size
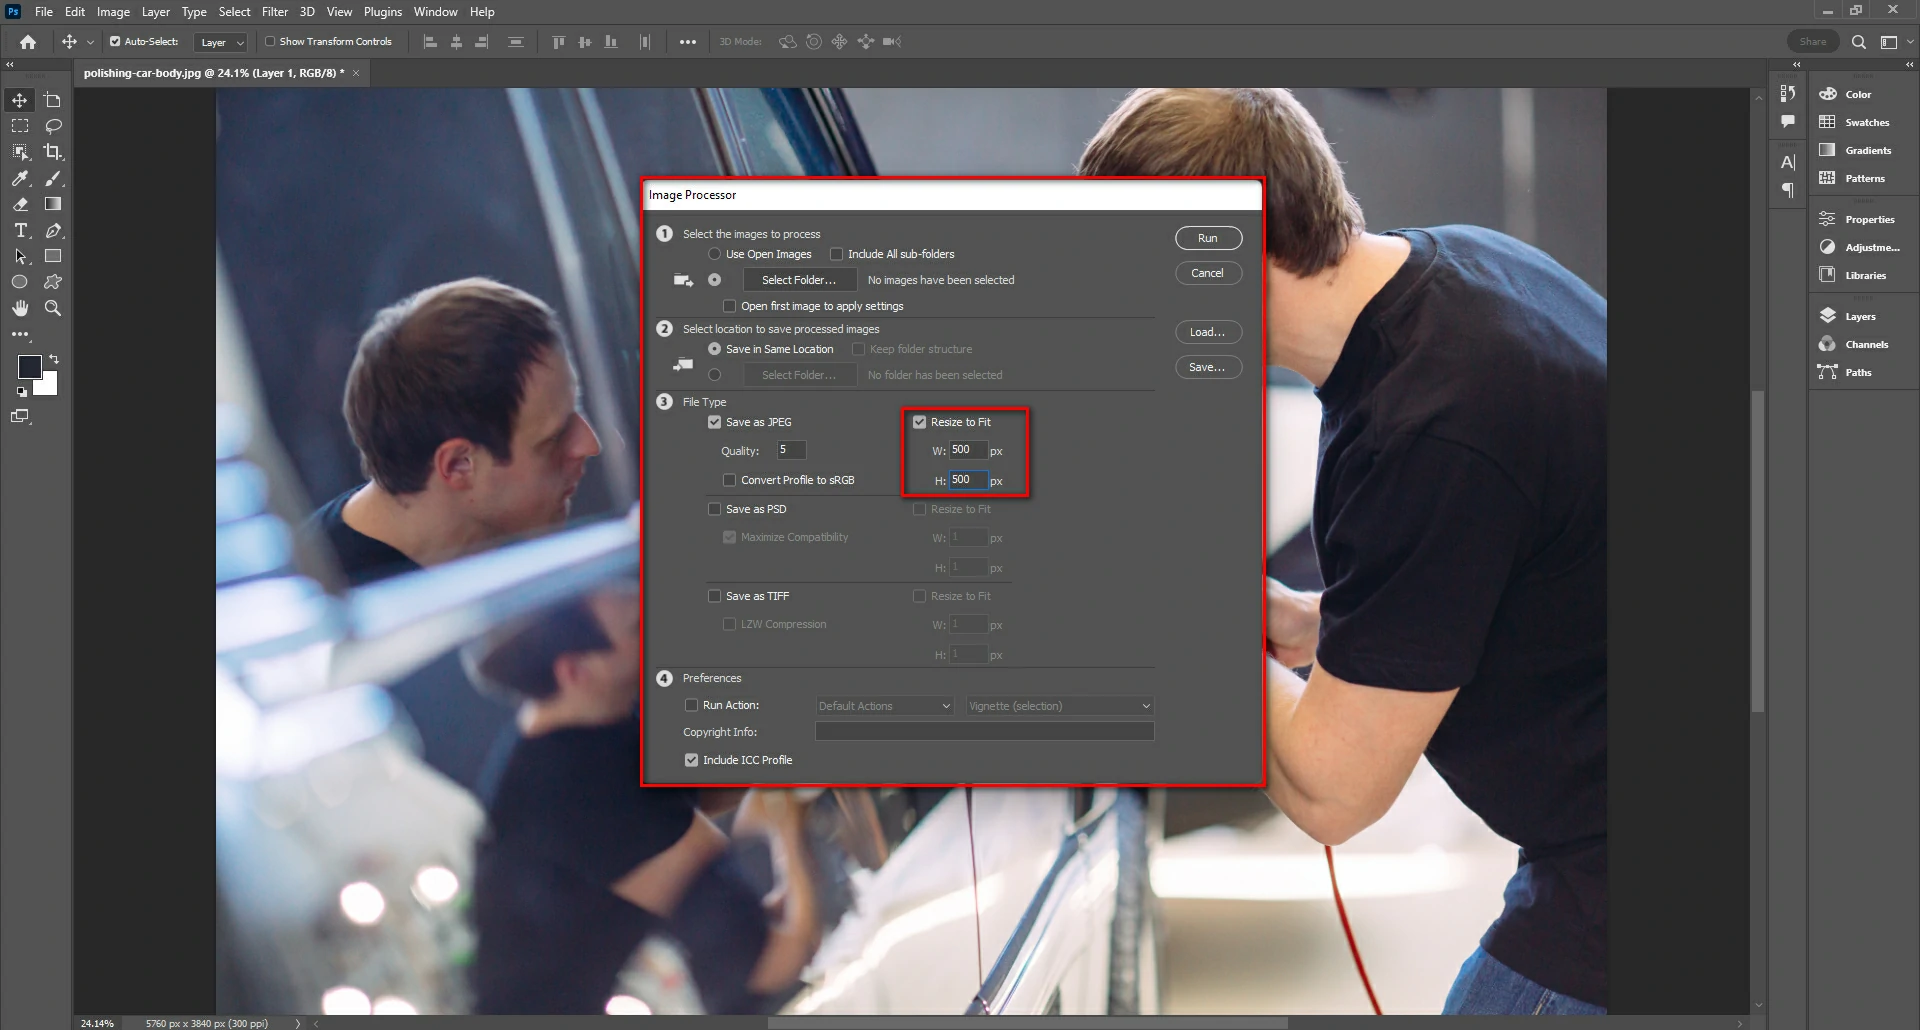
In both width and height, put in the new size in pixels. Don’t worry; the program keeps the original shape. For example, if you want all images at 1600 pixels, put 1600 in both boxes. You can use whatever size you need.
Step 8. Run the Edit
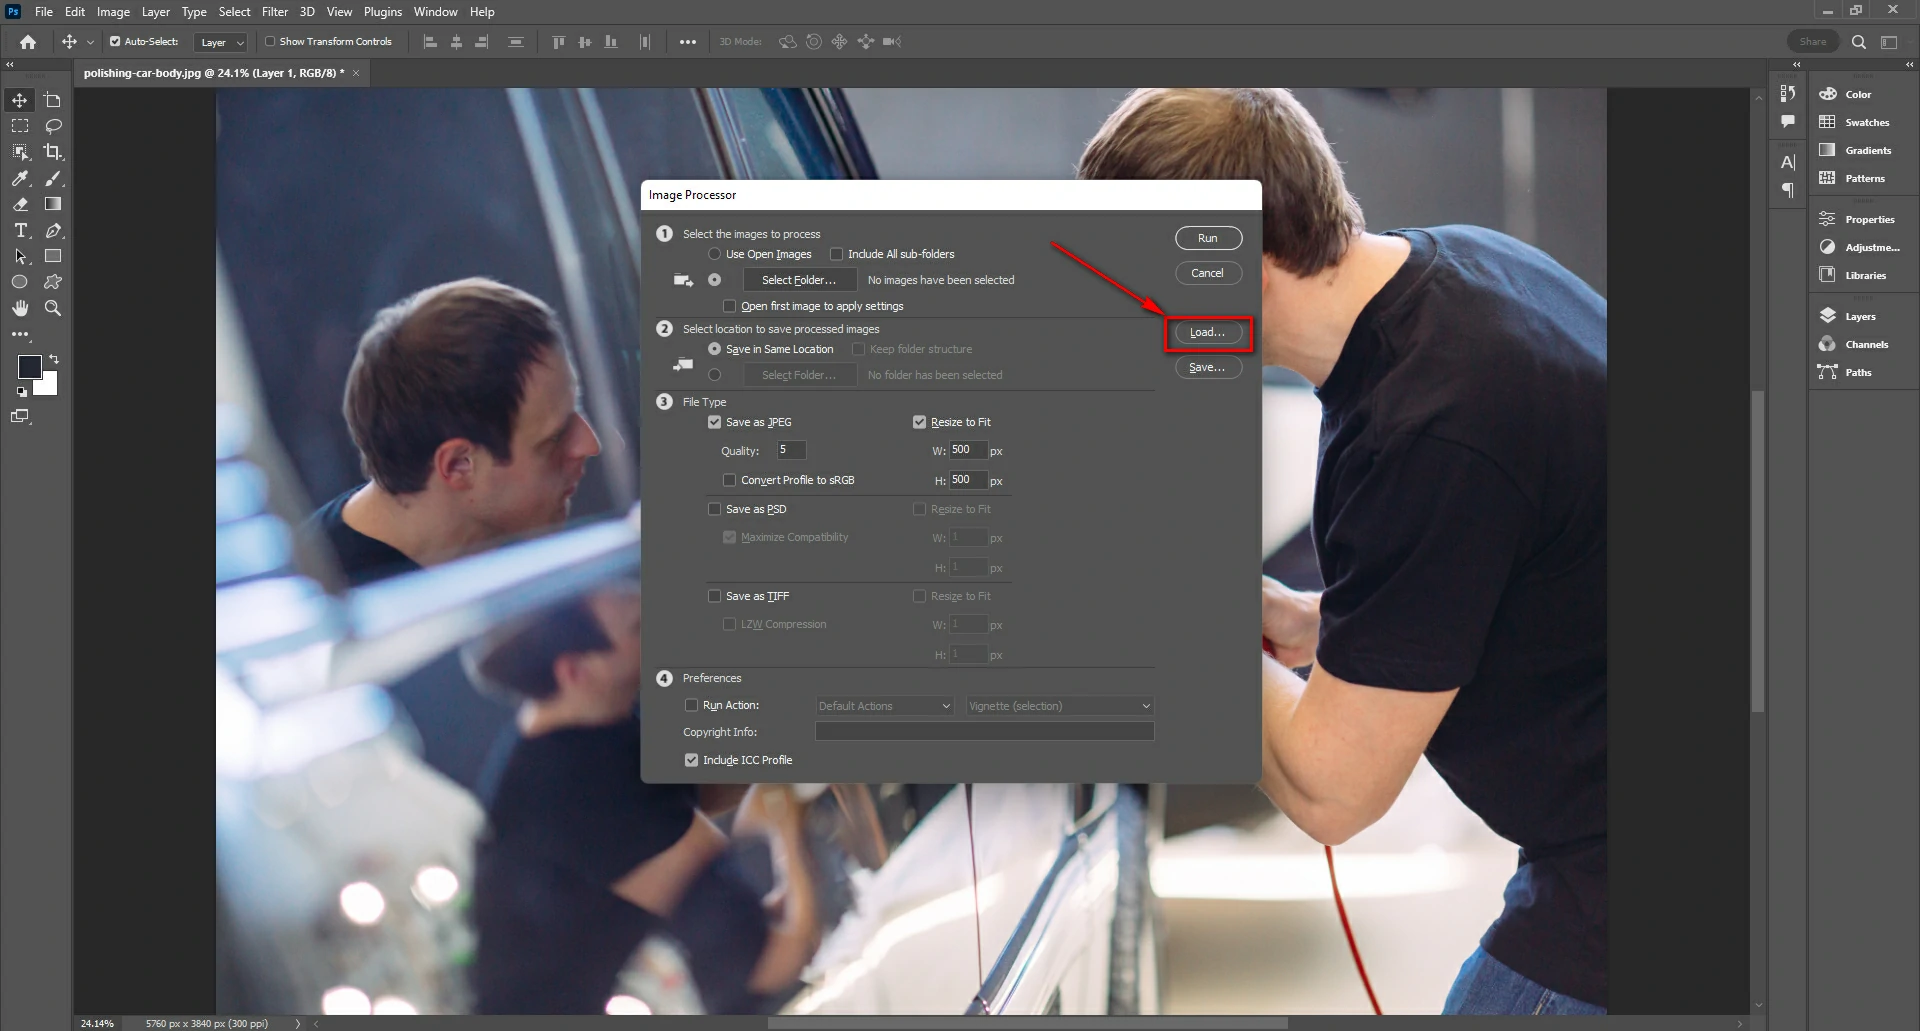
When you’re set, click ‘Run.’ Photoshop will handle everything, opening and closing each File. If you have lots of images, it might take a while. You can step away and check later.
No need to worry if you miss or make any mistake while running the editing. You can stop it and fix the settings before starting again. Resizing batch images in Photoshop is effortless if you use these simple steps. You can save time and enhance your visuals more effectively with perfectly resized images that stand out with this technique.
Automating the Process
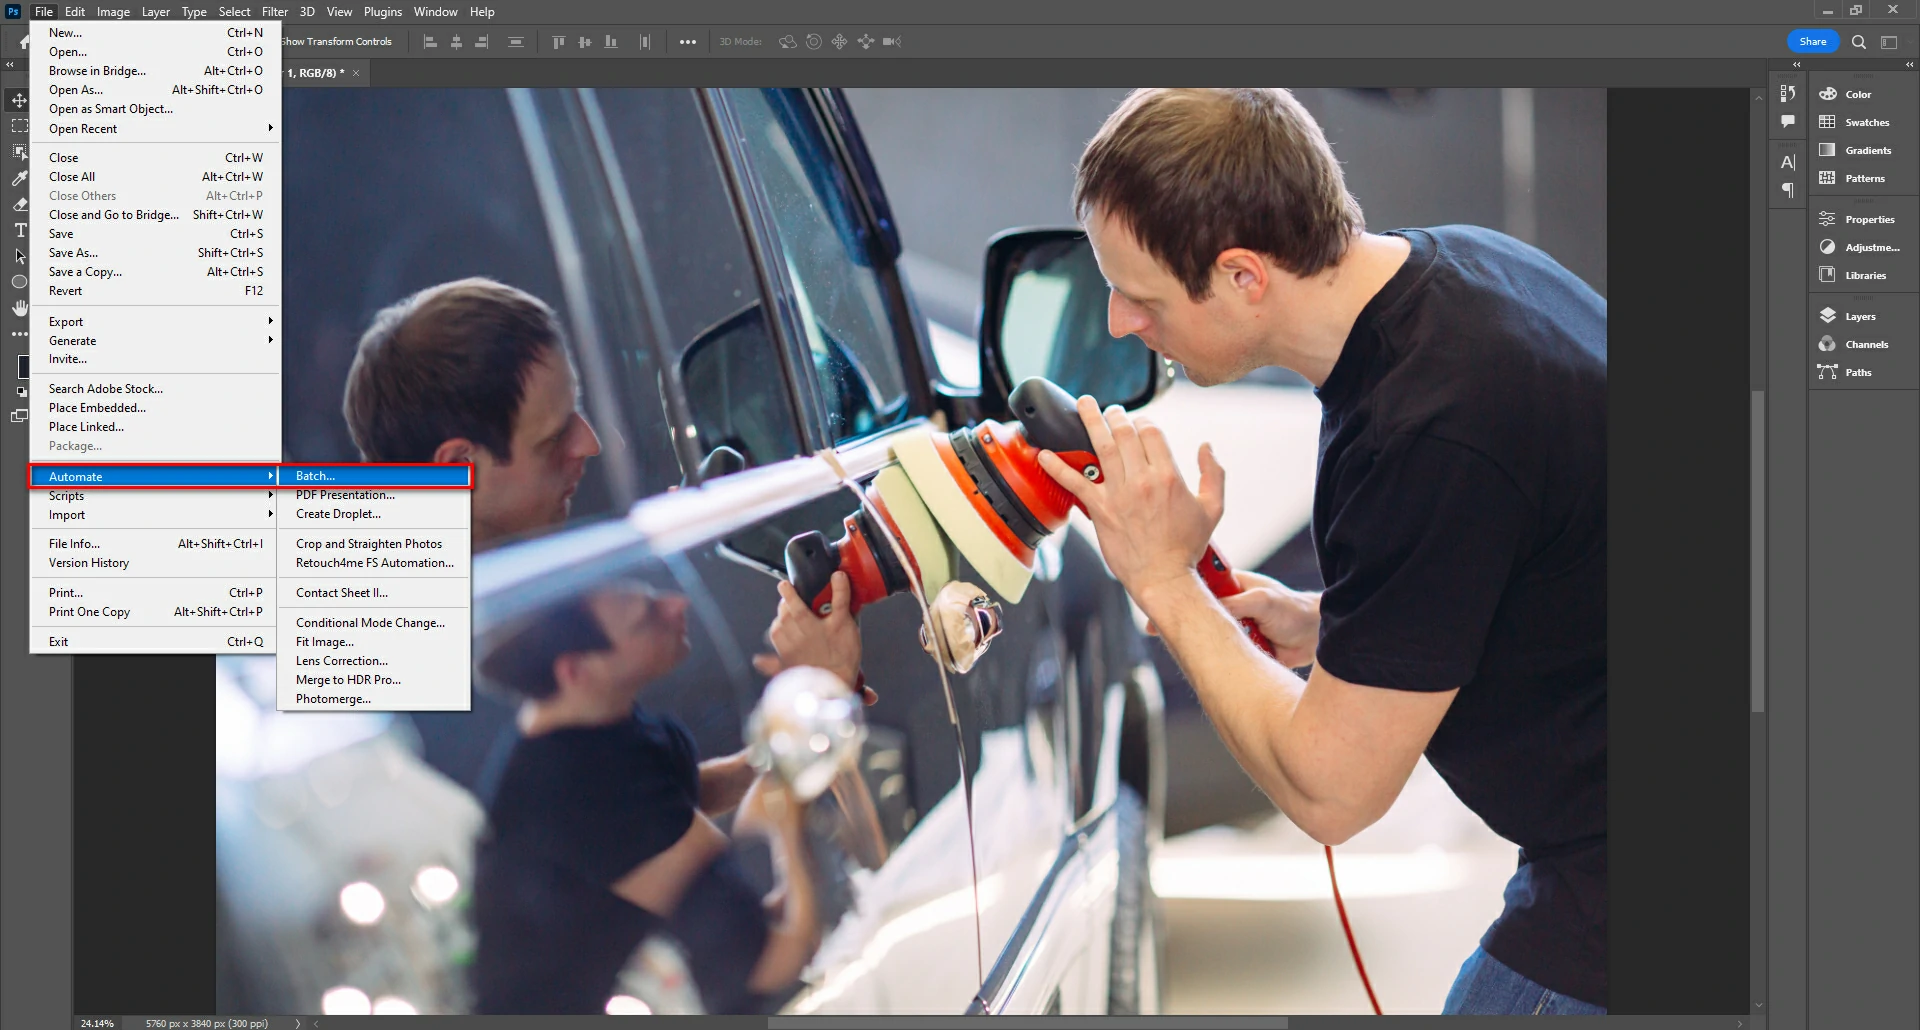
While the manual method of resizing images in Photoshop is effective, it can be time-consuming, especially if you need to resize many images. Photoshop Actions offers a more efficient way to resize images, allowing you to record and replay a series of steps and making batch resizing a breeze.
To create a custom action for resizing images, open the Actions panel (Window > Actions). Click the Create New Action button and give your action a name. In the Action Recording Options dialog box, select the Record Actions checkbox and click OK.
Now, perform the steps that you want to record. For example, to resize an image, you would select the image, click the Image Size dialog box, and enter the desired width and height. Once you have completed the steps, click the Stop Recording button.
Your custom action will now be listed in the Actions panel. To use it, select the images you want to resize and click the action, and Photoshop will resize them according to the steps you recorded.
Tips and Best Practices For Batch Resize

Optimal Dimensions for Common Uses
A 72 pixels per inch (PPI) resolution is standard for web images. However, for print, a higher resolution is necessary. Consider dimensions that align with the platform where the images will be displayed.
Highlight the Importance of Maintaining Image Quality
While resizing, it’s crucial to balance file size and image quality. Avoid excessive compression that may result in pixelation. Find the sweet spot that maintains clarity without sacrificing performance.
File Naming Conventions for Organized Output
To maintain order in your resized image collection, adopt a consistent file naming convention. This will not only aid in organization but also streamline future retrieval. For example, you could use a naming convention that includes the original image filename, the resized image dimensions, and the date the image was resized. This would make it easy to find specific photos later, even if you have an extensive collection.
Troubleshoot Common Issues
Despite the straightforward process, you might need help with batch resizing. Addressing resolution discrepancies, aspect ratio problems, or unexpected errors requires a troubleshooting mindset.
Address Potential Challenges During Batch Resizing
Be prepared to troubleshoot common issues, such as images appearing pixelated or distorted. Double-check your input settings and ensure they align with your intended output.
Provide Solutions for Resolution and Aspect Ratio Problems
If you are experiencing issues with your images’ resolution or aspect ratio, you may want to revisit the “Image Size” dialog box. This dialog box allows you to adjust the dimensions of your images and the resolution and aspect ratio. To access the “Image Size” dialog box, open the image in question and click on the “Image” menu. Then, select the “Image Size” option.
Troubleshoot Errors in the Photoshop Batch Resizing Process
In case of errors during resizing, examine error messages or consult online resources. Photoshop’s extensive community and support forums can be valuable in troubleshooting unexpected issues.
Alternatives to Photoshop For Batch Processing
While Photoshop reigns supreme, alternative tools exist for batch resizing. Depending on your needs, explore options like GIMP, Lightroom, or online platforms for batch resizing.
GIMP is a free and open-source image editor that is similar to Photoshop in many ways. Lightroom is a paid photo management and editing software supporting batch resizing. Its features make resizing images easy, including presets that can be applied to multiple photos simultaneously.
Real-world Applications
Showcase Scenarios Where Batch Resizing Is Crucial
Imagine you’re a photographer preparing a portfolio for online display or a web designer optimizing images for a responsive website. Batch resizing becomes indispensable in such scenarios, ensuring uniformity and efficiency.
Discuss Its Relevance in Professional Photography and Web Design
Professional photographers and web designers dealing with an extensive collection of visuals can attest to the time-saving benefits of batch resizing. It streamlines workflows and allows for a more streamlined and organized approach to image management.
Future Trends in Image Resizing
As technology evolves, so does image resizing. Keep an eye on emerging artificial intelligence and machine learning trends that promise more advanced and efficient image-resizing tools. The future might bring innovations that redefine our approach to optimizing visual content.
Conclusion
In the ever-changing landscape of digital content creation, it is valuable to master the art of batch resizing in Photoshop. Whether you are a seasoned professional or a novice, the efficiency gained through batch resizing contributes to the quality of your work and the overall performance of your digital presence.
FAQs
Q: Can I batch-resize images in Photoshop without compromising quality?
A: Absolutely! By carefully adjusting the dimensions and resolution, you can maintain image quality during the batch resizing.
Q: Are there any free alternatives to Photoshop for batch resizing?
A: Yes, there are free alternatives like GIMP and online platforms that offer batch resizing services.
Q: How does batch resizing impact SEO?
A: Batch resizing contributes to faster website load times, positively impacting SEO rankings by enhancing user experience.
Q: Can I undo batch resizing in Photoshop if I make a mistake?
A: Yes, Photoshop allows you to undo or revert changes made during batch resizing, providing flexibility in the editing process.
Q: What are the recommended dimensions for social media images during batch resizing?
A: Social media platforms often have specific dimension recommendations; ensure you comply with these guidelines for optimal display.


