How to Enhance Your Photos with Light and Color Correction
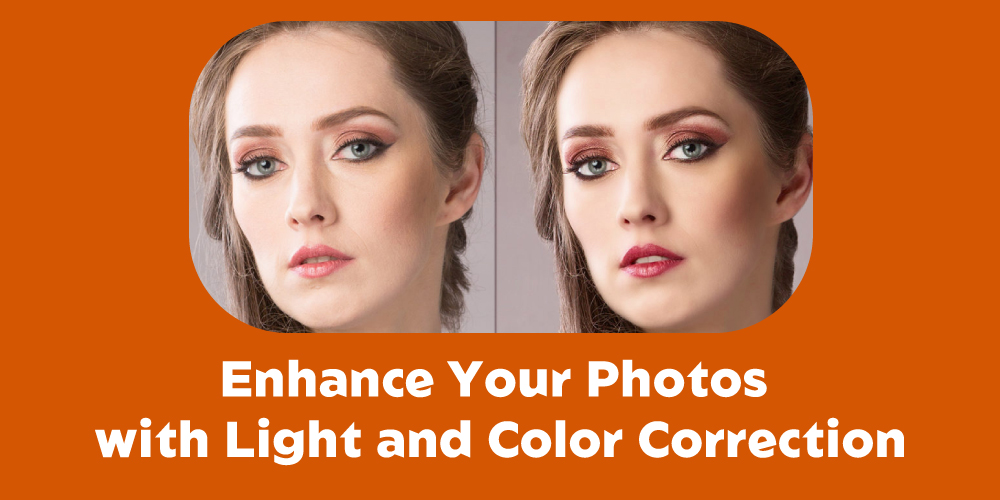
You must go for a professional image editing service provider to enhance your photos with the proper light and color correction. To describe the process of Color Correction to enhance your photos, first of all, you need to understand what color correction is and what are the benefits of Color Correcting.
Photographers strive to take perfect shots to save time and money in post-production. However, it can be challenging to spot distortions and color contamination in the camera. We usually notice these problems when we view photos on a computer, but they can be corrected using color correction software.
Depending on your chosen color scheme, color correction can add drama and charm to a photo. Most photographers want their photos to look great, and this is especially true when it comes to the colors of the objects in the pictures. It will make you appear more appealing to visitors if you can alter the colors in your images.
Anyway, let’s save time here, scroll down below and look at how to enhance your photos with light and Color Correction.
Table of Contents
What is Color Correction in Photography?
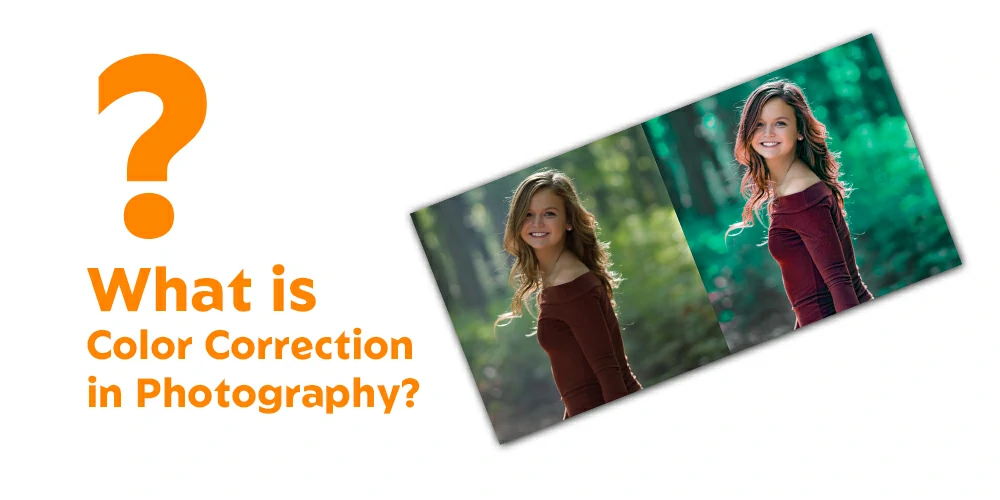
Color correction is a process that helps improve the colors in photos. It can make your photos look more artistic, dynamic, and improved overall. This is a skill that Paper Boat Creative specializes in. The goal of color correction is to make a photograph look more authentic and unprocessed by changing, modifying, and balancing the colors in it.
Some people like to add dramatic effects to specific colors, but the ultimate goal is to create simple corrections so your photos look their best. Most pictures look different when printed than when taken on a camera. In print, the colors are more rich and vibrant.
Photographers use color grading and color correction tools to bring out all the different colors in a picture. Color correction is an art of its own, but even with a bit of practice, you can make a big difference in the look of your shots.
Color correction is a skill that can help you take good photos, even if you aren’t a professional photographer. It’s essential to use the white balance tool in your photo editing program to get a starting balance for your photos, and from there, you can fine-tune the Color to make them look their best.
In commercial photography, it’s essential to use accurate Color to create a precise picture. This is usually done by ensuring the photographer’s red Color is the right shade.
However, this can be challenging with digital images, as they may look different on different devices. Before you edit your photos, there are certain things you can do to ensure they seem realistic.
How to Enhance Your Photos with Light and Color Correction

Color grading and photography are related. Online photo editors can make it easier to correct colors in images. In “Befunky,” we will use the “edit” option to make color adjustments. There are three tools: Hue, Saturation, and Temperature. We can use these to improve the Color of an image.
The three colors you can adjust in your editing tool are saturation, temperature, and hue. They all have different effects on your photo, so here are some tips on how to use them. Saturation makes your image look more colorful and intense.
Temperature affects how warm or cool your photo looks. Hue changes the colors of your print. Let’s discuss these three tools in detail below.
Step-1: Adjust The Saturation To Intensify The Colors
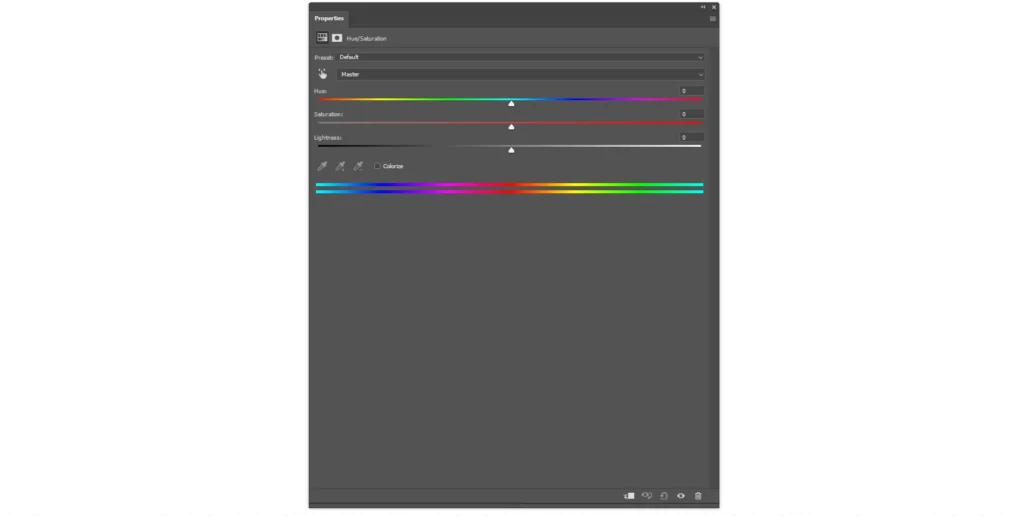
Saturation refers to how intense the colors in your images are. It can significantly impact your photographic style, making a scene look more moody or emotional. Some photographers like to desaturate their pictures, creating the colors less intense.
In contrast, other photographers like to add intensity to the colors in their photographs, making them more bright and cheerful. When coloring, it is crucial to make minor color adjustments to make the final picture realistic. If your colors are either too bright or too dark, the image will seem weird.
Try to make adjustments by adding or subtracting a tiny amount of Color to ensure that the overall picture looks natural. If you have a lot of Color in your image, you can make it more robust using the saturation tool.
This scale starts at 0 and goes down, meaning that your pictures will look more grayed and moody on the negative side, and on the other, they can be almost neon-vivid.
Step-2: Change The Temperature To Adapt To The Mood
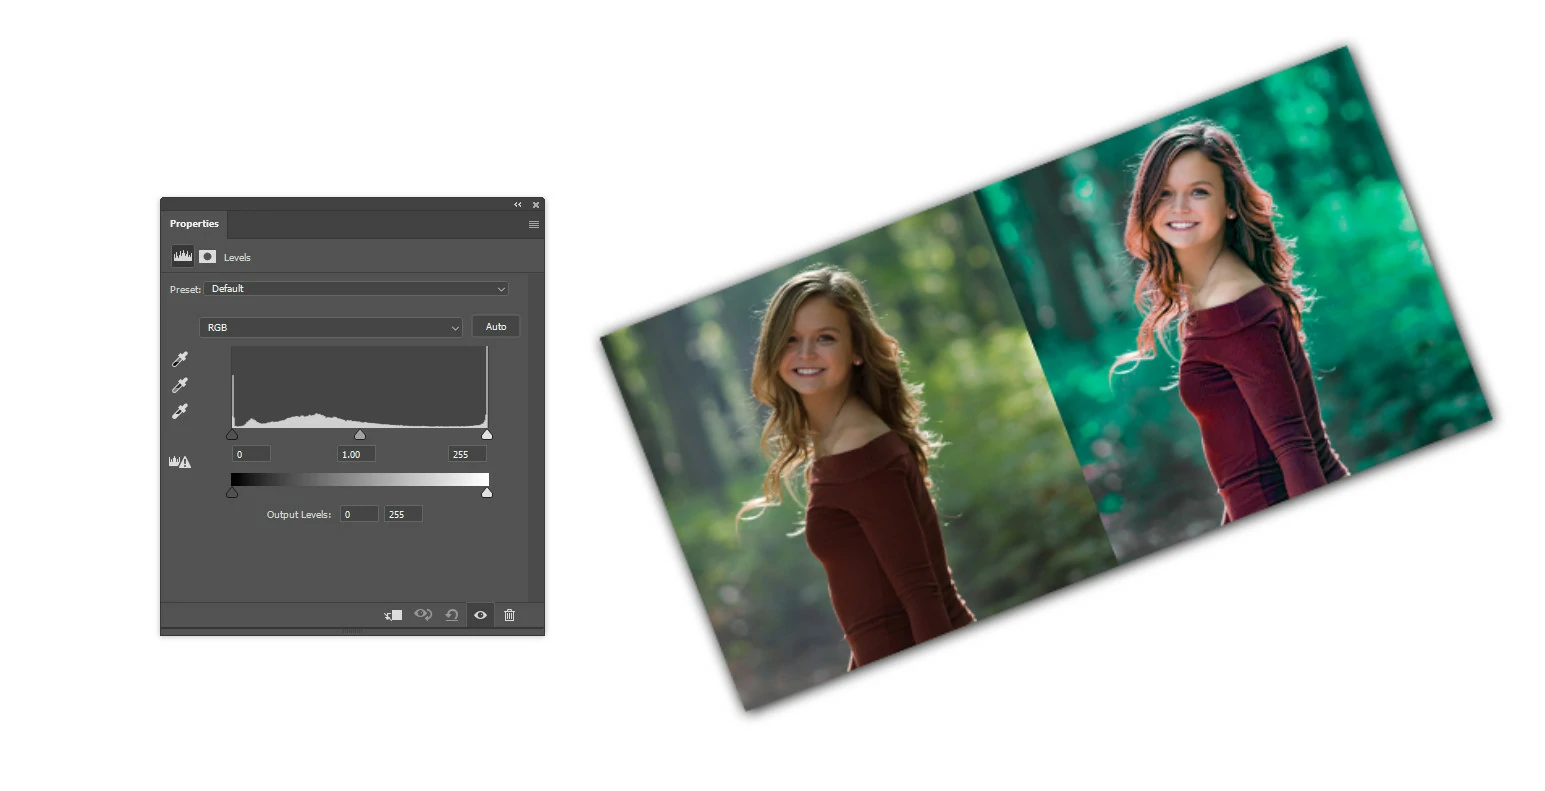
Temperature is a measure of how cool or warm an image looks. The camera can only take in a limited amount of light, so even in ideal lighting conditions, photos can sometimes come out cooler or warmer than expected.
Adjusting the temperature of your images can give them some life and make them look more like you want them to. When adjusting your camera’s temperature, you can change the photo’s colors by making it colder or warmer. Be careful to make only a few changes, or your image will look too different from how you wanted it to.
Adding a joyful or depressing mood to your images is also a good idea. Color temperature and white balance should be considered when selecting a light source or a light bulb. With blue at one end to make your image appear more relaxed and yellow at the other to make it seem warmer, you can see it as a scale in an image editor.
Step-3: Use Hue As Your Style Color Wheel
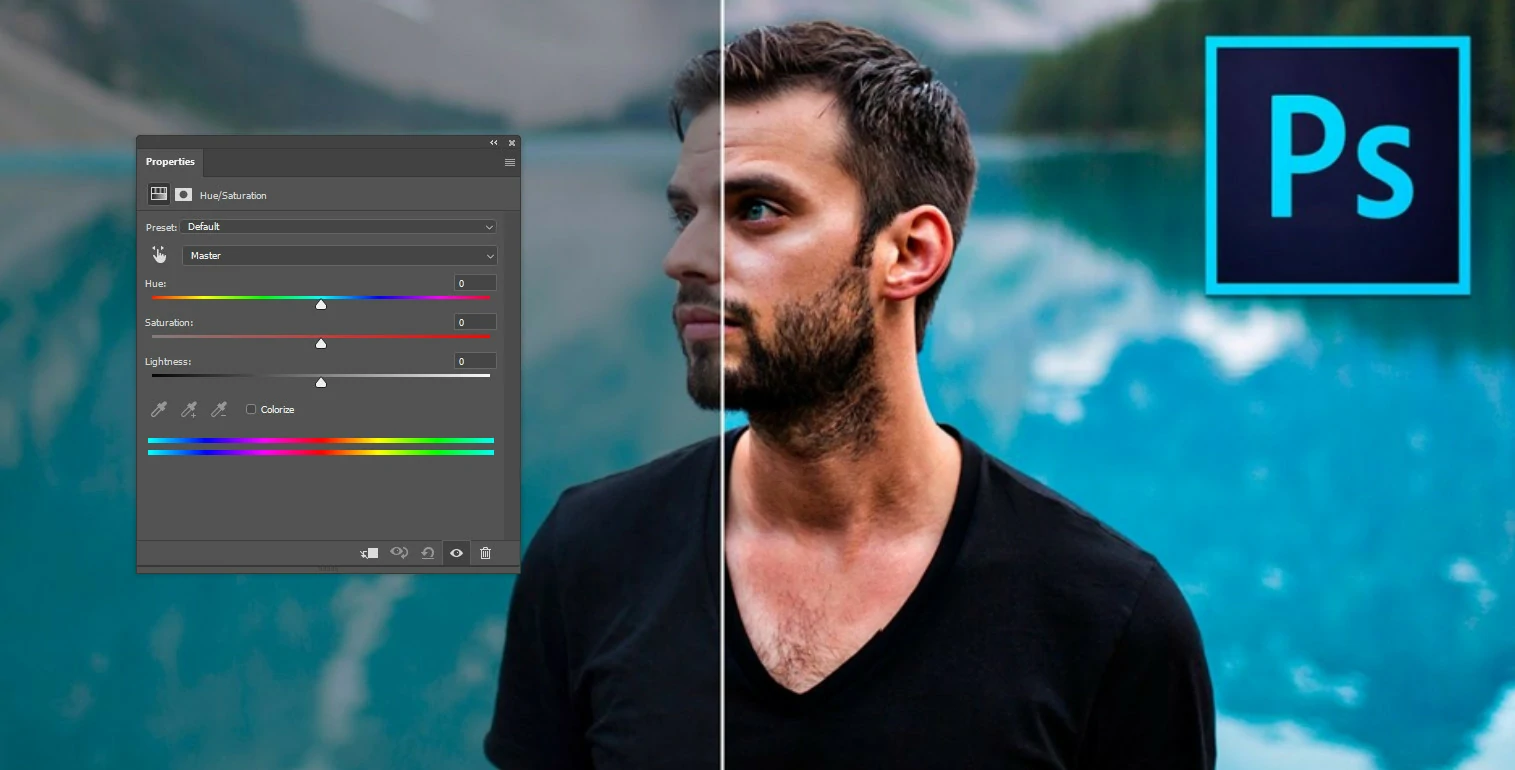
To make your photo look more like what you saw when you took it, we can use the color wheel to see the different colors present. On the color wheel, Hue is where all the colors are mixed.
This is like a painter’s palette, where you can mix colors to create hues. Additionally, while color grading photographs and altering the color of images, you may accomplish this. Making too many changes to one area of the image can prevent the picture from looking unrealistic.
Hue can be the most challenging of the three tools when trying to get the tones right on a picture. It’s easy to over-adjust the Color, creating an unrealistic view with too many colors.
It’s simple to alter the colors in your photo using the hue scale. However, if you want to make a small change to the colors, it’s best to do it in Paint Mode so you can selectively change the colors without affecting the overall image.
Benefits of Color Correction
There are many benefits to color correction in different areas of photography. By making a picture more vivid and clear, it can enhance its overall appearance. It can also help to adjust the color balance, ensuring that the photo looks as close to the desired Color as possible.
Additionally, color correction can help to adjust the brightness, shadows, and lighting in an image to make it look more accurate and consistent. In most cases, color correction is essential to achieve the desired look in any field.
Sometimes old family photos can get damaged, and you might feel sad because you can’t get them back the way they were. Besides, some people in the pictures may have died.
But don’t be frustrated because there’s a way to get the photos back the way they were before they were damaged: by color correction. In business, ensuring that your products look good to customers is essential.
This is because it is expensive to produce items, so having attractive products that people want to buy is vital. In photography, color correction is often necessary to create a more glowing effect.
In glamor, color correction is used to improve confidence and success. There is a risk of being photographed with improper camera settings, which can result in less striking images than those with perfect Color. To make these images look their best, color correction can be performed in Photoshop.
Color correction is a type of retouching that You can use to fix any problems with the Color of an image. Don’t give up if you discover that the color in your shot is wrong. Many professionals can help you fix the problem using color correction techniques.
How to improve lighting in your images:
Light is essential to photography. Changing the lighting in the room when taking a picture may alter both the appearance of the image and the emotion it evokes in the viewer. Light may be used to create gentle, natural, or dark, dramatic images.
You can use it to highlight specific parts of the picture or to hide things that might distract from the photo. The top three suggestions for enhancing your photographs’ lighting are shown below.
Tips-1: Avoid Blending The Lighting In Your Photos
Different lights come in from different directions when you’re taking a picture in your home. These lights can be from windows, overhead lights, lamps, and your camera’s flash.
These lights produce different light colors and might be slightly different in brightness, too. To take a good picture of your child, you must consider all these other factors. The child’s clothing might change Color depending on the time of day.
To make a good photograph, you’ll need to decide just one way to light your subject. You may disable your flash and solely use the light streaming in via windows by turning off all the lights in your home. Close your blinds or curtains if you want to use some inside lighting.
Tips-2: Turn Off The Flash
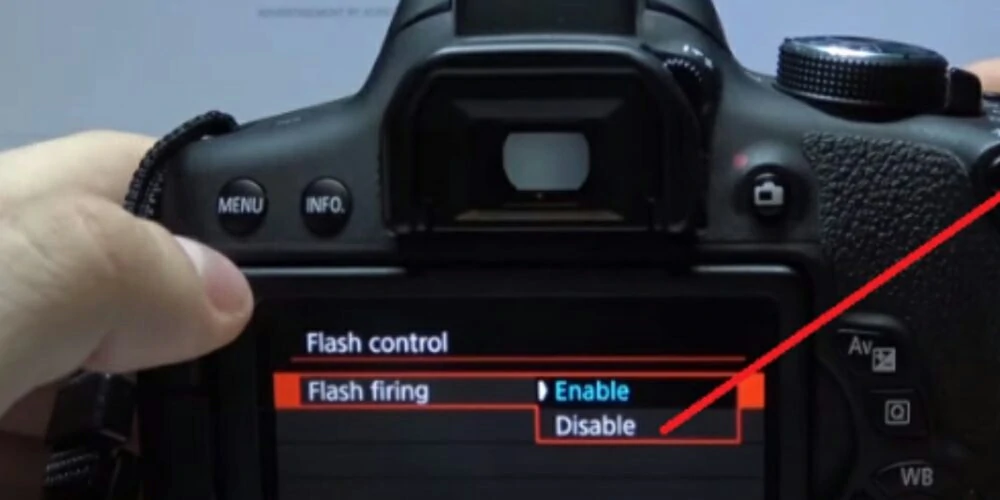
Some photographers use artificial light to create a different look for their photos.They may employ anything to soften the light, or they may not even direct the camera at the subject.
This can change how the light looks, which is only sometimes good. Typically, the built-in flash on our smartphones and cameras emits harsh, intense, and unpleasant light.
That’s different from what we want for our photos. I recommend turning off your flash and using light from other sources instead.
Tips-3: When Taking Pictures, Place The Light Source Behind You
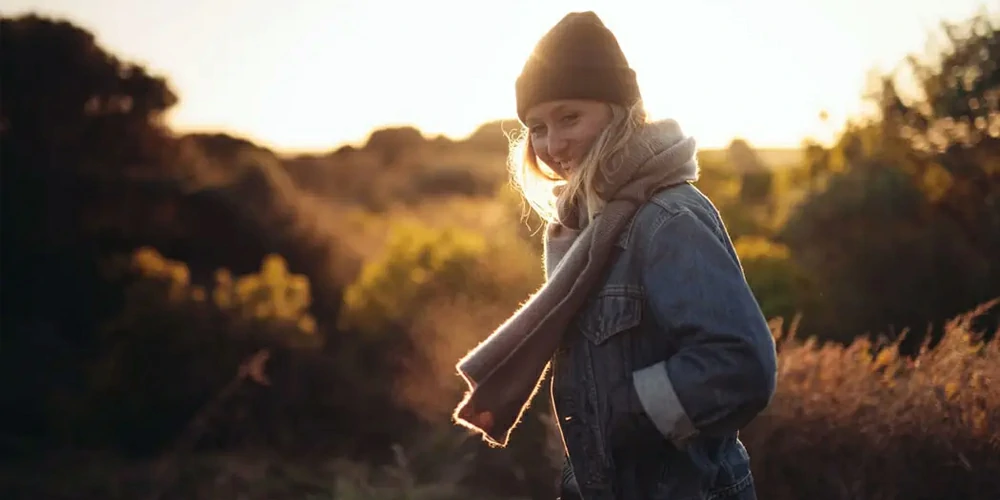
If you want to take a good picture of someone, you can use a light to create different effects. To achieve a certain look, some photographers may position the light to one side, above, or even below their subject.
However, if you want to capture a decent photo of your children, you can typically do it by using the light source behind you and the youngster in front of you.
How to Adjust the Lighting of a Picture Using Adobe Lightroom:
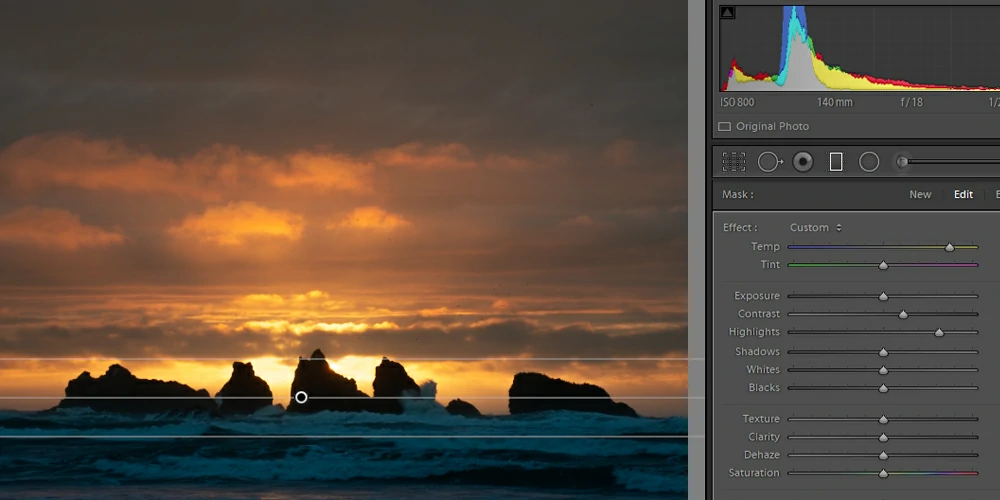
If your photo is dark, there are some easy tools in Lightroom to help make it brighter. These tools work by brightening the dark areas of the image while leaving the essential details in other exposure ranges unchanged.
To make your photos look brighter, you can use the Darks and Shadows sliders to soften the shadows. You can also decrease the Whites and Highlights slider to bring back details in more promising areas.
Finally, you can use the Exposure slider to adjust the brightness until you find a balance that you like. Last, you can use the Tone Curve to add contrast and make your photo come to life.
Step 1: Move the Blacks & Shadows sliders
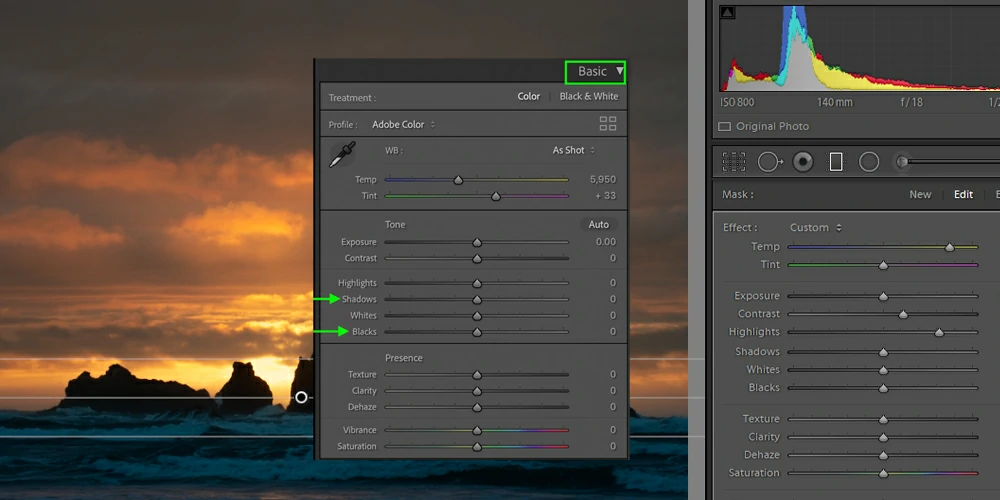
In the Develop Module, you’ll start by adjusting the brightness of your photo’s shadows and dark areas. You’ll want to drag the Blacks and Shadows sliders to the right to make the shadows brighter.
There is no “perfect” setting for every photo, but you want to bring back some of the details lost in the original image.
Step 2: Bring Down The Whites & Highlights Sliders
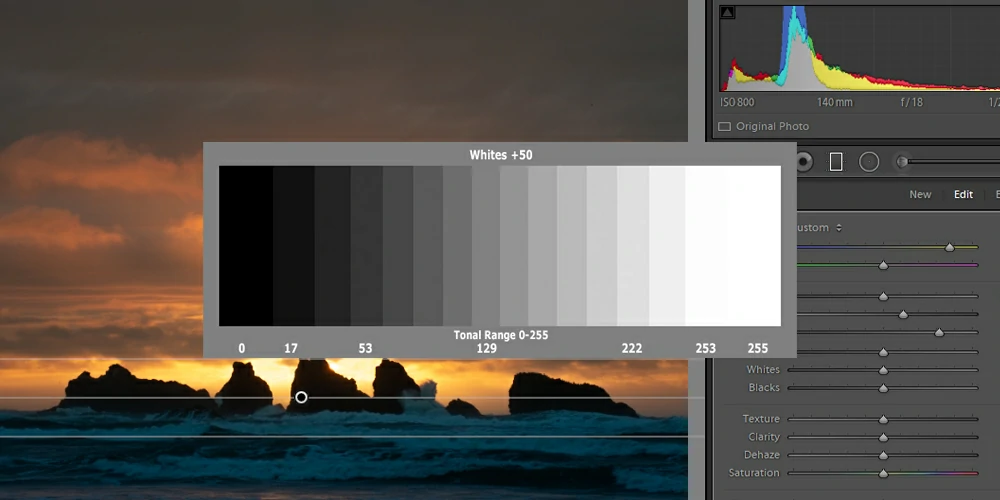
To ensure the highlights in your photo are as bright as possible, we’ll need to darken the “Whites” and “Highlights” sliders. This will make the brightness of the highlights in your photo the same as the brightness of the shadows.
If your photo is overexposed, these sliders can help make sure you have more details visible. By moving the slider to the left and darkening the highlights while bringing back more detail from the bright areas, you can brighten the image.
This will make it easier to see details between the shadows and highlights.
Step 3: To Ensure A Balanced Brightness, Adjust The Exposure Slider
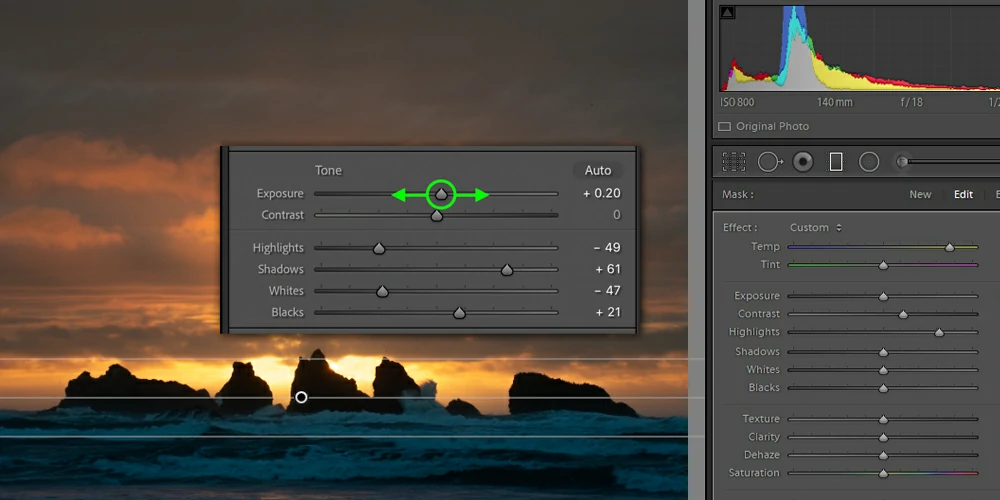
If the photo looks too dark, you can use the Exposure slider to brighten it up. To achieve this, click on the Exposure slider at the top of the Basic Panel and adjust it to the right to brighten or to the left to darken.
Since you’ve increased the image’s brightness in previous steps, you only need to move the Exposure slider slightly to achieve the desired result.
The Exposure slider brightens all the exposure levels equally, making everything brighter. This way, you can raise the base of all your brightening adjustments.
Step 4: The Tone Curve Should Also Have Back Contrast
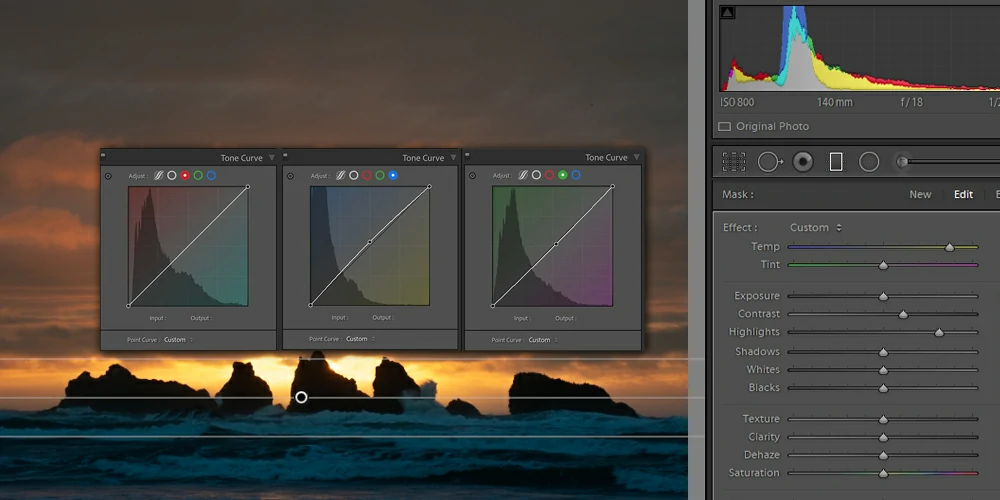
After the exposure slider, your photo may look brighter, but it could be more contrasty. You can make the image more contrasty by adjusting the Tone Curve. The Tone Curve is found below the Basic Panel, and it has four sliders that you can use to change the contrast in different areas of the photo.
To add some contrast, you’ll need to darken the shadows and the highlights. To start, reduce the Darks and Shadows sliders to make the shadows more visible. Then, adjust the Highlights slider to make the highlights brighter.
Now make the brighter parts of the photo look a lot more auspicious by increasing the Whites and Highlights sliders. We don’t need to make too much of a change here, just enough to make the more promising areas look more noticeable.
Next, we’ll add some contrast to the photo by changing the Brightness setting. Now the image looks a lot brighter than it did before!
Step 5: Utilizing Luminance In The HSL Panel To Selectively Brighten
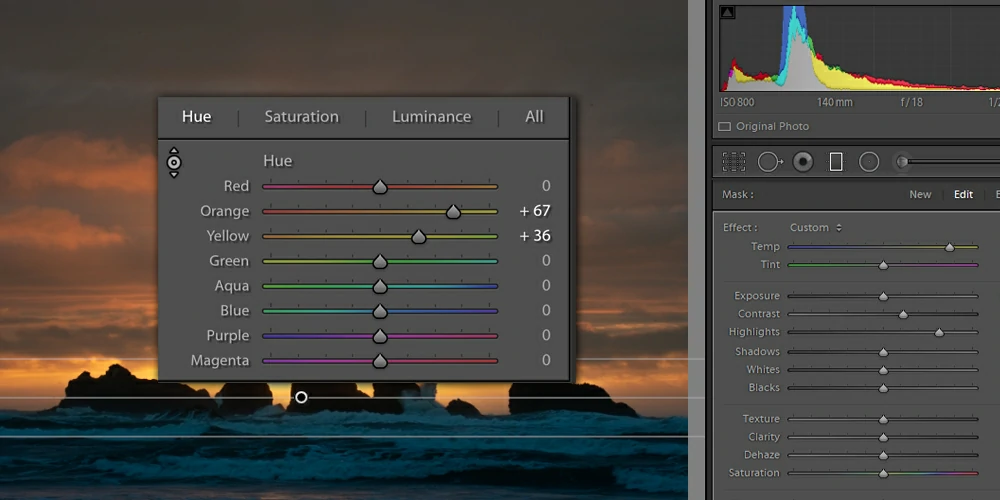
The Luminance setting in the HSL Panel lets you change the brightness of individual colors in a photo. This can help make specific colors more visible, such as brightening the sky or making the Color of a sunset brighter.
You adjust the Color ranges you want to affect, and the change will be visible in the photo. Different types of sliders can be used to change the Color and brightness of an image. Some of them are better than others for different parts of the picture.
FAQ
Q: What is light and color correction in photography?
A: Light and color correction is adjusting the lighting and Color of a photograph to enhance its visual appeal.
Q: Why is light and color correction important?
A: Light and color correction can make your photos look more vibrant and appealing by adjusting the image’s exposure, contrast, and color balance. This can bring out details that may have been lost in the original photo and create a more professional-looking final product.
Q: What are some standard tools used for light and Color Correction?
A: Some standard light and color correction tools include brightness and contrast adjustments, color balance adjustments, and hue and saturation adjustments. There are also a variety of software programs and apps available that offer a range of editing options.
Q: Can light and color correction fix a badly taken photo?
A: Light and color correction can help improve a photo’s visual appeal, but it cannot fix fundamental issues with the image, such as a blurry or out-of-focus subject.
Q: Do I need special equipment to perform light and Color Correction?
A: No, you do not need special light and color correction equipment. However, having access to a good camera and photo editing software can make the process easier and yield better results.
Q: How do I know if my photo needs light and Color Correction?
A: If your photo appears dull or lacks vibrancy, or if the lighting or color balance appears off, it may benefit from light and color correction.
Q: Are there any rules or guidelines to follow when performing light and color correction?
A: While there are no hard and fast rules regarding light and color correction, following some basic guidelines, such as avoiding over-saturation or making overly dramatic adjustments that make the photo appear unnatural. Additionally, it is crucial to consider the photo’s intended use and the overall aesthetic you are trying to achieve.
Q: Can I learn light and Color correction techniques online?
A: Yes, there are a variety of online tutorials and resources available that can help you learn light and Color correction techniques, including video tutorials, online courses, and blog posts.
Conclusion:
If you have completely read the article, you must have learned how to enhance your photos with light and Color Correction from above. However, when you print your photos, consider the lighting where they will be displayed.
This can affect the colors in the image. If you know the lighting situation or control it, you can look at your photo under similar lighting to ensure it looks correct.
There are also color correction light boxes that you can use to provide the image looks correct under “white” light, even if it will be displayed in a different location.
When you’re Color correcting photos, it’s important to remember that it will take some time to get it right. There must be a thin line between correcting too much and getting everything right.
The good news is, with practice, you’ll be able to get color correction right the first time, which will make your photos look better and help you stand out as a professional. Remember to comment below if you need clarification about how to enhance your photos with light and Color Correction.


