How To Create A Spotlight Effect In Photoshop?
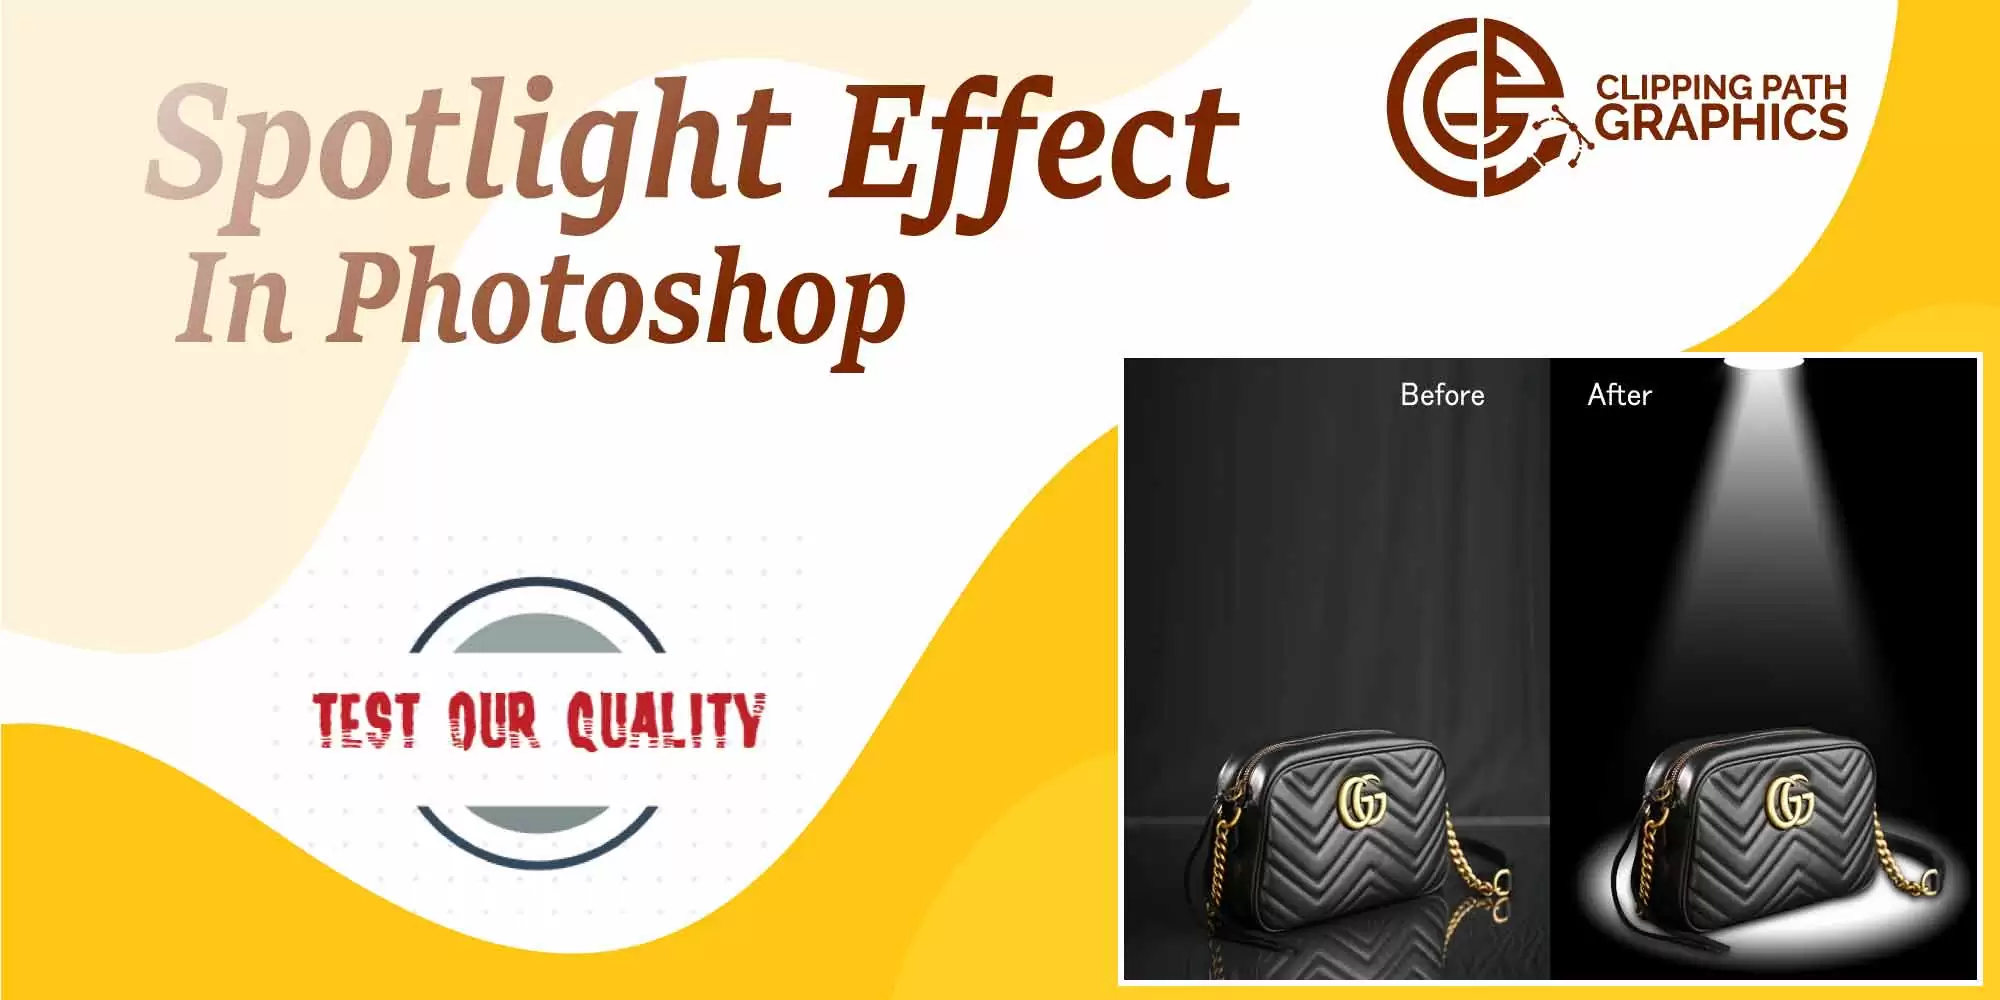
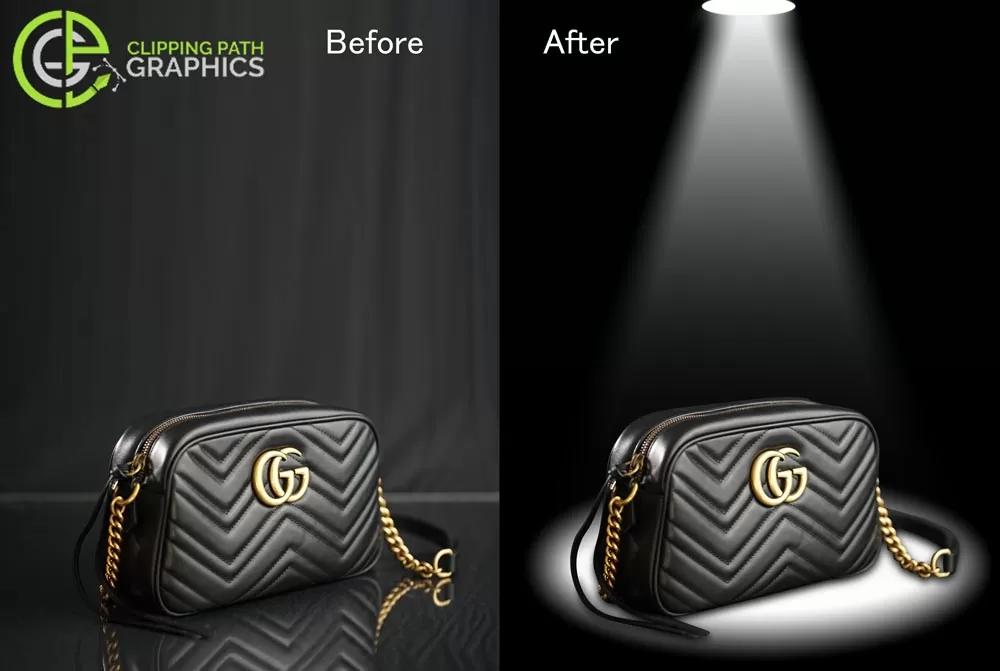
If you are using Photoshop to edit your photos, you may have found many intriguing and interesting tutorials in it. Photoshop has helped people achieve the desired effects in their photos. You can use it to add or eliminate anything you have in your photos and get the result of an ideal image that appeals to its viewers and audience. How to make Spotlight Effect In Photoshop?
Today we are going to see how you can add a spotlight photoshop effect to your images. You will learn it by adding amazing special effects to your photos. You can start right away by following the given steps:
Table of Contents
How to start creating an Action:
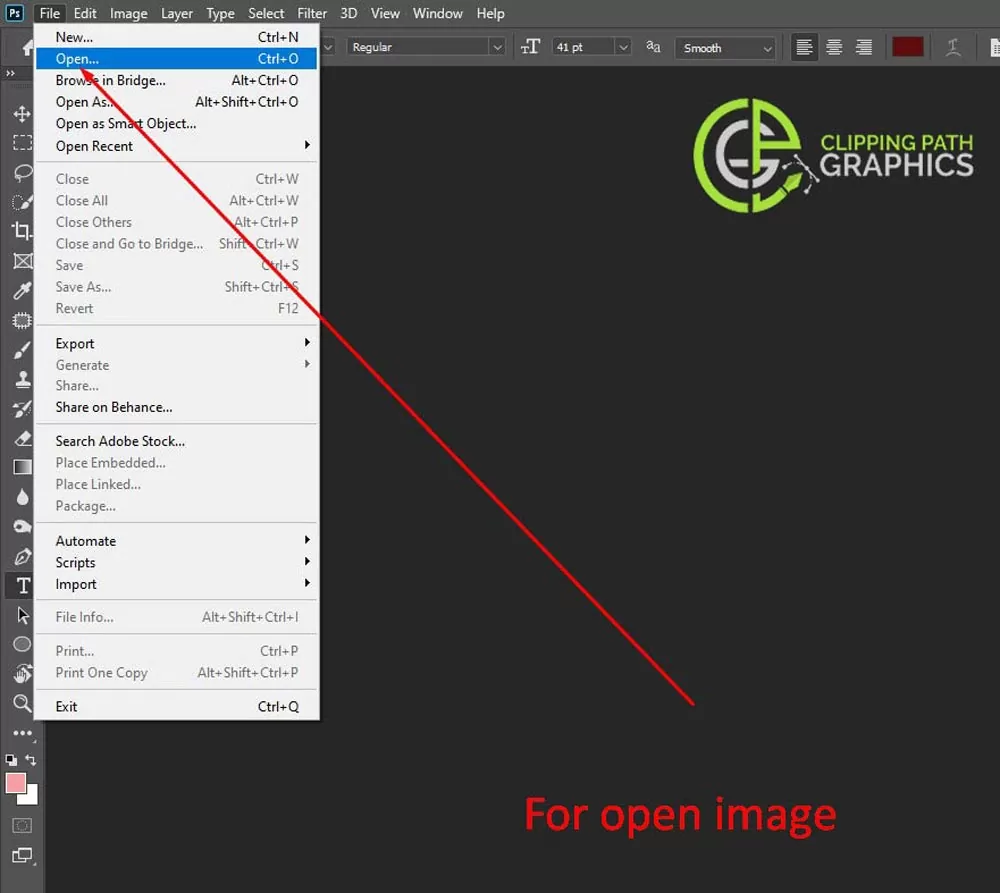
- First, open the photo which you want to work on. To open your photos, go to File > Open and choose the photo you will add Spotlight photoshop Click Open. Now before we get started with the tutorial, check the following few things:
- Your photo must be in RGB color mode and 8 bits per channel. To check this, you can go to Image > Mode.
- For ideal results, your photo must be 2000 – 45000 px wide/high. To check this, you can go to Image > Image size.
- Your photo must be a Background layer. If it is not, go to Layer > New > Background from the Layer.
-
Expand the canvas:
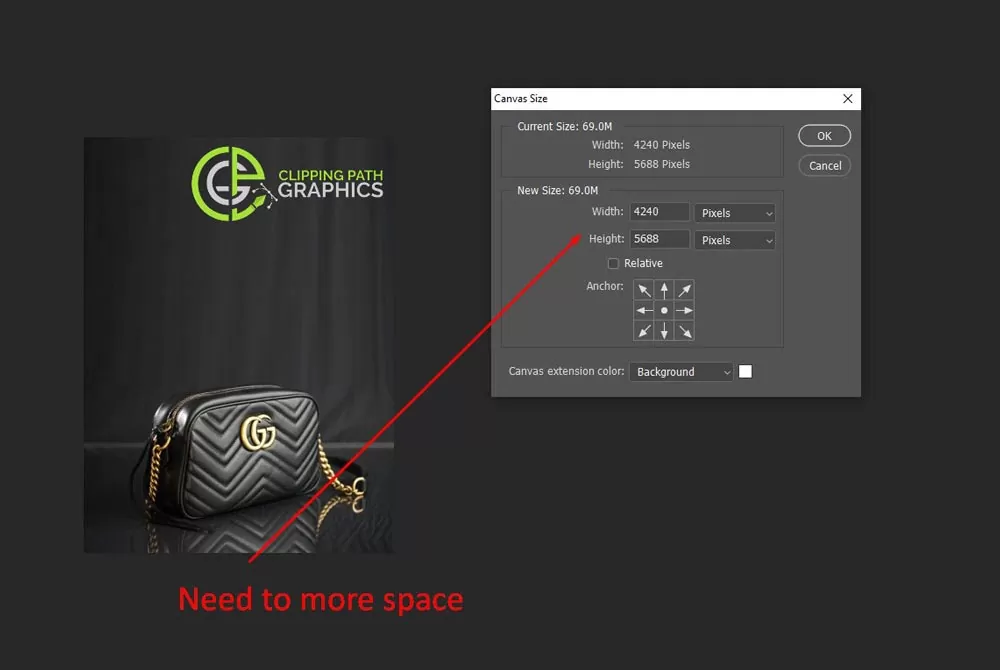
Now we have to expand the canvas over the top and the bottom so that we have a lot more space around the Subject on all sides. Go to Image > Canvas Size and then use these settings.
- Go to Window > Actions and in the Actions panel, click over the menu icon in the top right size, pick New Set to create a new set and then name it Spotlight. Then click on this menu icon once again and pick New Action to create the new action and then name it Spotlight.
How to select your Subject:
- This section will then select our Subject and then copy this Subject to the spared Layer. Pick the Quick Selection tool (W) and then select the background of your photo. Use Shift – Alt buttons over your keyboard to add or then subtract the areas from your selection. After you have made this ideal selection, press Ctrl – Shift – I on your keyboard and invert the selection.
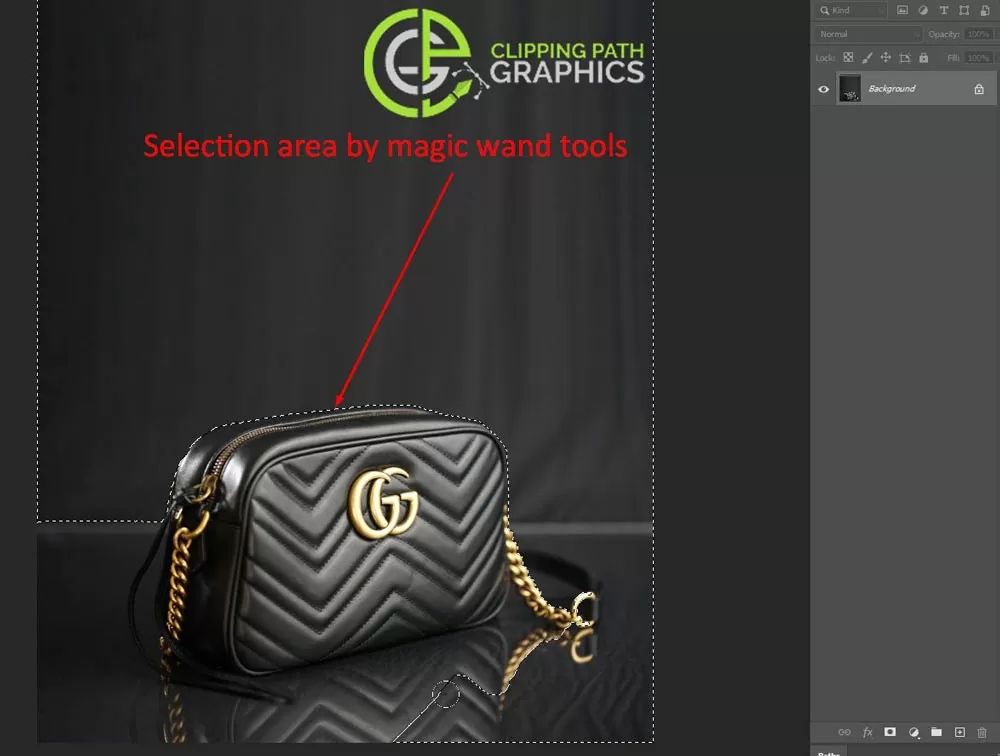
- Now go to Select > Modify > Smooth and then set the Sample Radius to 5 px. Next, go on to Select > Modify > Contract and set Contract By to 2 px. Finally go onto Select > Modify > Feather and then set Feather Radius to 2 px.
- Press Ctrl – J on your keyboard to create the new Layer using a selection and then name this new Layer as a Subject.
How to create the background:
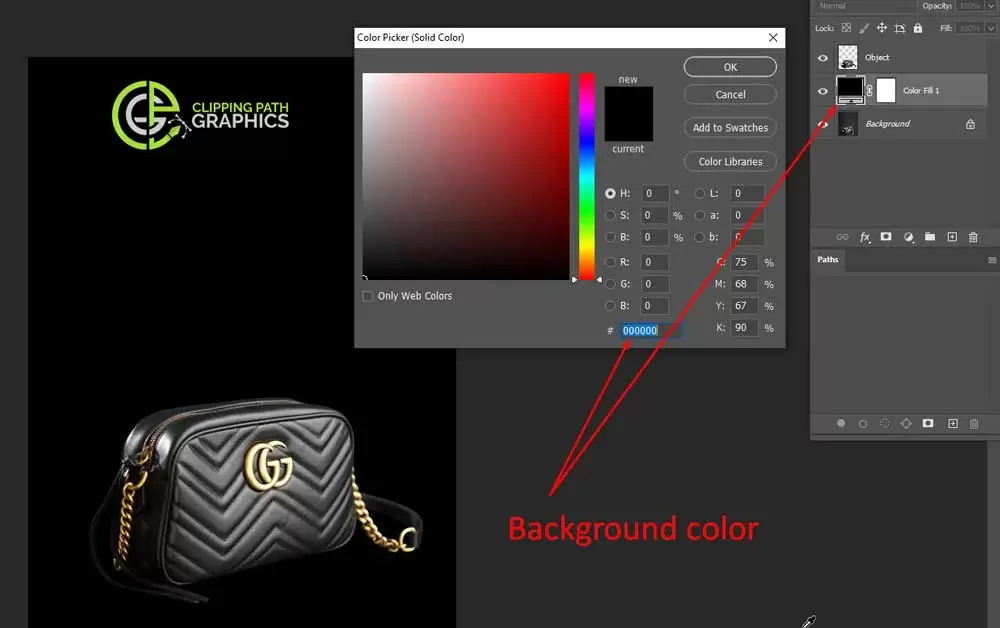
- Through this part, we are going to create a background. Select the Background layer, go to Layer > New Fill Layer > Solid Color to create the new solid color fill layer, now name it Background Color and then pick the color #000000
How to create the light source:
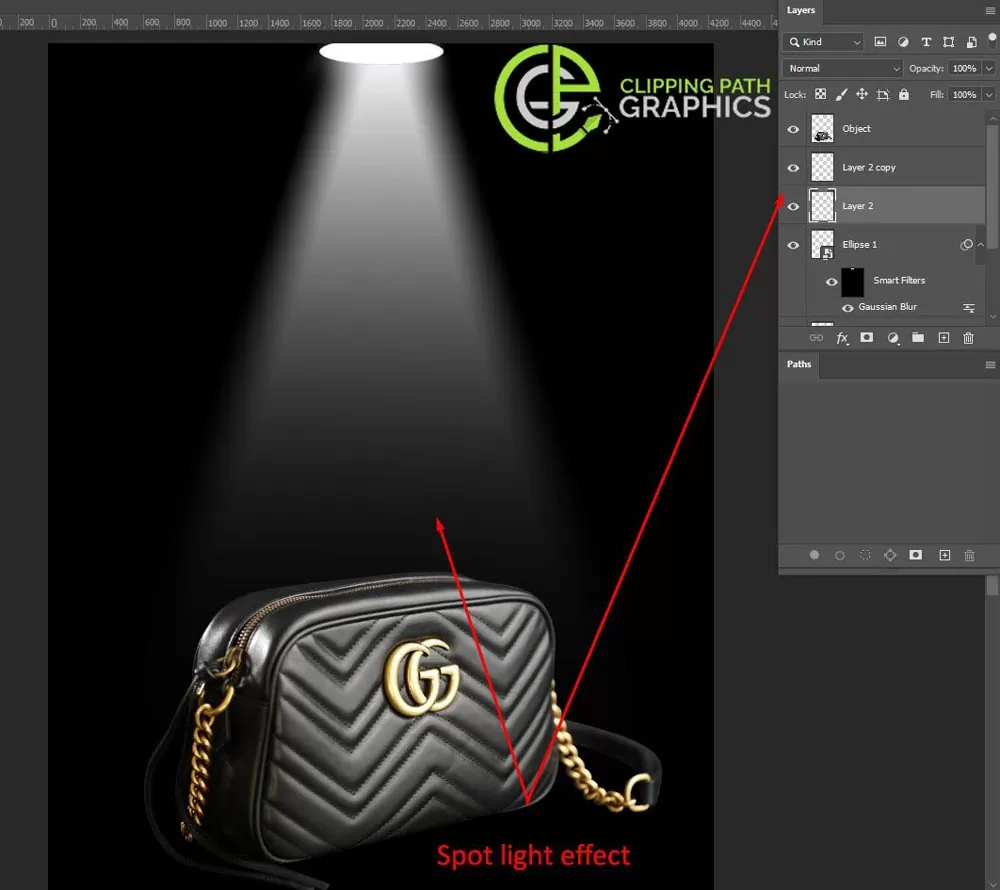
- In this section, we are going to create the light source now. Go to Layer > New Fill Layer > Gradient Fill to create the new gradient fill layer, name it Light Source, and use these settings below.
- Now Double click on this layer thumbnail and use the Move Tool and click and drag anywhere inside your canvas position the gradient.
- Select the Subject Layer and then press Control J over your keyboard to duplicate it. Then go on Filer > Blue > Motion Blur and set your Angle to 0 degrees and Distance to 1000 px.
- Now press Control – Alt – F over your keyboard to apply the previous filter once again. Then press on Control J from your keyboard to duplicate this Layer. After this, using the Move Tool, clicks and drag anywhere in the canvas to position the Layer.
- Press Control J on your keyboard to duplicate the Layer, and using Move Tool, click and drag anywhere inside the canvas to now position the Layer.
- Now Shift-click over the Subject copy layer and select all the layers in between. Then press Control E on your keyboard to merge the layers into one Layer. After this, press Control J to duplicate this whole new Layer.
- Control-Click over the Subject copy 3 layer to select both of these layers at a similar time. Then press Control E on your keyboard to merge the layers into a single layer. After this, using Move Tool click and then drag anywhere in the canvas to position the Layer.
- Now Control-Click on this layer thumbnail to make this selection of the Layer. Then press D over your keyboard to rest all the swatches and select the layer mask of the Light Source layer. After this, go on to Edit > Fill and set Contents to Foreground Color, Mode to a Normal, and Opacity to 100%.
How to blend Subject:
- In this section, we are going to blend the Subject with the background. Now Right Click over this Layer, choose the Blending Options to check Gradient Overlay.
- Now go to Layer > Layer Mask > Reveal All to pick the layer mask that reveals the new Layer. Then, go to Image > Apply Image.
- Right-click on this layer, pick the Blending options, select Gradient Overlay, and pick the Blend Mode to Multiply.
- Now change your Blending Mode of this Layer of Soft Light.
- Control-Click over this layer thumbnail to make this selection of this Layer. Then select your Background layer and press Control J over your keyboard to create a new layer while using this selection. After this, drag the new layer over the top of the layers in the layers panel.
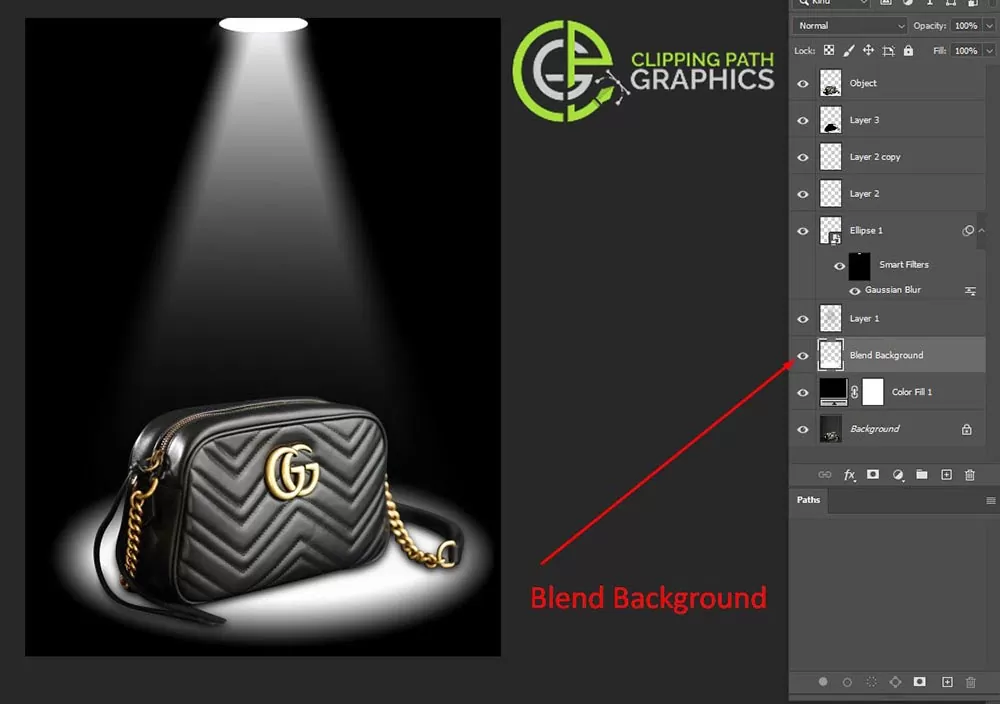
This was how you could create the Spotlight photoshop effect over your photos. This is an ideal way to create the Spotlight photoshop effect perfectly.
Meta Description:
Today we are going to see how you can add a spotlight photoshop effect to your images. You will learn it by adding amazing special effects to your photos. You can start right away by following the given steps. Check out eCommerce product image editing.


