How to merge all layers in photoshop?
Do you want to know the process of merging layers in Photoshop? If so, continue reading this blog. This article will describe how to merge all layers in Photoshop. Keeping your layers organized is critical. Photoshop makes use of layers. Layers are beneficial because they allow you to edit photos without damaging them. They’re helpful since they make it simple to hide or remove adjustments with just one click.
To export the file, you will need to merge all of the layers at some point. You could print your photo or share it on social media. Combining layers isn’t tricky, but you must know what you’re doing or risk losing your work. Let’s look at how to merge layers in Photoshop in a few easy steps. However, let’s not waste your time. Let’s dive into the main point and learn about combining layers in detail below!
Table of Contents
What is a layer in Photoshop:
A layer is one image piled on top of another. Photoshop layers are analogous to stacked acetate sheets. A layer’s transparent areas can be seen with the layers below. You can move a layer to slide a sheet of acetate in a stack to situate the content on the layer.
Translucent techniques allow you to see through to the layers below. Layers are used to combine multiple images, add text to images, and incorporate vector graphic shapes into images. You have to manage your layers in the Layers panel. Layer groups aid in layer organization and management.
How to Merge Layer In Photoshop: Step by step process
In Photoshop, there are three ways to merge layers. Use the most recent version of Photoshop. Use the most appropriate method based on what you want to achieve. Continue reading to discover a secret way for merging all layers in Photoshop. It is one of the most used photoshop processes in image editing services, and we certainly offer the best value for money to our clients. Anyway, here is how to merge all layers in Photoshop below.
Method 1: Merge Layers in Photoshop:
It is now time to complete your post-processing and send it to the printer. Let’s look at the first method for layer merging in Photoshop.
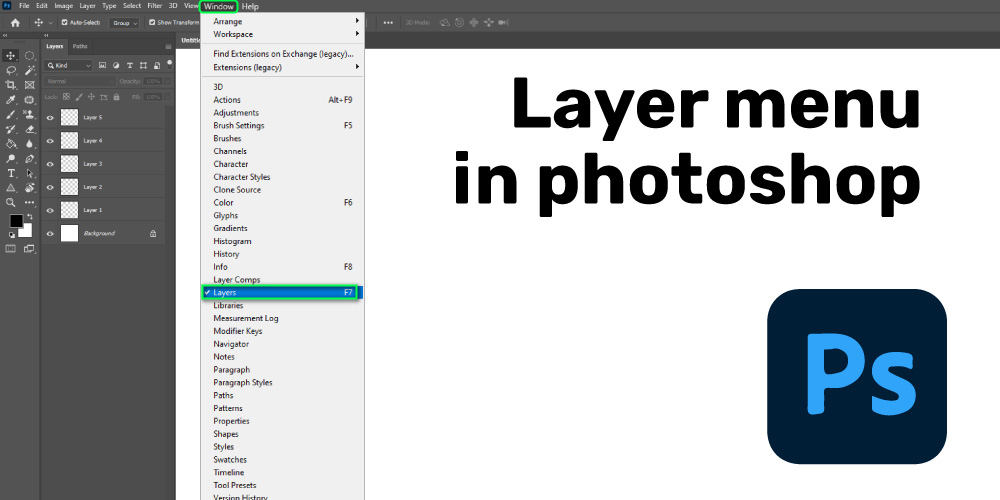
Launch the Layers Panel: Open the Layer Panel from the top menu bar if you haven’t already. Navigate to Window> Layers or press the F7 key on your keyboard.

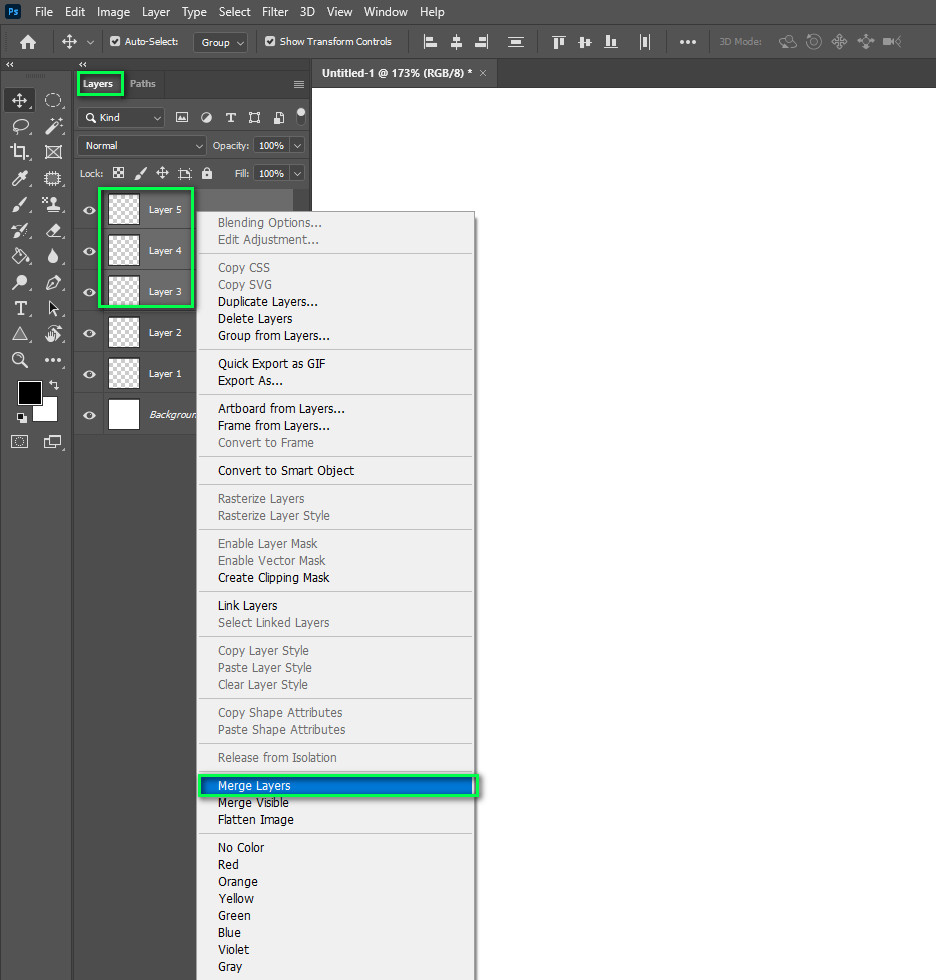
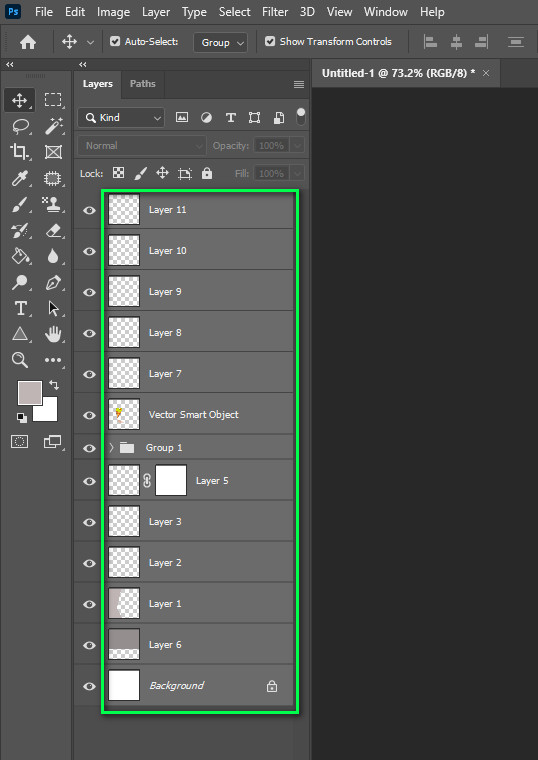
Select Your Layers: By left-clicking on the upper layer, you can pick all of the layers to merge. Hold down Shift and then left-click on the Background layer at the bottom of the list.
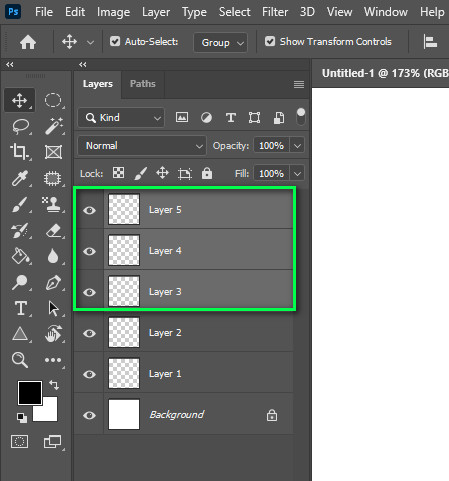
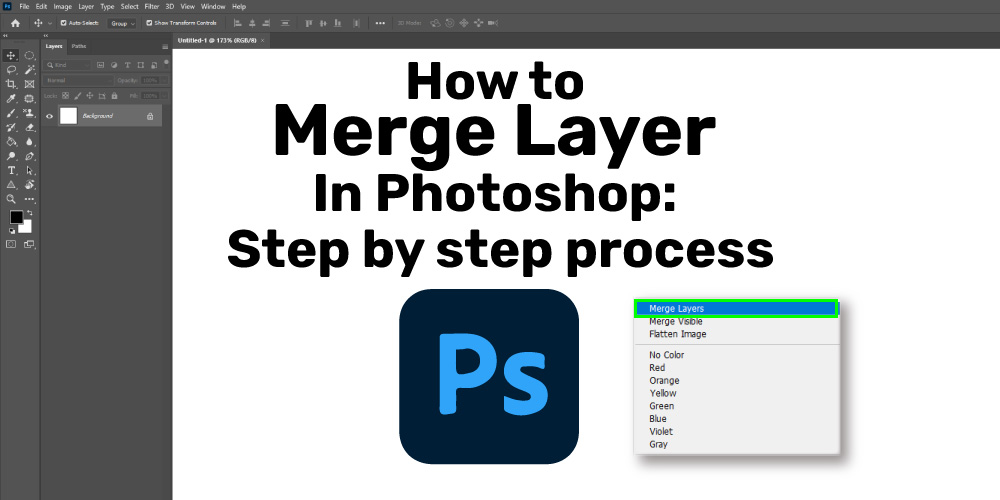
Merge Layers: You can right-click on the layers you would like to merge and choose Merge Layers from the general tab; if you’re like me and enjoy using keyboard shortcuts, press Ctrl + E (Windows) or Cmd + E (Mac) (Mac). All of the layers you’ve chosen will be combined into one.
——————————————————————————————————————————————————————————————
————————————————————————————————-
Method 2: Merge down Image in Photoshop
Video source: https://www.youtube.com/watch?v=NBirmcO82Rg
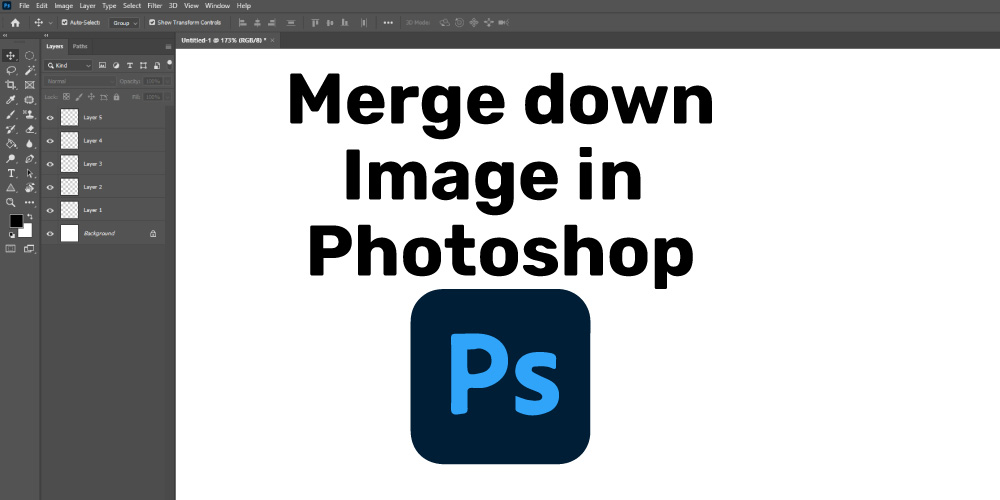
Choose the top layer of those to be merged. Merge Down is accessible via the Layers plate menu or the Layer tab. Merge Down integrates the selected layer with the layer from underneath it. Six simple steps for combining images in Photoshop.
Open the following images in Photoshop: In Photoshop, open the base image you want to use. Most of the time, you could do that by right-clicking on the document and picking ‘Photoshop’ from the ‘Open With’ navigation bar. Then, drag the image you want to overlay in the same Photoshop tab.
Line up your layers: Whether you’re working with multiple bracketed/nearly comparable images, confirm the information in each photo as roughly similar. To begin, select the layers that you will align. After that, select ‘Auto-Align Layers’ from the ‘Edit’ menu. It will present you with a dialog box to select the ‘Auto’ projection option. Click the OK button.
On the top layer, mask out any unwanted details:
Add a layer mask to the composition’s top layer to mask out unwanted information. Use Photoshop’s brush tool to remove any unwanted information. Alternatively, you can fill the layer mask with detail and erase the areas you want it to show. Use a soft brush around the edges to create more natural-looking transitions between layers.
Change the opacity: Experiment with your top layer’s ambiguity to fine-tune the tones and details in your composition.
Recheck the results:
Make sure you’re happy with the look of your composition before saving and exporting it. Finish by adjusting the mask’s edges and opacity. You may want to make any global changes that affect both image layers at this point.
Mix the two layers: Select both layers along with any additional adjustments you’ve made. Right-click and choose ‘Merge Layers.’
———————————————————————————————————————————————————————————-
Method 3: Layer menu in photoshop:
The Layers Panel may be the most crucial Window to have open when working in Photoshop. Not only will we show you how to display the panel, but we’ll also break down each button, menu, and feature so you can quickly find what you’re looking for. You can find additional commands and options in the Layers panel menu.
The Layers Panel in Photoshop is a powerful tool that allows you to do various things with your layer compositions. You will examine the layers palette in Photoshop next. Have you ever wondered what each component of a layers panel does? I’ll explain what each ingredient is here.
-
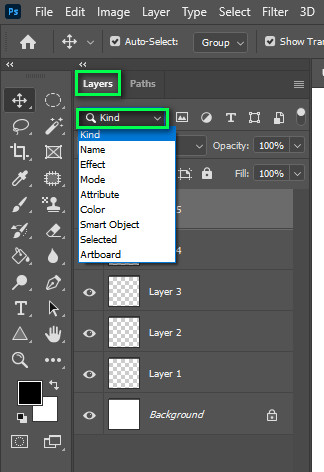
Layer Filter:
This lets you hide layers based on various criteria.
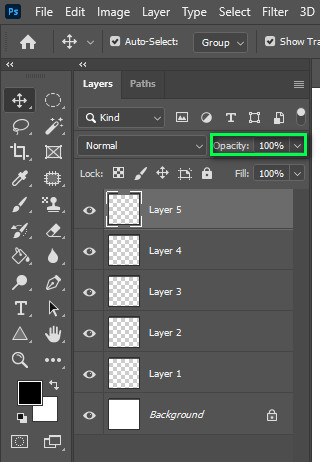
- Opacity: 0 indicates complete transparency, 100 indicates full opacity.
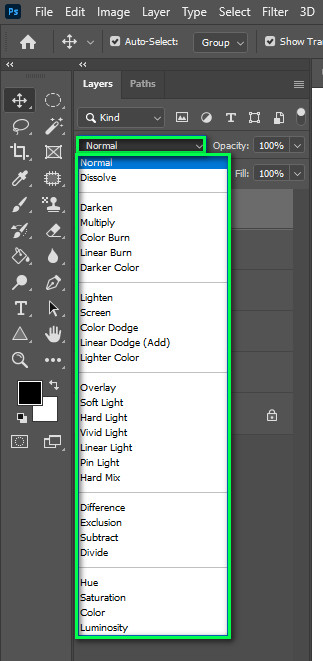
- Blend Modes: This is excellent for compositing and special effects work.
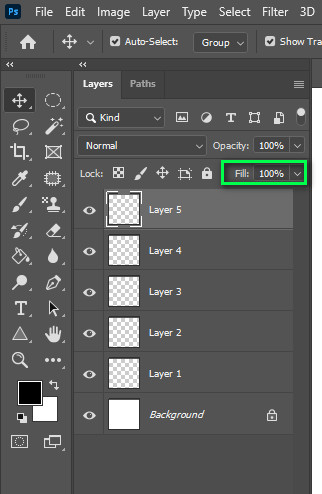
- Fill Opacity: Only affects the opacity of the pixels; any layer styles remain entirely opaque.
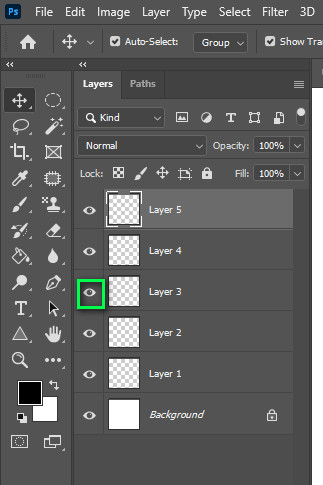
- Visibility: A layer is visible if the eye can see it. When you click on the eye, the layer remains but becomes invisible until you click again.
-
Locked:
The padlock indicates that something in the layer is locked.
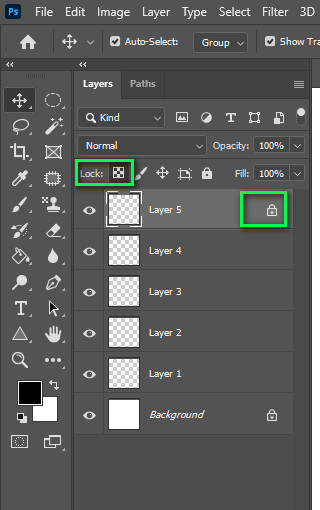
- Lock all: When this box is checked, the layer is locked and cannot be edited.
- Pixels for Image Locking: If this Layer is selected, you will not draw on it. You can paint on this layer, but you can’t paint on the transparent areas because they’re locked.
- Link: This allows you to join layers together.
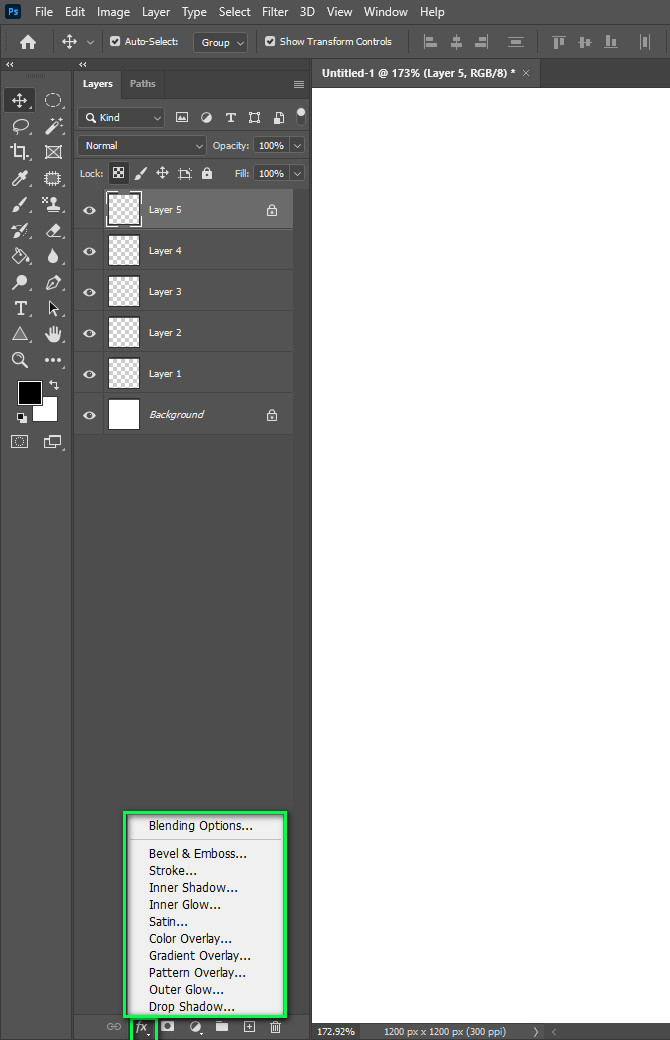
- Layer Effects (Styles): These are effects applied to an image layer. Each effect will be listed individually. You can use multiple layers concurrently.
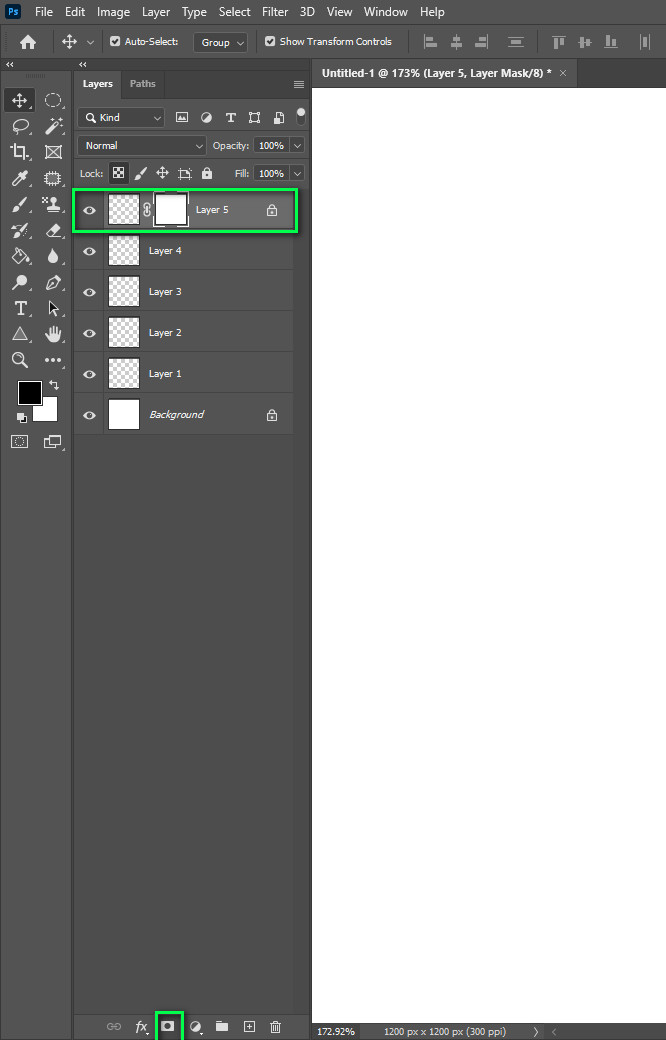
- Add Mask on Layer: Apply a layer mask to the currently selected layer by clicking on add mask on layer button. Paint over portions of your layer without affecting the original image.
-
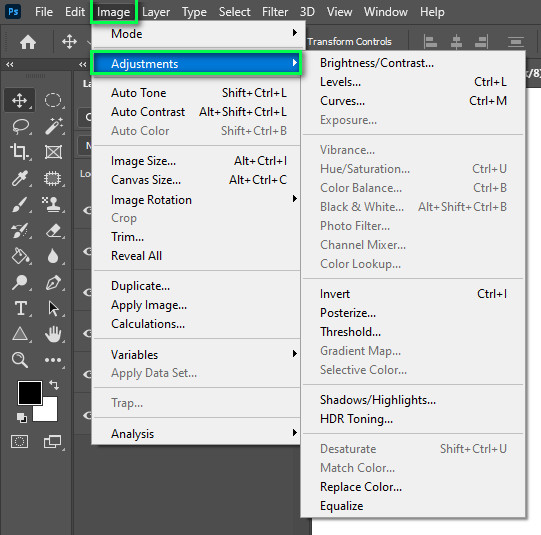
Add an Adjustment Layer:
The best way to apply image adjustments is to add an adjustment layer. Image>Adjustments are an excellent choice because they are non-destructive and re-editable.
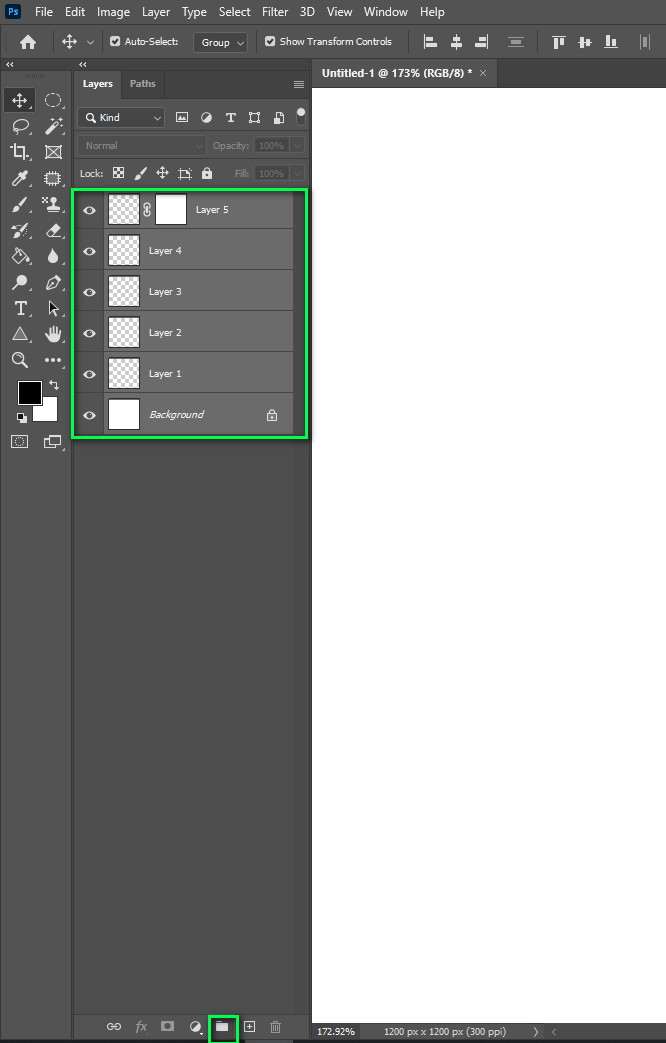
- Layer Groups: It is a fantastic organizational tool. As a result, layers are saved in a folder. By pressing Cmd/Ctrl+G, you can group multiple layers or create a group by clicking this icon. You can move layers into and out of groups by dragging them.
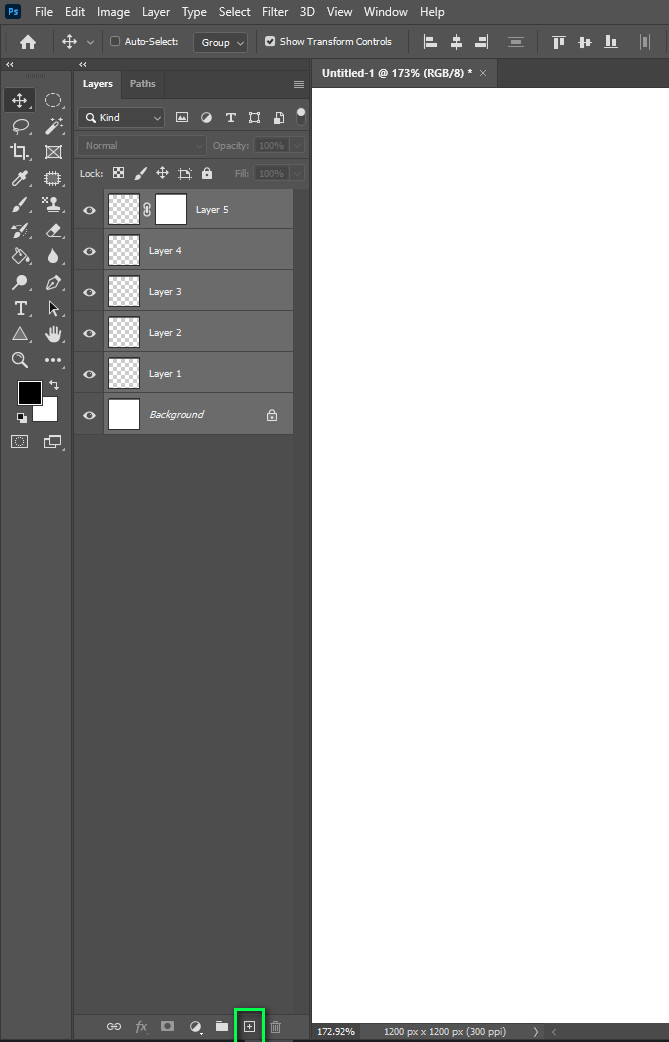
- Make a New Layer: An existing layer will be duplicated if you drag it into this icon.
- Panel Options: This will create a drop-down menu with several options, many of which aren’t listed anywhere else.
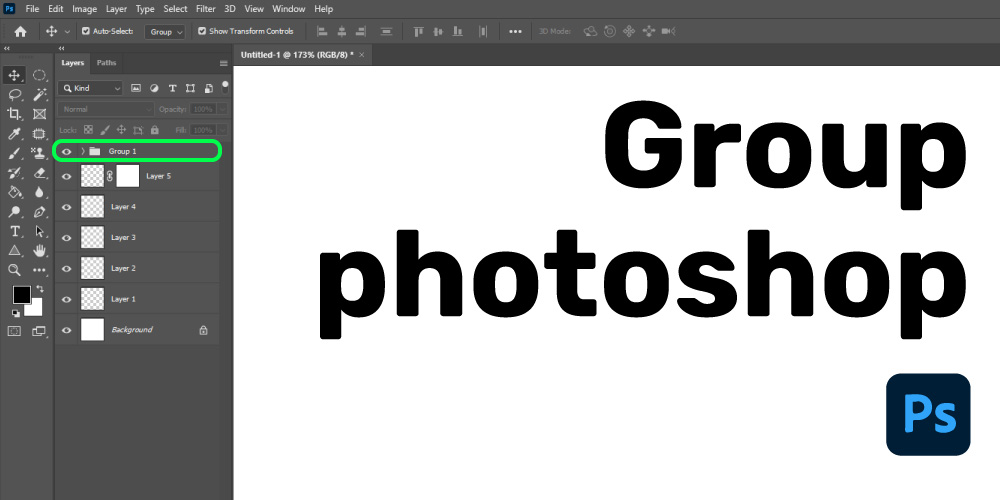
Method 4: Group photoshop
Groups in Photoshop are more than just a way to stay organized. They also offer great flexibility and control when applying edits to an image. You can, for example, use Layer Masks and Clipping Masks on an entire group of layers to maximize their power. It doesn’t take plenty to create a messy layers panel. That is why it is critical to understand how to group layers in Photoshop.
This not only makes editing multiple layers at once more accessible, but it also makes finding the layers you’re looking for much more manageable. To group a group of layers, first select them. Depending on which layers you want to select, you can use three effective methods.
Individual Layer Selection:
The first way to select multiple layers in Photoshop is to hold Command (Mac) or Control (PC) and click on the layers you want to select. This is the best option if you need to choose a series of layers that aren’t directly in front of one another. You can select multiple layers in any order by using this shortcut.
Consecutive Layers:
The second approach is to hold Shift while clicking between the two layers you want to select. Rather than choosing individual layers, this option will choose a group of them. This is your best option to choose a series of layers.
To select all of your layers at once, hold down the Shift key and click on the top and bottom layers. Your layers are now all selected. Once you’ve decided on the layers you want, it’s time to create a group! You can accomplish this in 2 easy steps. The first is to use a keyboard shortcut, and the second is to click an icon.
Keyboard shortcut: To create a group, press Command + G (Mac) or Control + G (PC) while your layers are selected. You will merge all of the selected layers into a group folder.
Manually Creating Groups:
Select all of the layers you want to add to your group once more. Click the folder icon at the bottom of the Layers panel while the layers are highlighted. Both of these options are viable for anyone interested in starting a Photoshop group. Although using the keyboard shortcut saves time, knowing the manual workaround is always worthwhile!
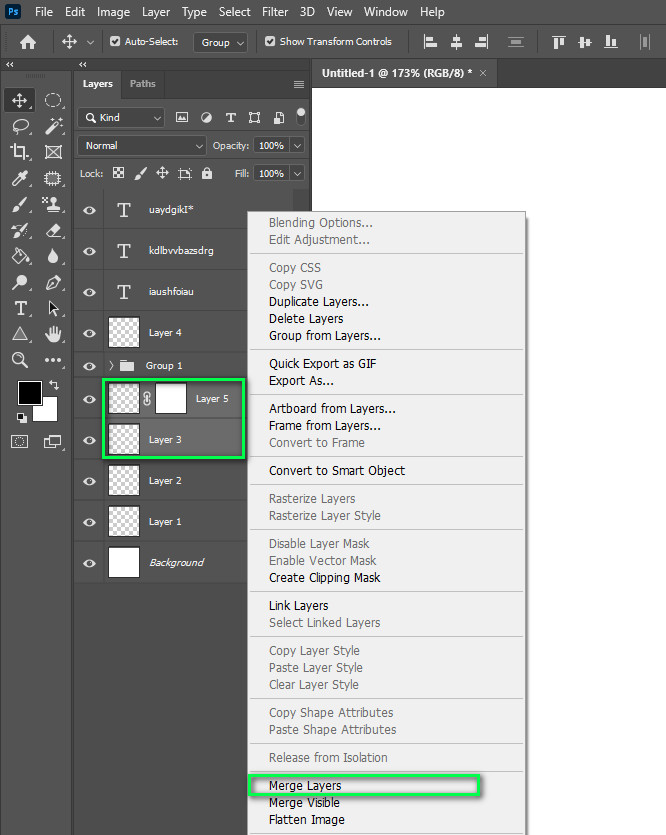
Method 5: Merge text layers in photoshop:
Do you know how to merge text layers in Photoshop? Here is the step-by-step process is given below. I hope it will help you to learn to incorporate text in Photoshop.
- First of all, select both the text and other layers you want to merge, then right-click and choose “Merge Layers” from the drop-down menu.
- Both layers will then be merged and form one. You also won’t be able to alter your text once it’s been merged.
- To move layers between open documents, choose a layer from the Layers panel and drag it to the windows of the other papers. It is not necessary to utilize copy/paste.
- If you need to copy/paste something, go to Select > Select All first, then copy/paste.
Method 6: Multiple layers
Multiple construction parts should be chosen and identified: First, select the top layer. Hold Shift and select the bottom layer to select various levels in a continuous stack. This selects the top and bottom layers and all middle layers. Choose a layer, then select other layers in the Timeline while holding Control (Windows) or Command (macOS).
You will skip the stack’s remaining layers. If you have many layers selected, you can change the label color of all by clicking the colored square to the left of anyone in the Timeline. By adjusting the label color of many layers, You can visually organize levels.
Access the drop-down Label box by dragging the square to the left of one layer in the Timeline and selecting Choose Tag Group to pick all layers in the appearance with the same color tag.
Uses of the precompose Layer in groups:
Shift, Control (Windows), or Command (macOS) can be used to group layers in Pre-compose, or You can use the Label menu’s Select Layer Group command to select multiple layers on the Timeline. Select layer> Precompose from the main menu. Double-click on it to access and explore the layers of a Pre-composition in the Timeline. Use the tabs at the top of the Timeline panel to return to the main composition.
Multiple layers can be animated:
A null object in the Timeline is a layer that does not render in the composition. You can use parenting to link a null object and generate animation in the related levels. To manage the animation of many layers, use a null object as a parent:
To add a null object to the composition, go to layer> New > Null Object. Choose Columns > Parent from the timeline menu on the tab at the top of the Timeline to the right of the composition name if the parent column isn’t visible. When a checkmark appears next to the term Columns in the timeline menu, the panel will appear in the Timeline.
Method 7: Merge layers photoshop shortcut
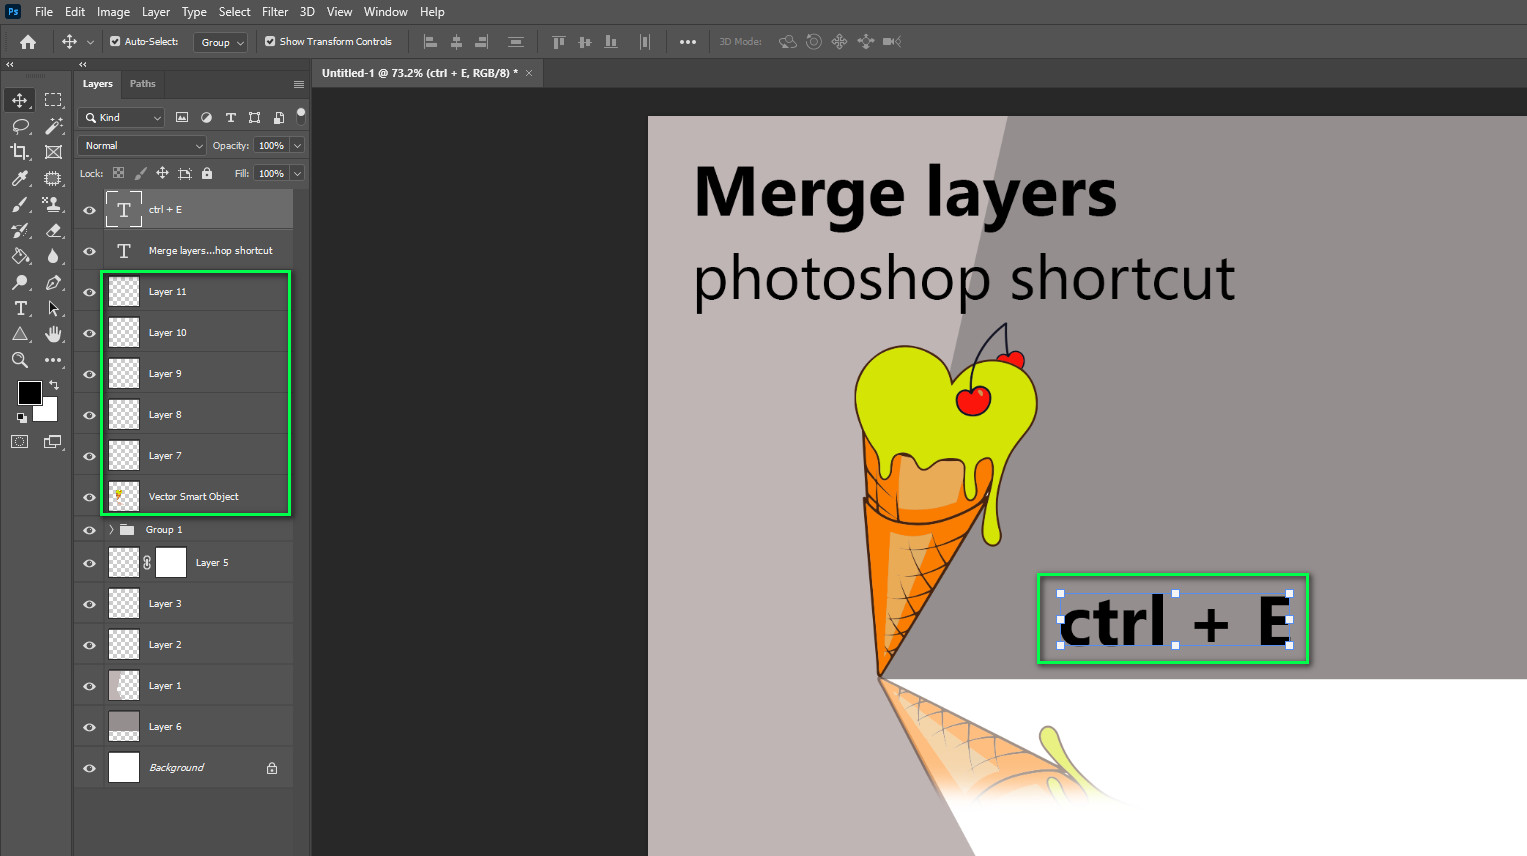
Learning keyboard shortcuts is essential if you want to speed up your Photoshop workflow in any way. Here are a few Photoshop keyboard shortcuts for merging layers that will help you combine layers faster.
- Merge Layers: (Command + E (Mac) / Control + E (PC). You can merge two or more layers that this shortcut has selected. This key combination is ideal for merging certain layers.
- Merge Visible Layers: Shift + Command + E (Mac) / Shift + Control + E (Windows). It will merge all visible layers in your layers panel. Rather than selecting layers one by one, this approach decides which layers to merge based on layer visibility.
- Duplicate & Merge Layers: Shift + Command + Option + E (Mac) / Shift + Control + Alt + E (Windows). This shortcut duplicates and merges the layers you’ve selected. This is the best option for merging your layers while keeping a backup of the originals.
————————————————————————————–
Frequently Asked Question(FAQ):
- Que: What exactly does the Merge Layers function do?
Ans: Even though this function is comparable to the Flatten Photo option, it provokes Photoshop to merge the selected by the user or energetic layers. This indicates you have absolute ownership over which layers you want to combine. Transparent accountability is preserved, and non-selected or concealed layers are skipped and left untouched.
2. Que: What exactly is the Image Flattening Function?
Ans: The Flatten Image option in Photoshop allows you to combine all of your document’s visible layers into a single background layer. It deletes any convolutions and replaces any transparent areas with white’s default background color. The component is traditionally used in circumstances where you need to significantly reduce the file size of your document because it is a highly effective means of preventing file size.
It is also suggested that you use this function only after you are sure that you have finished editing the document thoroughly. Once the layers have been merged into one, You can no longer edit the components separately.
3. Que: What does it mean to merge layers?
Ans: Merging multiple layers simply means collapsing and combining them into a single layer. When this happens, the opaque areas of the topmost layers obscure the details of the bottom layers, while the transparent is as of all layers remain visible.
4. Que: In Photoshop, how do layers work?
Ans: Layers function similarly to sheets of transparent film stacked on top of one another will display objects on the top layer on top of objects on the lower layer. Applying a solid color to it will obscure any objects on Layers beneath it. The Layers panel in Photoshop is where you can access, modify, create, and delete layers.
5. Que: How to do smooth in Photoshop?
Ans: Select the Smudge tool from the Tools panel after opening the image. Select the following options from the Options bar: Using the Finger Painting option, begin the streak with the foreground color. Smudge the areas you want to cover with paint.
6. Que: In Photoshop, how do you blend Layer colors?
Ans: Images that have been composited with blend and color effects Make a new document in Photoshop. Select the top layer in the Layers panel and open the Blending Modes pop-up menu. Select image> Adjustments > Levels from the main menu and then the bottom of the two layers.Select Image > Adjustments > Hue/Saturation from the menu.
Conclusion:
You now understand how to merge all layers in Photoshop. You can improve and speed up your post-processing with these methods. Adopting a non-destructive workflow can also help you avoid losing important information. Layers in Photoshop enable you to work non-destructively by stacking images on top of each other without interacting with or mixing the pixels of the images. When you create or open an image in Photoshop, it appears in the layer panel.


