How To Make Words Go In A Circle Photoshop
Do you want to spice up your designs by putting text in a circle in Photoshop? This systematic approach creates interest and pulls the eye when making a logo, poster, or any other visual.
In this blog article, we’ll show you how to create a circular text path, type straight into a circular form, and use the Warp tool to bend and curve text around a circle or other shape to get this effect in Photoshop.
Table of Contents
Circle Text in Photoshop
To make words go in a circle in Photoshop, use the “Type on a Path” tool to create a circular text path. Here’s how to go about it:
Step 1: Open your image in Photoshop, pick the “Type on a Path” tool from the toolbar, or press Shift + T on the keyboard.
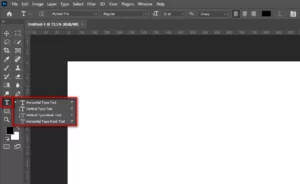
Step 2: Create a beginning point for your text route by clicking on your picture.
Step 3: Draw the shape of your text path using your mouse. You may confine the route to a full circle by holding down the Shift key.
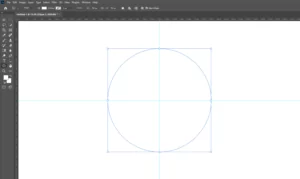
Step 4: Enter your text in the text area. You may alter the font, size, color, and other formatting characteristics under the “Character” panel.
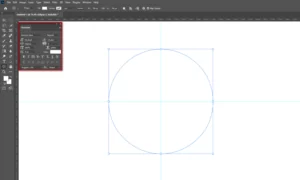
Step 5: To relocate the text along the route, click and drag it to the correct area using the “Type on a Path” tool.
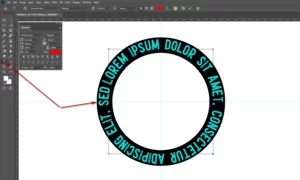
Keyboard Shortcut: Pressing the T key numerous times quickly switches between the “Type” and “Type on a Path” tools.
Type in a Circle in Photoshop
In Photoshop, you can also text right into a circular shape to make words appear in a circle. Here’s how to go about it:
Step 1: Create a new layer for your text. If feasible, add new layers in each section of your editing. Fresh layers allow you to differentiate your further modifications from the previous ones. You can take it as a pro tip for your image editing profession.
Step 2: From the toolbar, select the “Type” tool, or use the keyboard shortcut, T.
Step 3: Create a beginning point for your writing by clicking on your image.
Step 4: Fill in the text field with your text. You may alter the font, size, color, and other formatting characteristics under the “Character” panel.
Step 5: To resize and rotate the text to fit into a circular shape, use the “Free Transform” tool (Ctrl + T).
Step 6: Use the “Warp” tool (Edit > Transform > Warp) to bend and shape the text as required to wrap it around the circular shape.
Curve Text Around a Circle or Other Shape
Last but not least, you may use Photoshop’s Warp tool to curve and bend text around a circle or other object. Here’s how you do it:
Step 1: Create a new layer for this part. You can create the layer from the layer panel or from the top menu bar.
Step 2: From the toolbar, select the “Type” tool, or use the keyboard shortcut, T.
Step 3: Create a beginning point for your writing by clicking on your image.
Step 4: Fill in the text field with your text. Change the font, size, color, and other formatting characteristics in the “Character” panel..
Step 5: Use the “Warp” tool (Edit > Transform > Warp) to bend and shape the text as desired to wrap it around the circular shape.
Step 6: Manipulate the text with the warp grid as required. You may adjust the form of the text by dragging the control points, or you can pick different wrap styles from the drop-down box.
Aligning Circular Text in Photoshop
Circular text can be more difficult to align in Photoshop than linear text, but it’s feasible with some effort and the appropriate methods. Here are some Photoshop techniques and strategies for aligning circular text:
Use the “Type on a Path” tool.
If you used the “Type on a Path” tool to produce your circular text, you could relocate it along the path by choosing the tool from the toolbar (Shift + T) and clicking and dragging the text to the appropriate spot.
You may also utilize the “Type” tool (T) to pick and highlight specific words or letters inside the text and then nudge the text into position with the arrow keys.
Use the “Free Transform” tool.
If you wrote your text straight into a circular shape, you may resize and rotate it with the “Free Transform” tool (Ctrl + T). Select the text layer in the “Layers” panel and transform it with the “Free Transform” tool.
Then, resize the text using the bounding box handles or hold the Ctrl key and drag a corner handle to scale the text non-proportionally. Position your mouse outside the enclosing box and drag it to rotate the text.
Fine-tune the alignment
To make any last tweaks to the text’s size and location, use the “Free Transform” tool. You could also wish to apply drop shadows, glows, or other effects to the “Layer” styles (Layer > Layer Style) to make the text pop out.
With these methods, you can easily align and rearrange your circular text in Photoshop. Don’t be afraid to try out several approaches to see which one suits your particular design the best. Good luck with your alignment!
FAQ
How do you put letters in a circle?
There are several ways to put letters in a circle, depending on the software or tools you are using. Here are a few methods you can try:
In Illustrator or similar vector graphics software:
- Type out the letters you want to put in a circle.
- Use the “Type on a Path Tool” to create a circular path and place the text on top of it.
- Adjust the font size and spacing to fit the circle.
In Microsoft Word or similar word processing software:
- Type out the letters you want to put in a circle.
- Select the text and go to the “Format” tab.
- Click on the “Text Effects” button and select “Transform.”
- Choose the “Follow Path” option, then choose the circular path.
Can you curve text in gimp?
You can curve text in GIMP (GNU Image Manipulation Program) using the “Bend” tool. Here’s a brief overview of how to do it:
- Create a new canvas in GIMP or open an existing one.
- From the toolbar on the left side of the screen, select the “Text” tool.
- Click on the canvas where you want to add text and write what you want.
- Select the text layer, then go to the “Layer” option at the top of the screen and choose “Text to Path.”
- Then, from the toolbar on the left side of the screen, pick the “Transform” tool, which is represented by a bent arrow.
- Select “Bend” from the “Transform” option.
- By moving the handles at the end of the text to create a curve, you may bend your text to the appropriate shape with the Bend tool.
- When you’re happy with the curved text, click the “Commit” button to save your changes.
- Now you have a text curved in your desired shape, and you can style it, color it, or combine it with other design elements.
Final Words
Finally, there are various methods for making text travel in a circle in Photoshop. These approaches may add interest and draw attention to your designs, whether you build a circular text path, write straight into a circular form, or use the Warp tool to bend and curve text around a circle or other shape.
This blog post helped produce this look in Photoshop. Experiment with different fonts and shapes to create your designs. Have fun creating!


