How to get rid of double chin in photoshop?
It takes a lot of elbow grease, skills, and effort to capture a perfect portrait picture. Setting up the lighting, adjusting the shooting angle, and using the best camera is all you need to get the best headshot of your model or client. After taking all of these steps, most portrait photographers still struggle to fight against the double chin. Indeed, it’s nearly impossible to fix the double chin problem naturally. The only way to solve this issue is to edit out the double chin using Photoshop. But all of us don’t know the right way to remove the double chin.
And for those who don’t know how to get rid of double chin in Photoshop, we bring this tutorial only for them. So, continue to read to fix the double chin issue.
Table of Contents
Different Ways on How to Remove Double Chin in Photoshop
In Photoshop, you can find multiple tools to remove the double chin. For example, you can use both the Liquify tool and the Clone Stamp Tool to get rid of the double chin area. And from this chapter, we will walk you through the way of using these two tools to eliminate double chin from your picture.
01. Use Photoshop Liquify Tool To Get Rid of Double Chin
Liquify is the best tool to eliminate double chin from a photo. Though it’s a time-taking process, you will get the best photo processing output using this tool. So, let’s see how to use Liquify in Photoshop to remove the double chin.
Open and Create Duplicate Layer of an Image
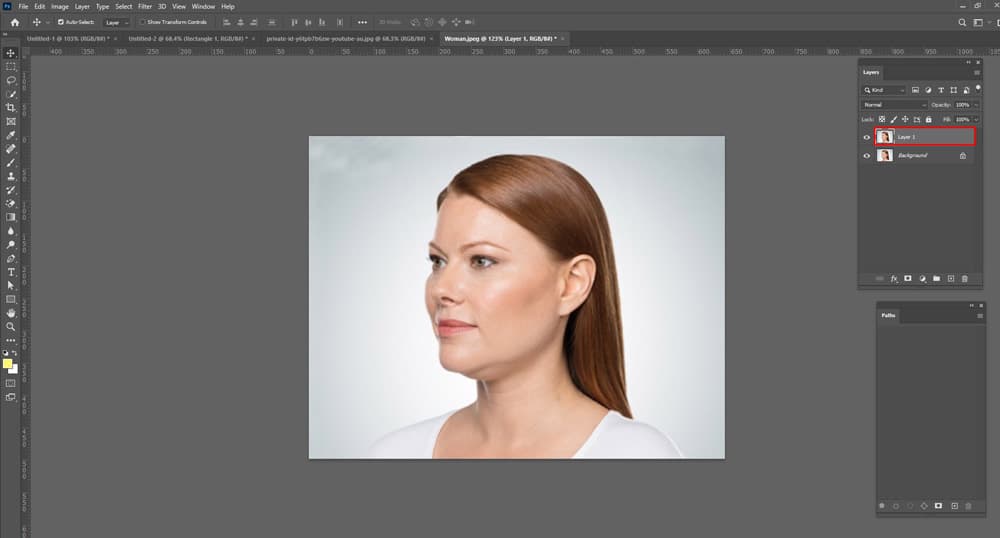
First off, open the photo you want to edit out the double chin. Then, make a duplicate layer of that picture. Duplicating the image will keep the original photo intact. Press Ctrl + J from your keyboard to create a duplicate layer of the main photo. We recommend you create two copies of the original photo.
Go to Filter > Liquify and Choose Forward Warp Tool
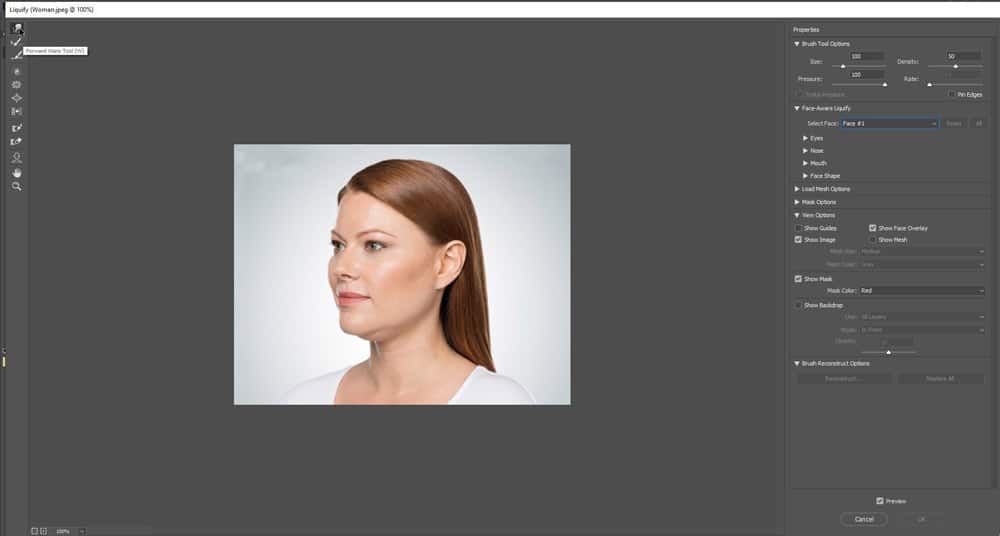
To get rid of double chin, Photoshop Liquify Tool is the best tool. To get this tool, head over to Filter > Liquify. You can find this option on the top menu bar. Next, choose the Forward Warp Tool from the Liquify menu.
Make Your Photo Ready First
Before diving into the editing workflow, ensure you prepare the original photo. Adobe Photoshop lets you customize the Liquify tool. For example, you can adjust its size, pressure, intensity, and density. What value you need to put depends on the original picture. So, play with the tool and tweak every setting to get the best photo retouching output.
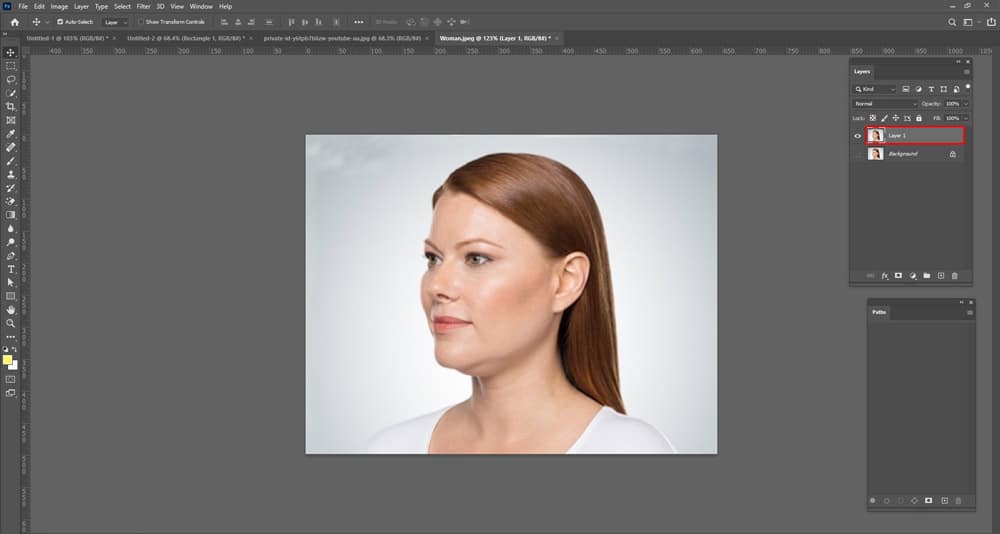
Start Editing with the Liquify Tool
Once you fine-tune the Liquify tool setting, you are ready to start editing your photo to remove the double chin. Brush out the double chine area with the Liquify tool. Keep in mind; you need to be subtle when editing. If you over-edit the picture, it damages the realistic look and effect of the portrait.
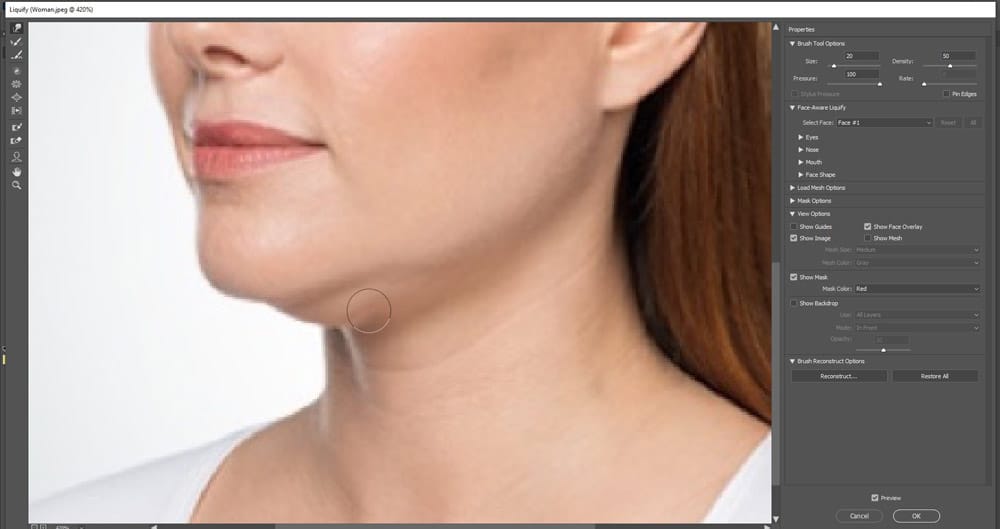
Create A Layer and Fill the Layer With Gray
Make another layer by clicking on the Layer and choosing Duplicate Layer. Afterward, head over to Edit > Fills to get the Fill dialogue box. From there, set the Contents to 50% gray, Mode to Normal, and Opacity to 100%.
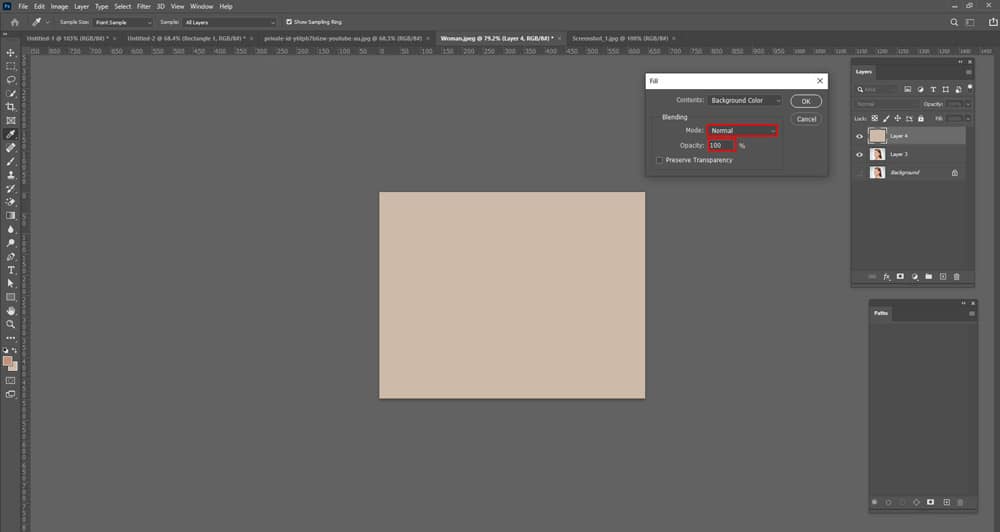
Add Noise and Apply Blur
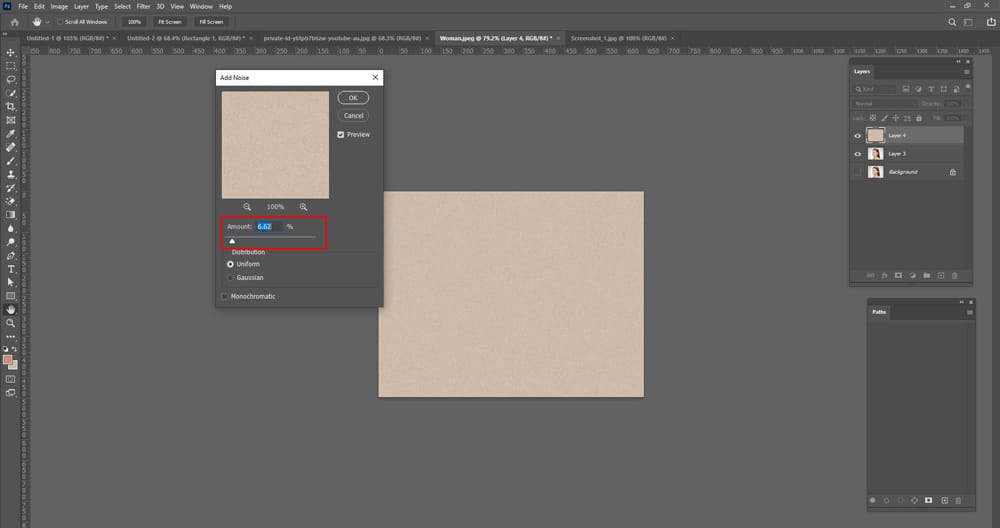
After filling the layer with gray, it’s time to add blur to your photo. To do so, go to Filter > Noise > Add Noise. It will bring up the Add Noise pop-up box. Then, adjust the amount according to your photo and apply it to the double chin area by clicking Ok.
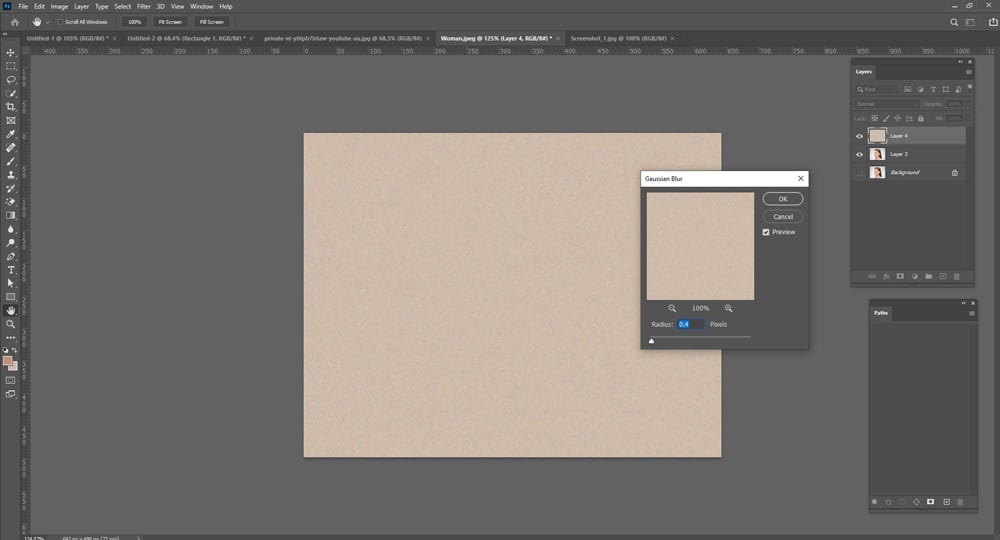
Next, select the Filter > Blur > Gaussian Blur to apply the blur. It will help to soften the noise effect. We suggest you play the blur effects by adjusting the Radius. Play with it until you get the editing output.
Create A Clipping Mask
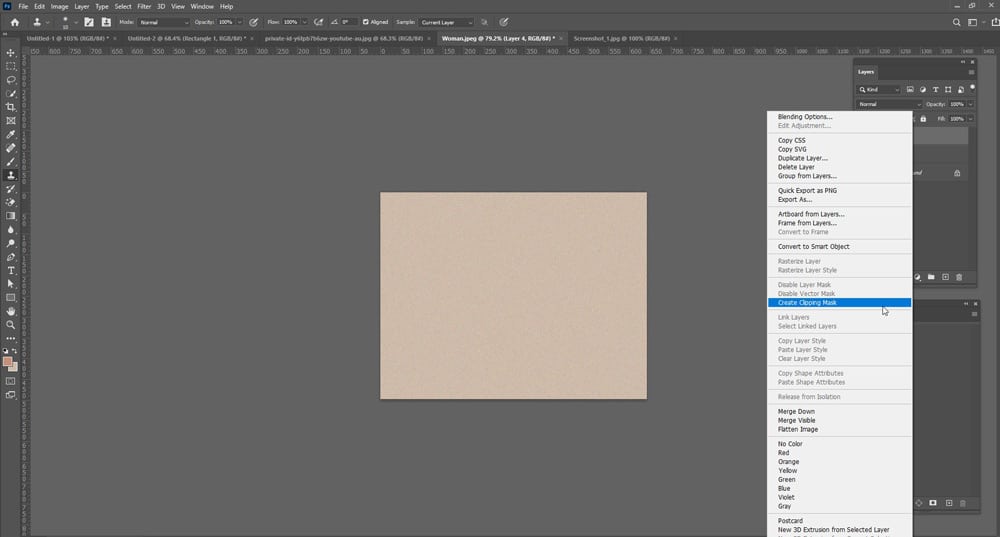
Right-click on the layer and choose to Create A Clipping Mask. Then, go for adding a shadow to the area to give a natural look to your photo.
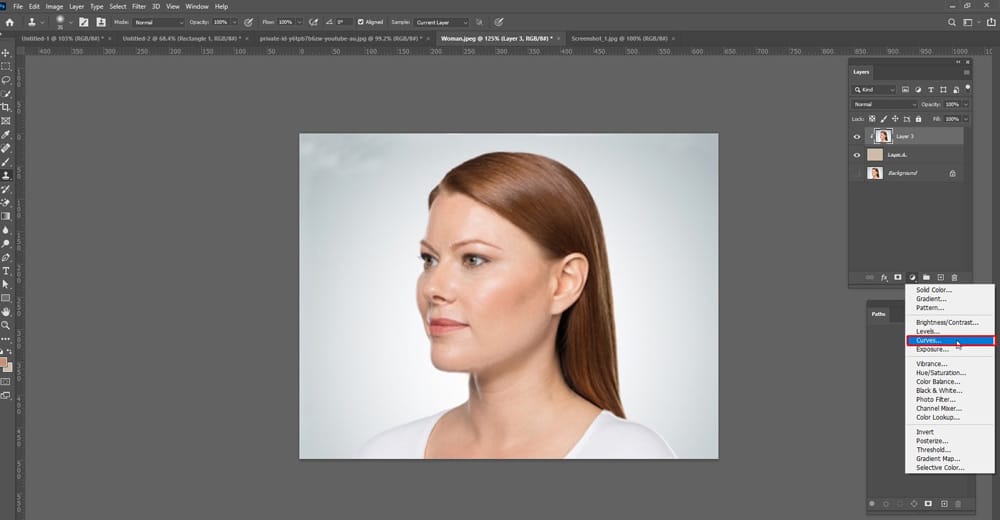
To add shadow, head over to Layer > New Adjustment Layer > Curves.
Now, choose the point you want to darken. Then, drag and pull down the curves to see changes it makes. When you get your desired result, stop pulling the curves down. Afterward, create a Layer Mask to the layer (you just fine-tune) fill it with black to add shadow. It will help to give a natural look to your photo. Now, apply the shadow to the double chin area.
Lighten Up Some Area
Finally, it’s time to light up some areas to make the effect more realistic. To do so, you need to create an adjustment layer. So, go to Layer > New Adjustment Layer > Curves. Next, select the point you want to bright up and start dragging the curves up.
02. Use the Clone Stamp Tool to Remove Double Chin
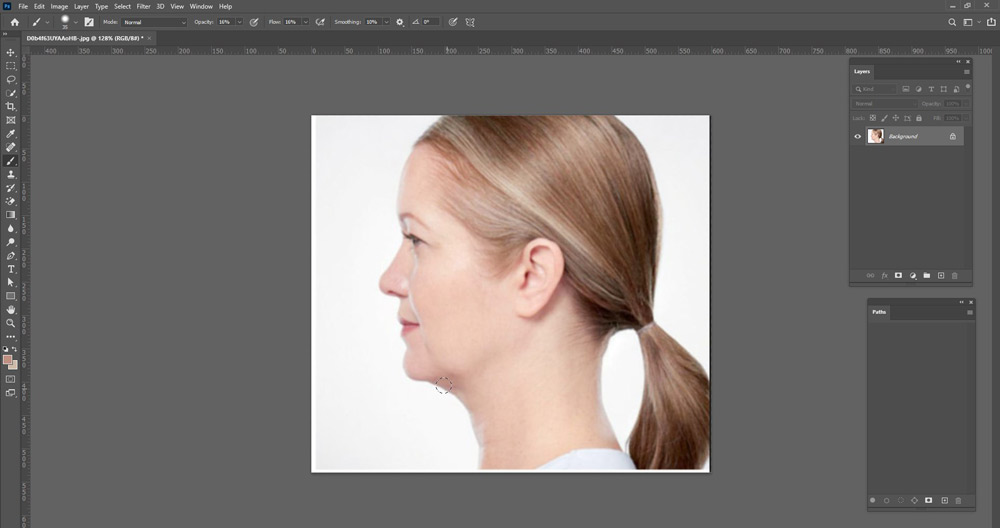
You can also use the Clone Stamp Tool to get rid of the double chin. Though it does not bring accurate results like the Liquefy tool, it is one of the easiest and fastest methods to remove the double chin.
- Begin the editing workflow by opening your photo in Photoshop.
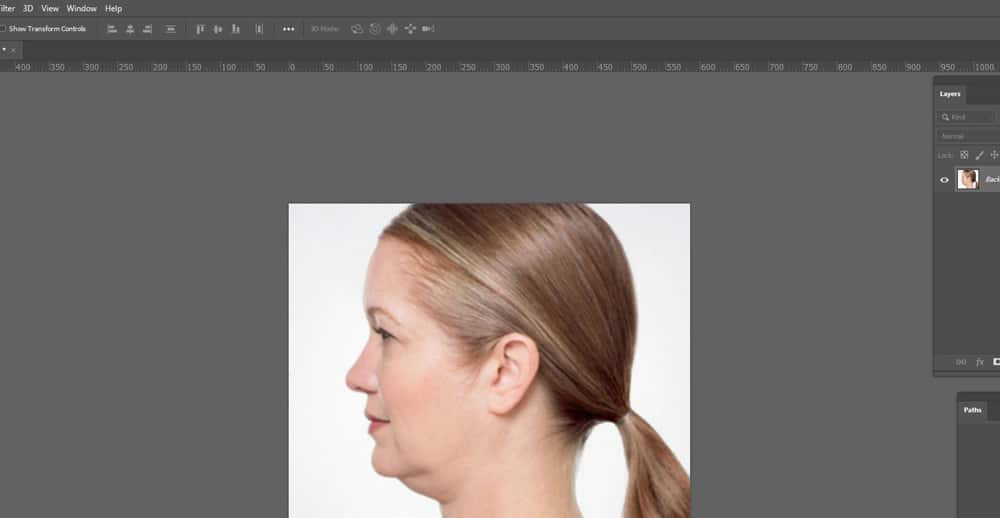
- From the left toolbar menu, choose the Clone Stamp Tool.
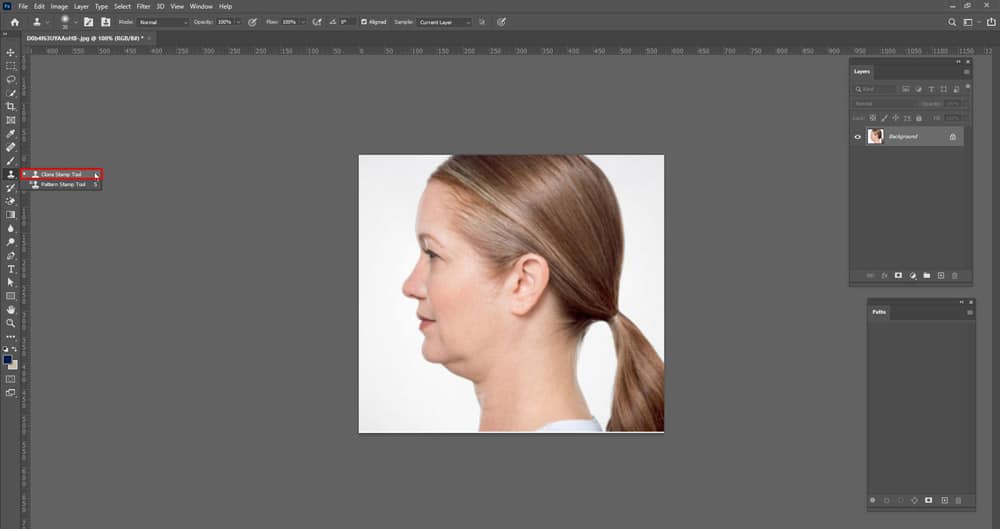
- Fine-tune the tool setting and adjust the brush size from the top tool panel. From there, set Normal to Lighten and the Opacity to 15%. However, you can adjust the Opacity based on your photo.
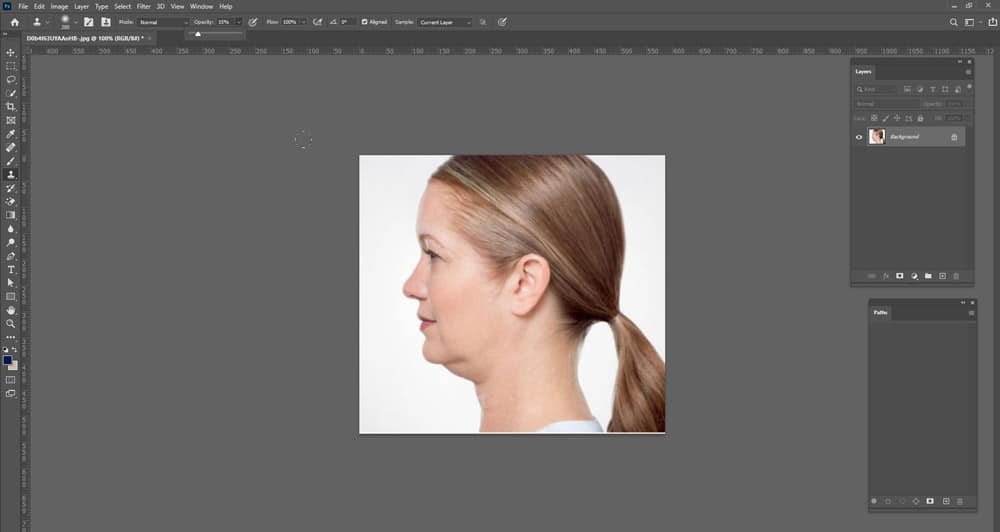
- Start brushing over the double chin area. Before that, hold down the Alt button from your keyboard and choose the area you want to clone from. Next, begin painting over the dark and shadow area from the double chin area.
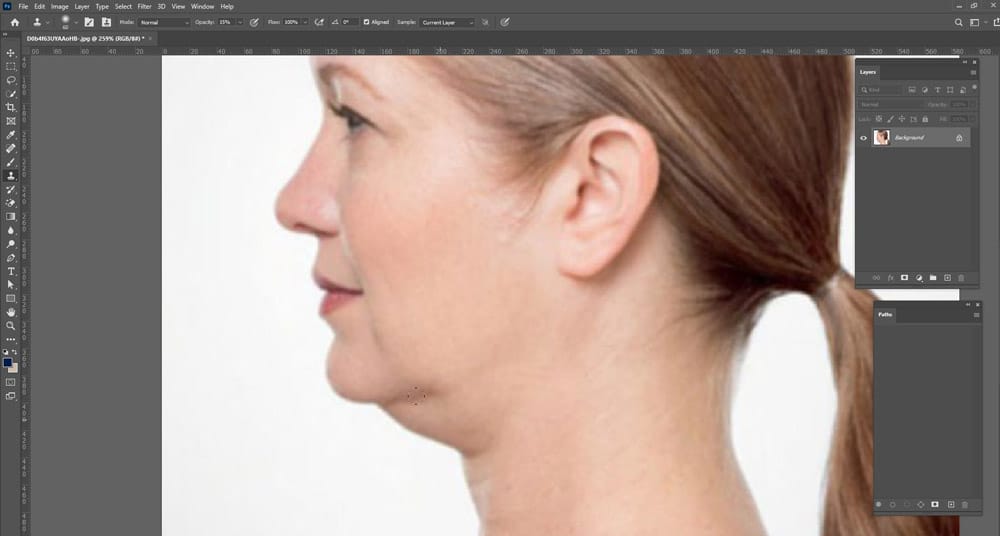
- Afterward, customize the Clone Stamp Tool from Lighten to Darken. Again, select an area you wish to clone from and start brushing over the highlighted area.
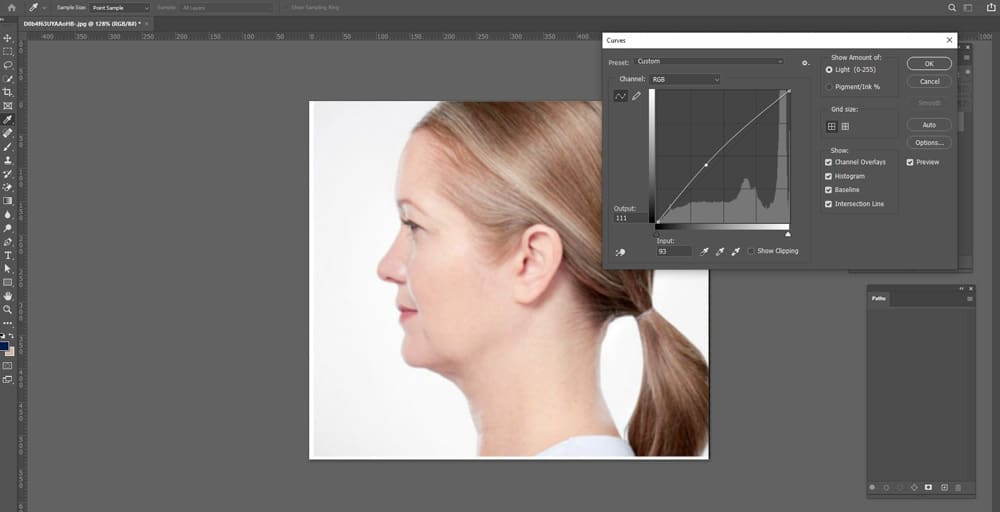
- Finally, change the Clone Stamp Tool setting again. Set it to Normal from Lighten and paint over the area to gain a more realistic effect by removing double-chin.
Conclusion
Getting rid of the double-chin naturally is almost impossible. But you can remove it through photography post-processing workflows. Using the above-mentioned methods, you can effortlessly remove the double chin.
However, we recommend you use the Photoshop Liquify Tool. It will help you to gain natural photo effects. On the other hand, if you don’t have enough time, use the Clone Stamp Tool. Either way, you can take the photo retouching service from a photo editing company like us to fix the problems with your portrait pictures.
If you have questions about this topic (how to get rid of double chin in Photoshop), leave a comment below. We are always available to help you out.


