How To Get Light And Airy Photos In Lightroom?

“Light and Airy” is a very common yet popular phrase in professional and commercial photographers. Learning how to get light and airy photos in Lightroom post-processing is the half picture of the whole scenario. And in this article today, we will learn how to use Lightroom and get light and airy photos with some simple steps.
Table of Contents
Step By Step Guide On How To Get A Light And Airy Photos In Lightroom
Photos that fall under this category are brighter and more colorful than normal ones. Photographers use this technique in wedding photography the most. To make your photos light and airy, you must first shoot in that scenario and then learn how to get light and airy photos in Lightroom. We will cover how to shoot light and airy photos some other day.
Let’s start our lightroom light and airy photo editing journey…

Step 1: Lightroom Presets
Using presets in Lightroom to get light and airy photos is an easy and quick solution that you can use if you don’t want to go with the learning process. With Lightroom presets, you can do one click and get a customized set of image editing cases If you don’t have any experience with Lightroom presets.

Portra -400 is one of the best Lightroom presets for light and airy photo editing. You can purchase it from Mastin Lab. If you want to give a traditional film photography look to your images, then it’s the perfect filter for you. Yes, in Lightroom, presets are like filters.
Step 2: Increase The Exposure
If we move forward from the presets, it’s time to run our learning wheel. We will start with the one dynamically noticeable and universal issue for photos which is the brightness issue. Raw photos often lack color and also seem a little bit dark.
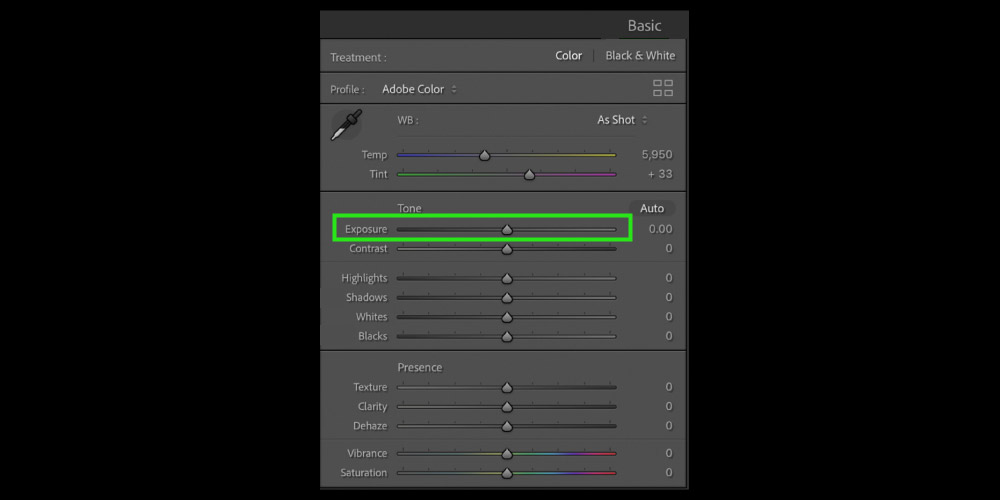
So the exposure settings are the tool that will save your image from the darkish vibe. In Lightroom, use the Exposure slider and fix the issue. You can increase or decrease the value of the exposure to see what looks best and when you find your low-exposure aesthetic keep it.
Step 3: Lower The Temperature
In photos, temperature basically decides how warm (reds, oranges, and yellows) or cool-tinted colors (blues, purples, and greens) your image will have. In the settings panel on the right side, you will see a slider called Temp under the WB settings.
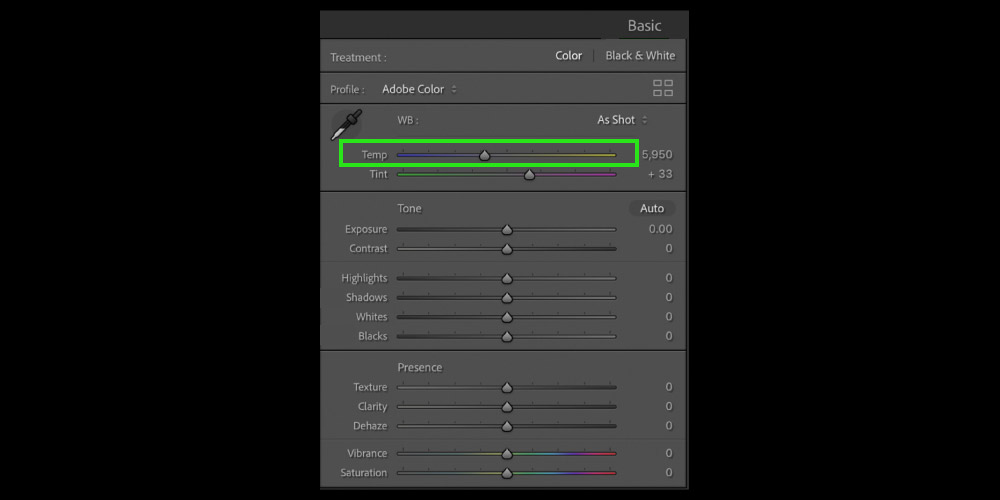
Change the slider to get either a warm or a cool tone to your image. It depends on the scene that you want to get in your image. So change it accordingly.
Step 4: Adjust The Contrast
In raw photos balancing the whites and blacks is very important. Adjusting contrast can be the solution where you can fix the saturation according to your requirements. One thing you must look out for when increasing the saturation is that the image doesn’t lose its detail.
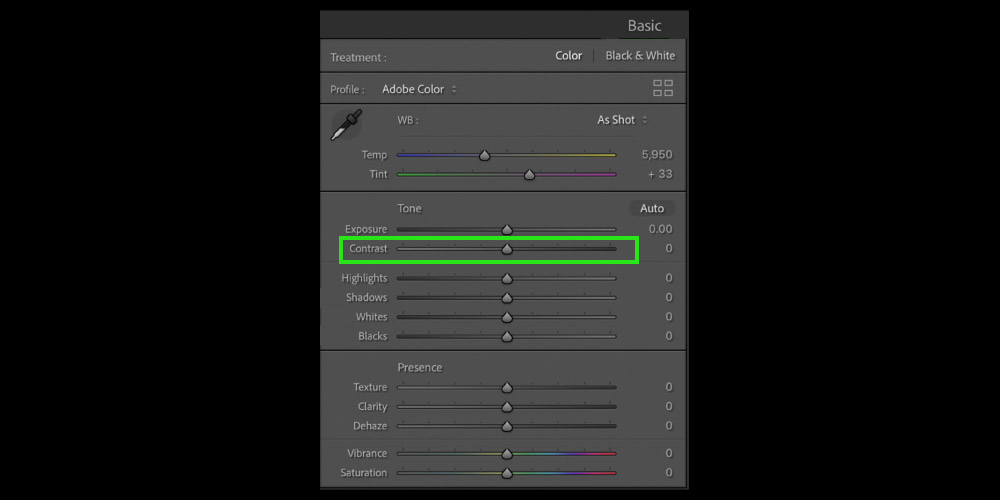
Pro Tip: Don’t overexpose your image while changing the contrast because you might get carried away by doing that. Yes, you can fix oversaturated photos, and you will find a great tutorial in our blog section on that, but it’s better to prevent it.
Step 5: Brighten Shadows
When you adjust the contrast, your images’ mid-tones and shadows increase, making the image look intense. But as we are making our image light and airy using the lightroom settings, we will increase the Shadows settings from the Tone Curve section to improve this.
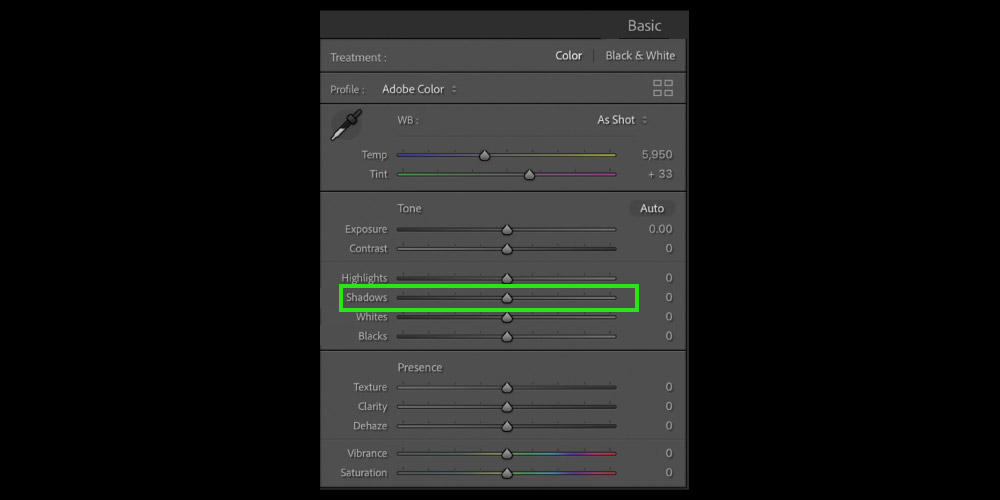
We will use the Shadow sliders from the settings panel. Apart from that, in this step, you can bring back the detail you might lose in the contrast step.
Step 6: Increase Clarity
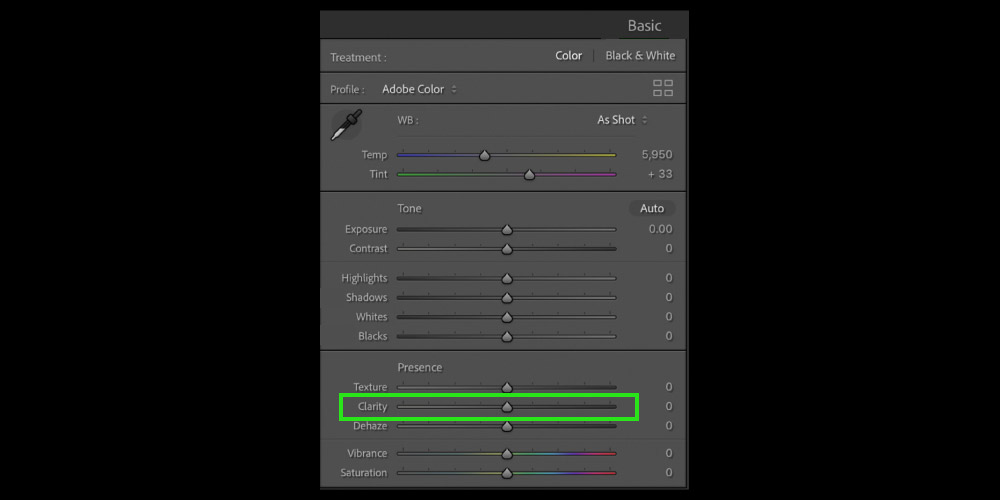
While you aim to make a light and airy photo, sometimes you get a smooth image in the final result. By increasing the clarity slider, you can bring back the sharpness of your image. On top of that, light and airy photos often attract noise and grain. The Clarity settings can reduce all of them just like magic. All you need to do is to change the slider.
Related Video:
Light and Airy Photography Mistake- Video source: Chelsea Nicole Photography
Bonus Steps
Well, after the previous step, you should have got your light and airy photo in Lightroom, which you can use for your essential purposes. But there’s more to it if you want to take it to the next level and make it perfect. So here it is…
Step 7: Desaturate Colors
In this step, we will explore the HSL section in Lightroom. In the HSL section, select the Saturation option; here, you will see a lot of sliders. But don’t get confused by them. Identify which color is more visible to your image and then desaturate them from sliders.
Based on the theme of your image, use the sliders wisely, and if you can do that, your image will become a masterpiece, if not less.
Step 8: Boost The Luminance
After desaturating from the saturation option, please select the option called Luminance which is right beside it. Try to play with the sliders in this section, and I suggest you increase them according to your image color tone. It will brighten up your images’ light and airy look. You can try decreasing it and see what happens as well. If you like it, then keep it.
FAQ:
How do I make a picture light and airy?
There are many ways to make a picture light and airy. One way is to use a light and airy color palette. Another way is to use light and airy textures.
How do you make something look hazy in Lightroom?
There are a few ways to make something look hazy in Lightroom:
- Use the Radial Filter tool to draw a circle around the area you want to haze. Then, go to the Effects panel and increase the clarity slider.
- Use the Adjustment Brush tool to paint over the area you want to haze. Then, go to the Effects panel and increase the clarity slider.
- Use the Graduated Filter tool to draw a gradient over the area you want to haze. Then, go to the Effects panel and increase the clarity slider.
How do I edit light photos in Lightroom?
To edit light photos in Lightroom, use the adjustment brush tool to paint light onto your photo. Select the area you want to lighten and then increase the exposure. You can also use the dodge tool to lighten specific areas.
How do I get sparkle effects in Lightroom?
First, select the image you want to edit in Lightroom. Next, go to the Effects panel and click on the Sparkle icon. This will open a new window with a variety of sparkle effects to choose from. Finally, select the sparkle effect you want to apply to your image and click OK.
Wrapping Up With The Result
With the bonus steps, you can make light and airy photos if you follow and practice enough. This article will teach you how to get light and airy photos in Lightroom post-processing. But there are a couple of dos and don’ts that you should know before even shooting such scenes. It will make your bright and airy photography and post-processing easier than you can think. So when you get your desired look, please save the file and use it wherever you want.


