How To Fix An Overexposed Photo In Photoshop?
Overexposed photos are a curse for photographers and their hard work because it is tough to find out this issue until you look at them on a big screen. Before going into today’s tutorial about how to fix an overexposed photo in photoshop, we need to understand the issue.
Table of Contents
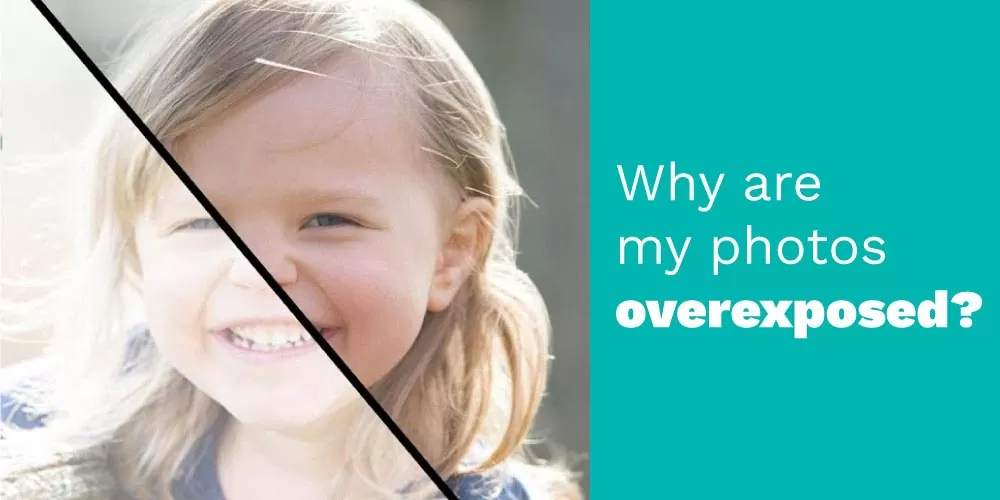
Why are my photos overexposed?
Overexposed photographs occur for a variety of causes. The first and familiar reason that can cause your photos to be overexposed is too much light hitting the camera’s sensor. Apart from that, another common reason is a low-quality lens or camera sensor. Sometimes it happens if you use too much zoom or not enough light.
The Problem of Overexposure
The problem of photos being overexposed is a genuine problem not only for beginner photographers but also for professional ones. Photographers put their heart and soul into their photography sessions to capture the best shot. But due to overexposure problems, images get burned down. Sometimes photographers shoot all day, and then when they complete their shooting and transfer the files for post-processing, they find out the photos are overexposed. It hurts when you find that all your hard work goes in vain.
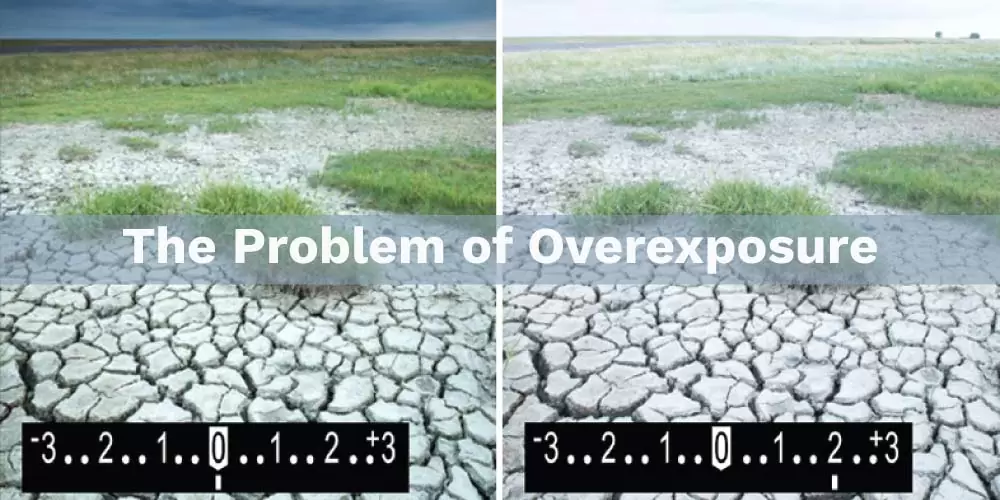
On top of that, sometimes overexposure issues go so far that it gets tricky for photoshop experts to fix overexposed photos in photoshop.
What is the difference between overexposure and underexposure?
As the names of these two terms, they describe exactly the opposite situations for images. Where overexposure gives us images with excessive light and scorches them, on the other hand, underexposure is images that didn’t catch enough light in them. You cannot see your subject in underexposure situations as the image comes out too dark. Sometimes a few underexposed photos might be a perfect shot for you as it deepens the colors and saturates them. But the problem occurs when it gets too dark.
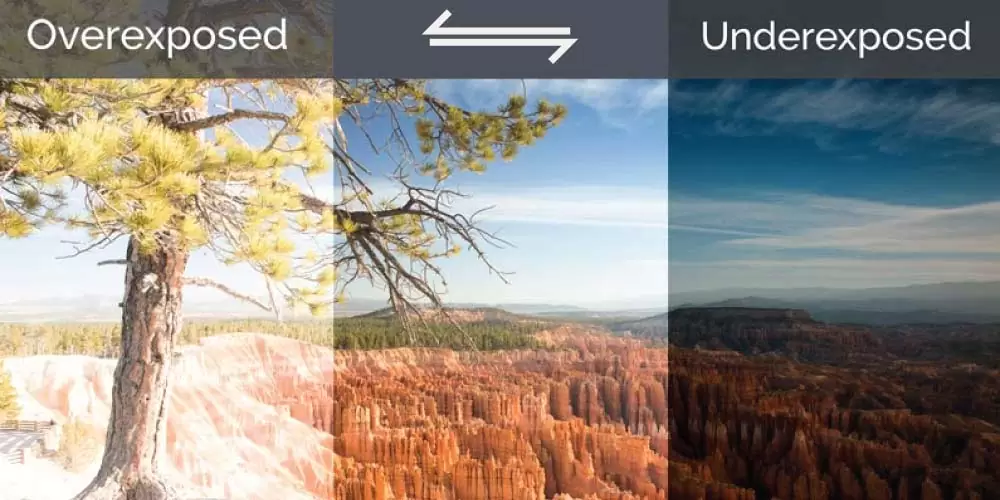
The same goes for the overexposed photos—many of us like bright and punchy colors in our photos, calling them social media-ready images. But when you have a perfect click after many tries but are overexposed, it isn’t very comforting. So now, if you are thinking about how to fix overexposed photos in photoshop, then your answer is right here.
Below we have demonstrated the most straightforward solution that everyone can follow to fix their overexposed photos in photoshop.
How to Fix Overexposed Photos in Photoshop?
The time that we have all been waiting for is here. This segment will learn how we can quickly fix our blown-out images in photoshop. We will learn the three most easy and professional ways to improve our problem. So let’s get started.
Use a Radial Filter to Fix Overexposed Photos
If you are looking for a solution that will allow you to work and fix only the overexposed area, then this is it. As we will be fixing our perfect shots, the fear of modifying the entire image and ruining it is not what we want.
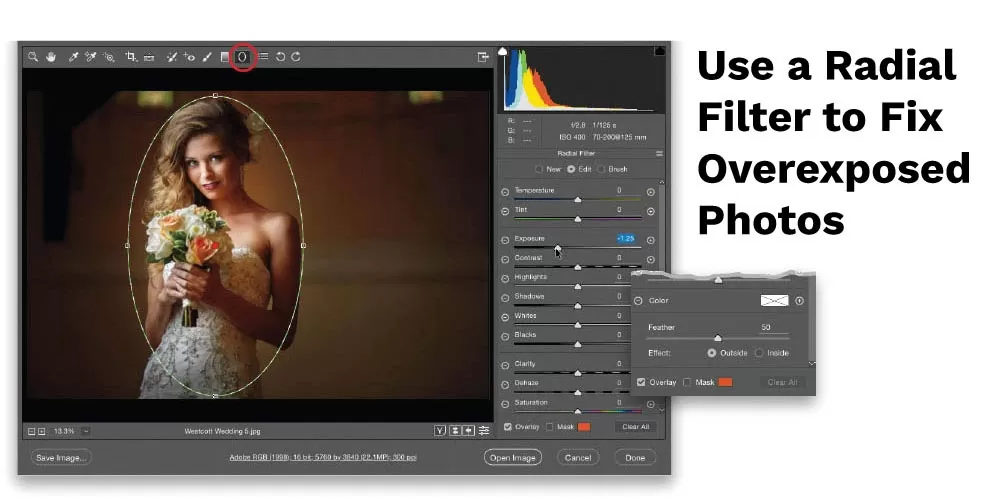
With the radial filter method, we can modify only the overexposed areas and fix them. Follow the steps and witness the magic.
Step 1: Insert your photo into the photoshop dashboard or artboard, whatever you call it. Drag your image and drop it on it to insert.
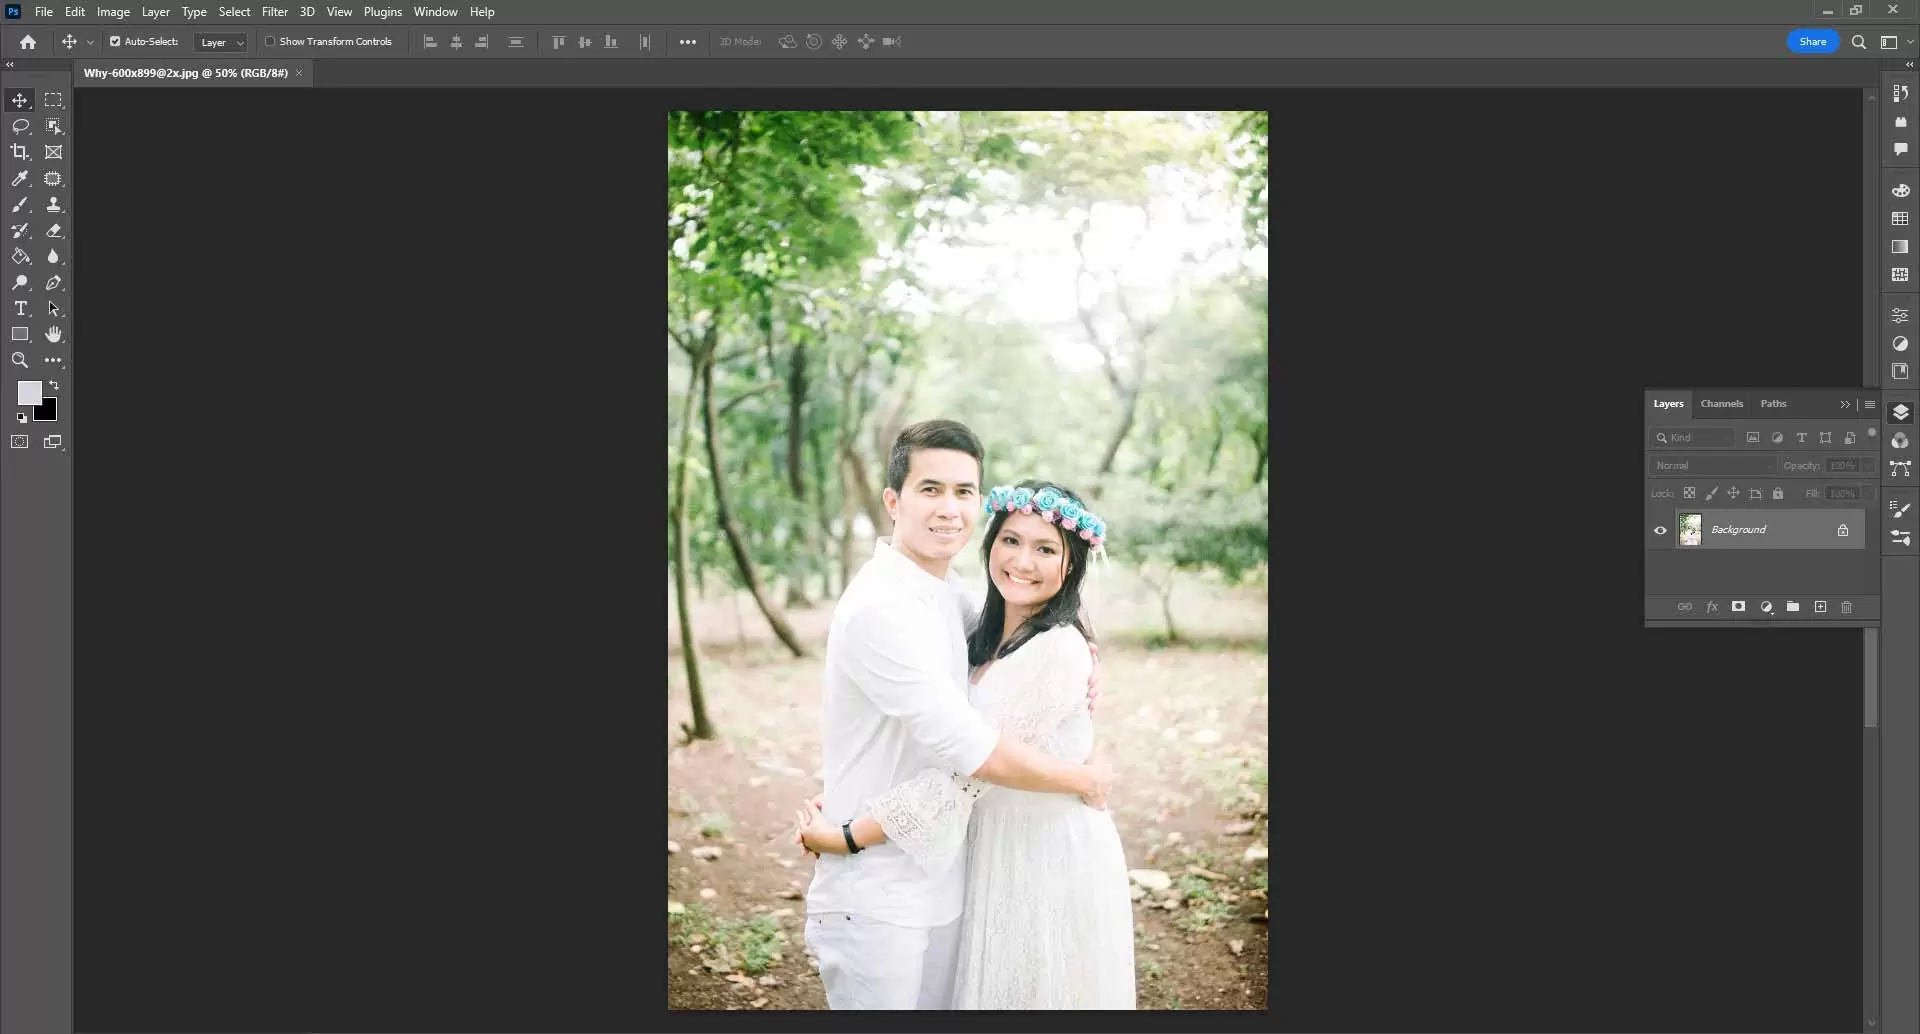
Step 2: Go to the Filter menu and select Camera Raw Filter.
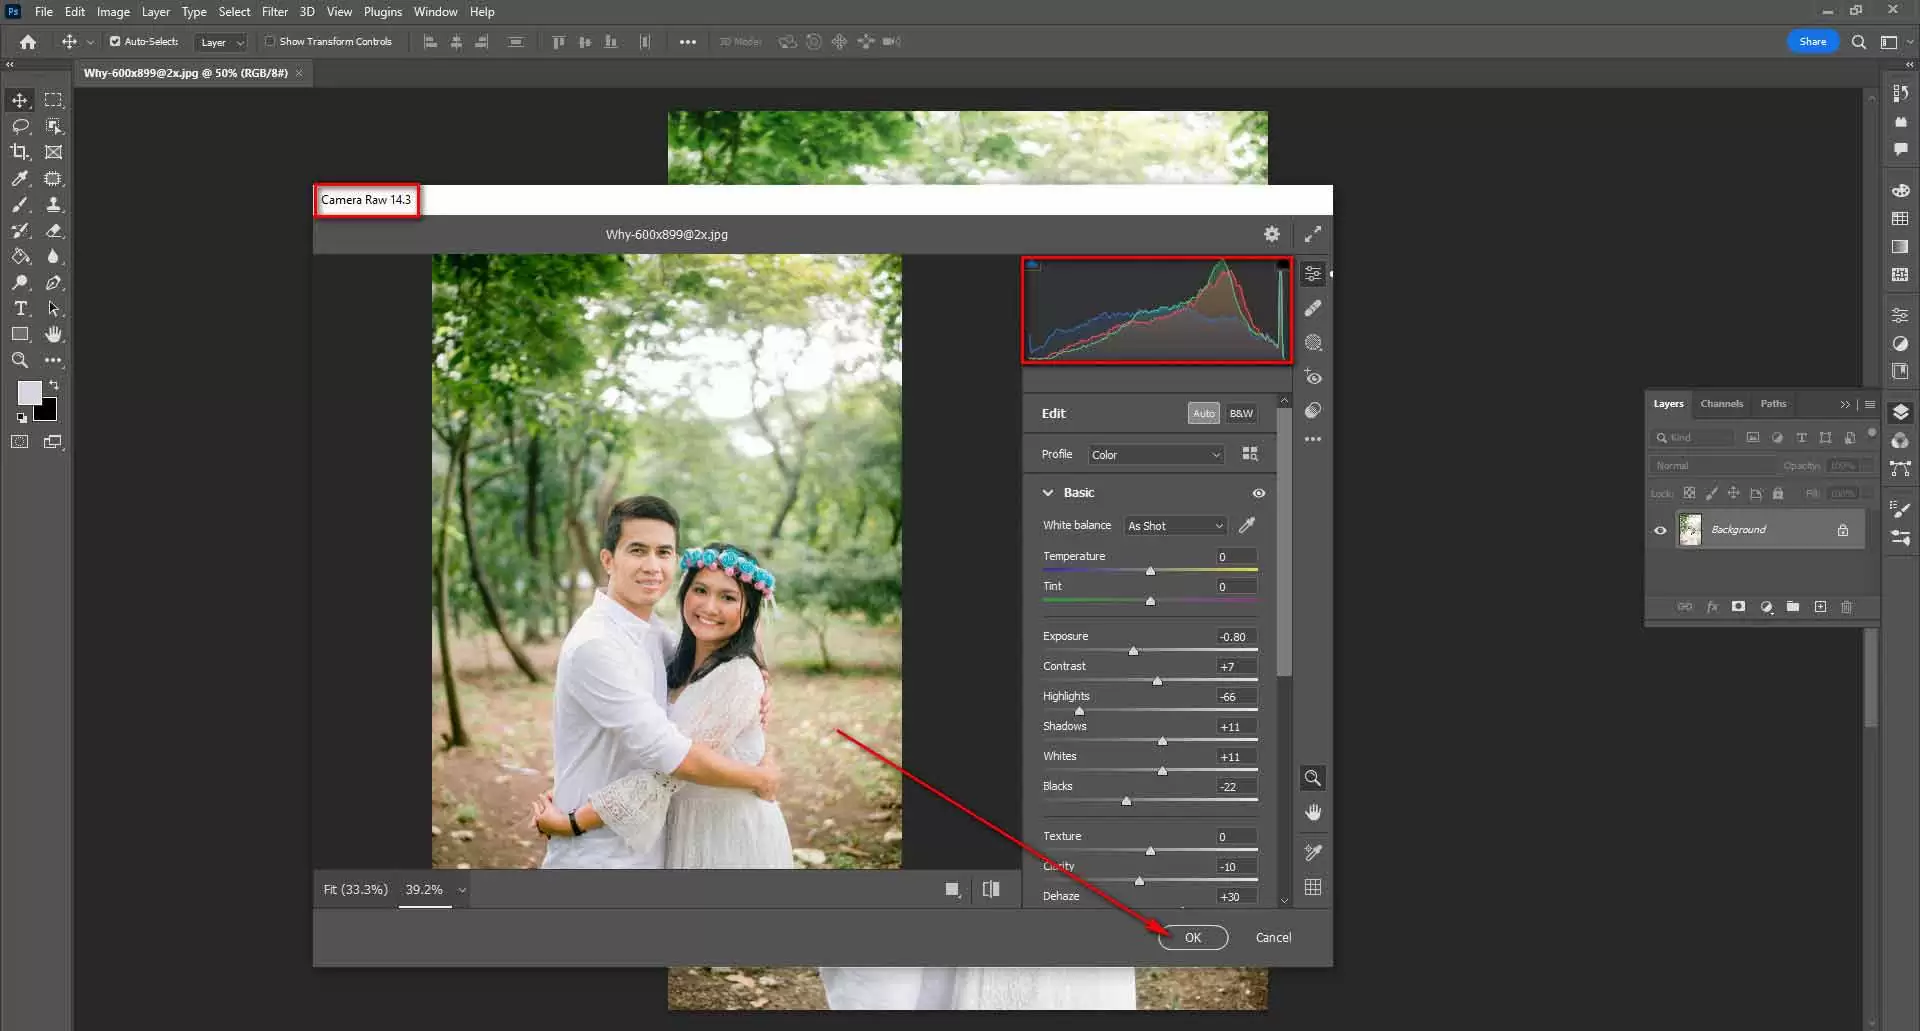
Step 3: Select the Radial Filter option. You will find the icon right above the image.
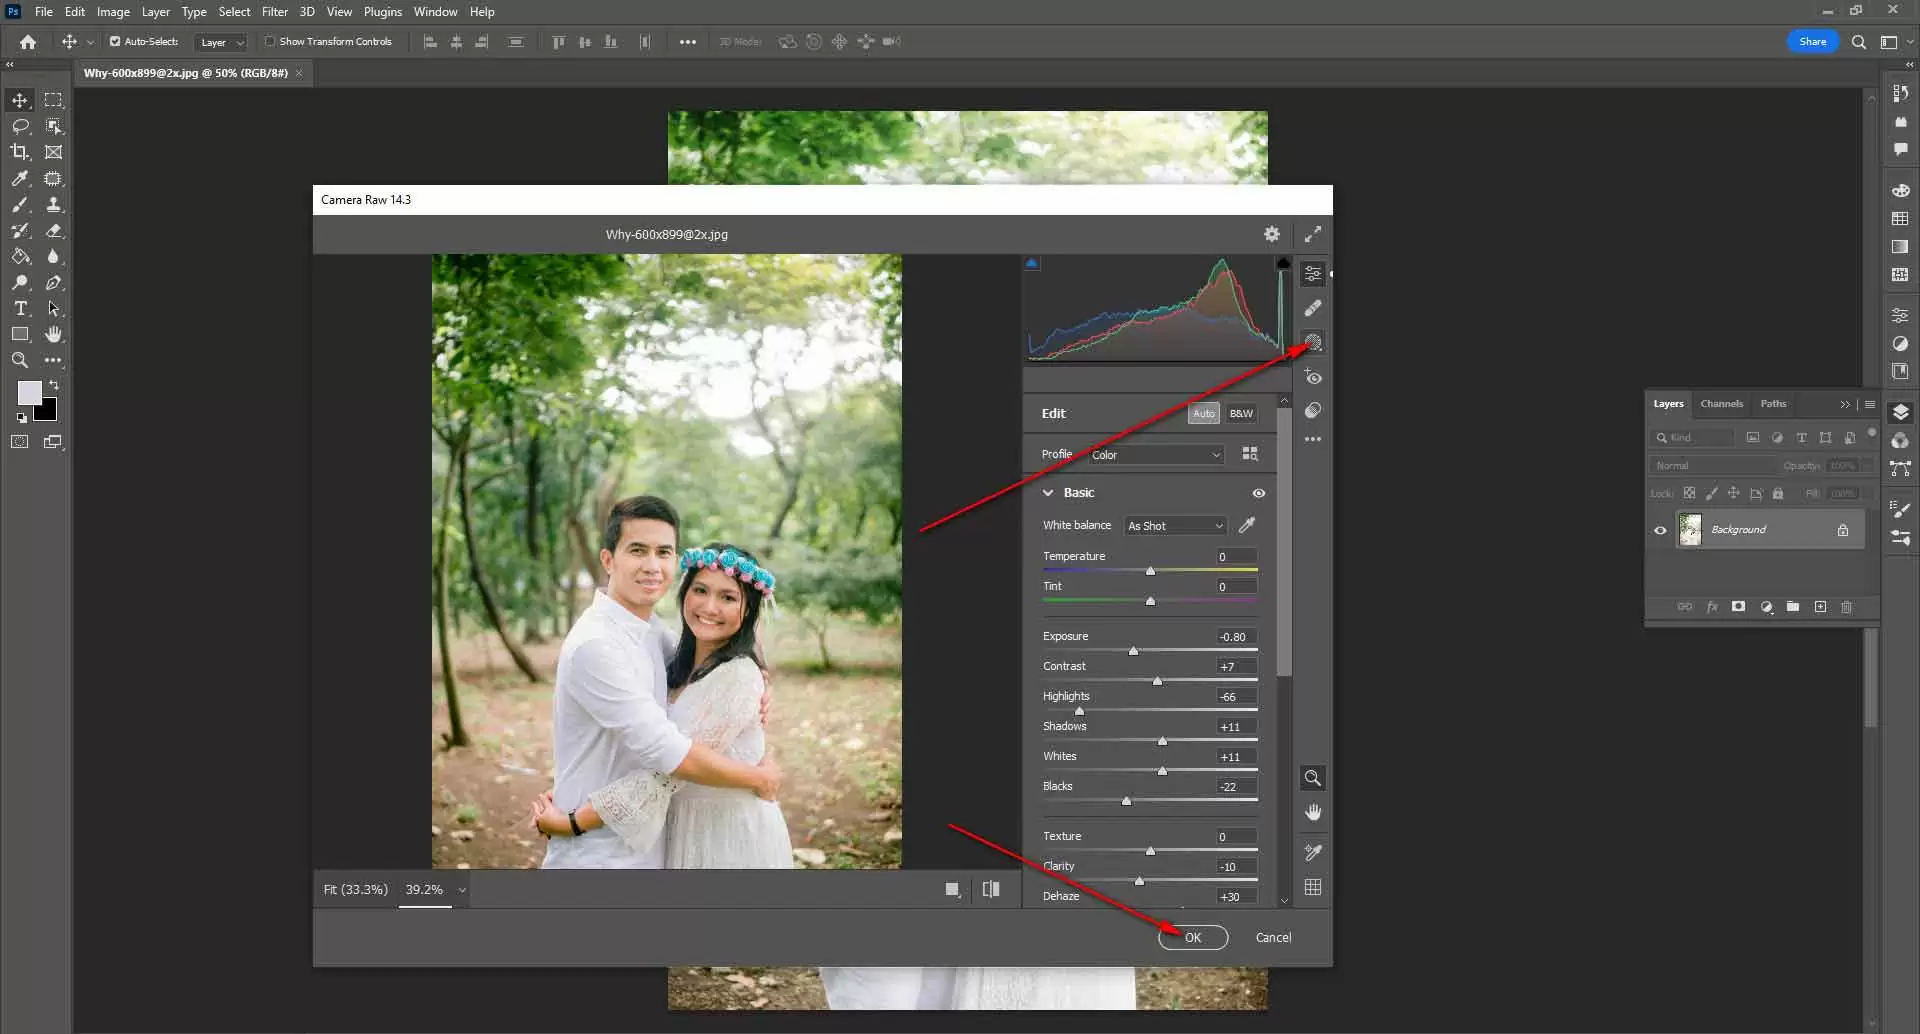
Step 4: With the preceding step completed, we are now ready to choose the region to be repaired. So in this step, select the overexposed area by dragging over the place using the cursor.
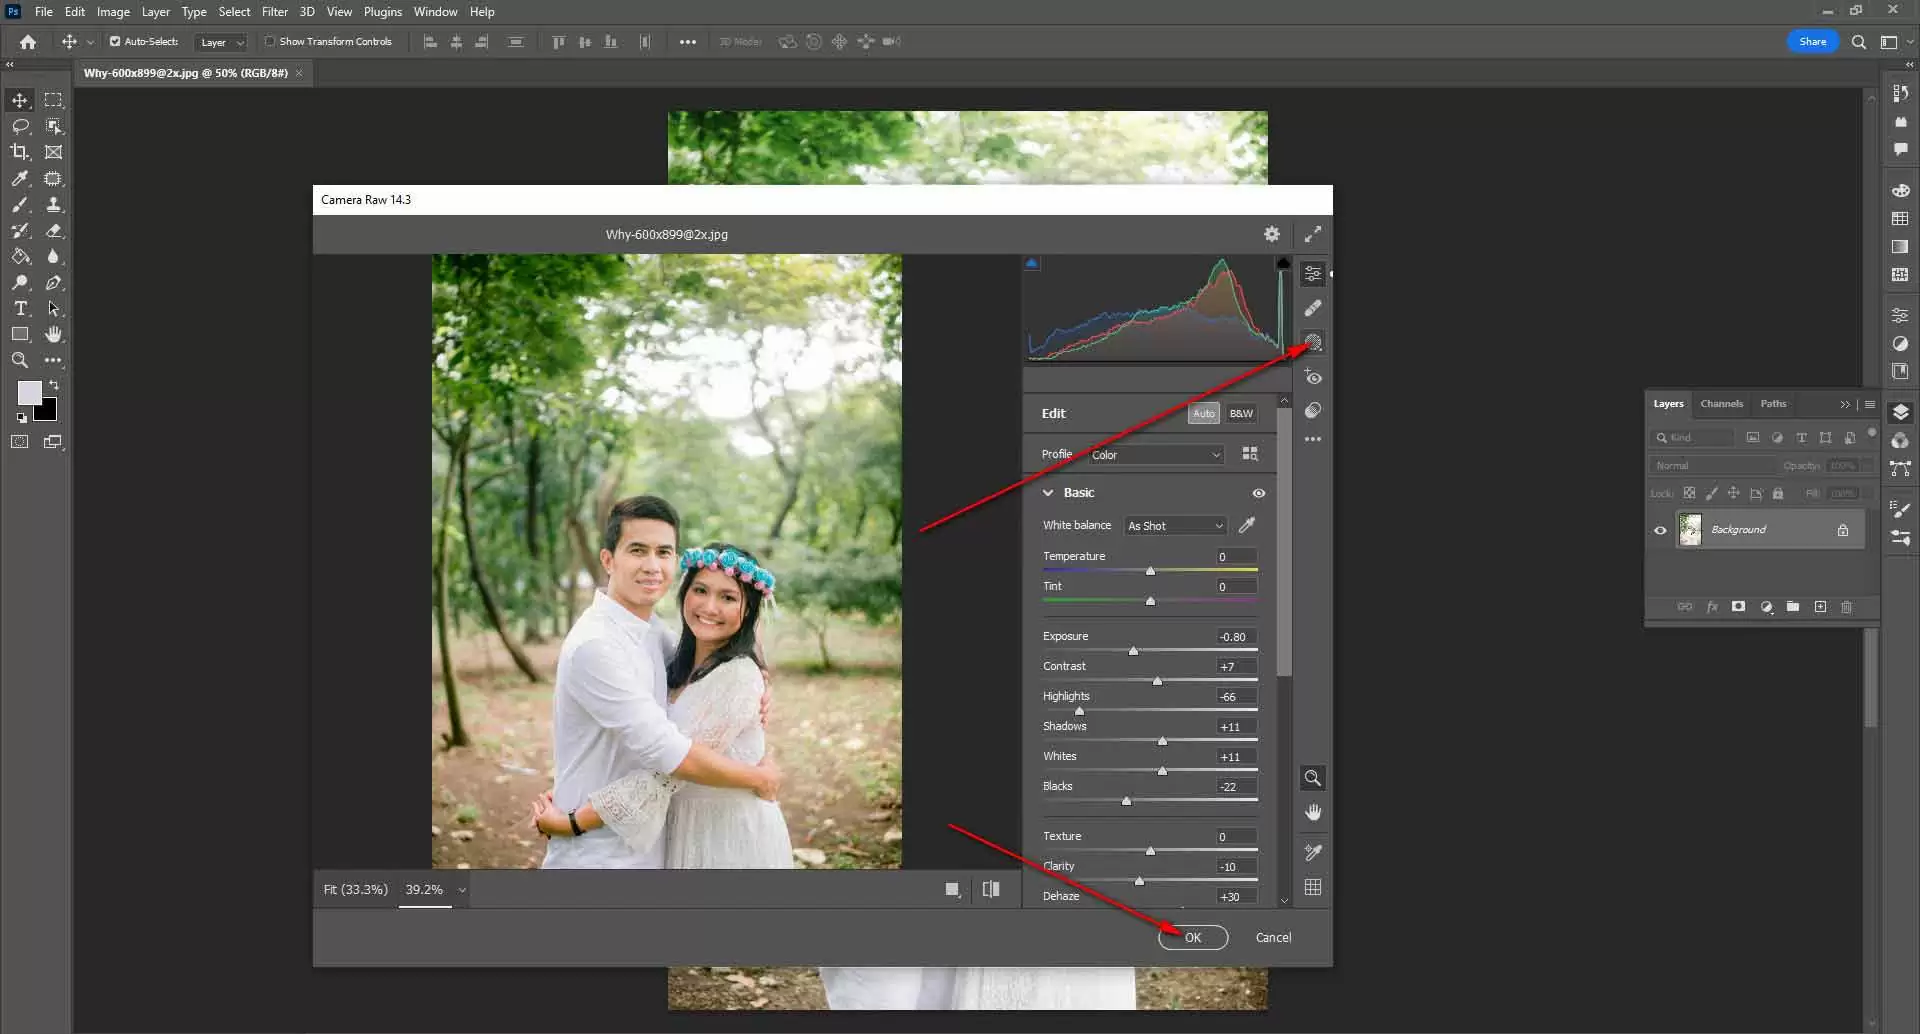
Step 5: We will ensure that whatever changes we are doing stay inside our selected area. To accomplish this, navigate to the left panel and select the inner effect button.
Step 6: Now go to the top menu bar and click on the Image menu. Select the Adjustment option from the drop-down menu, followed by the Exposure option. Play with the setting and lower the Exposure as you need.
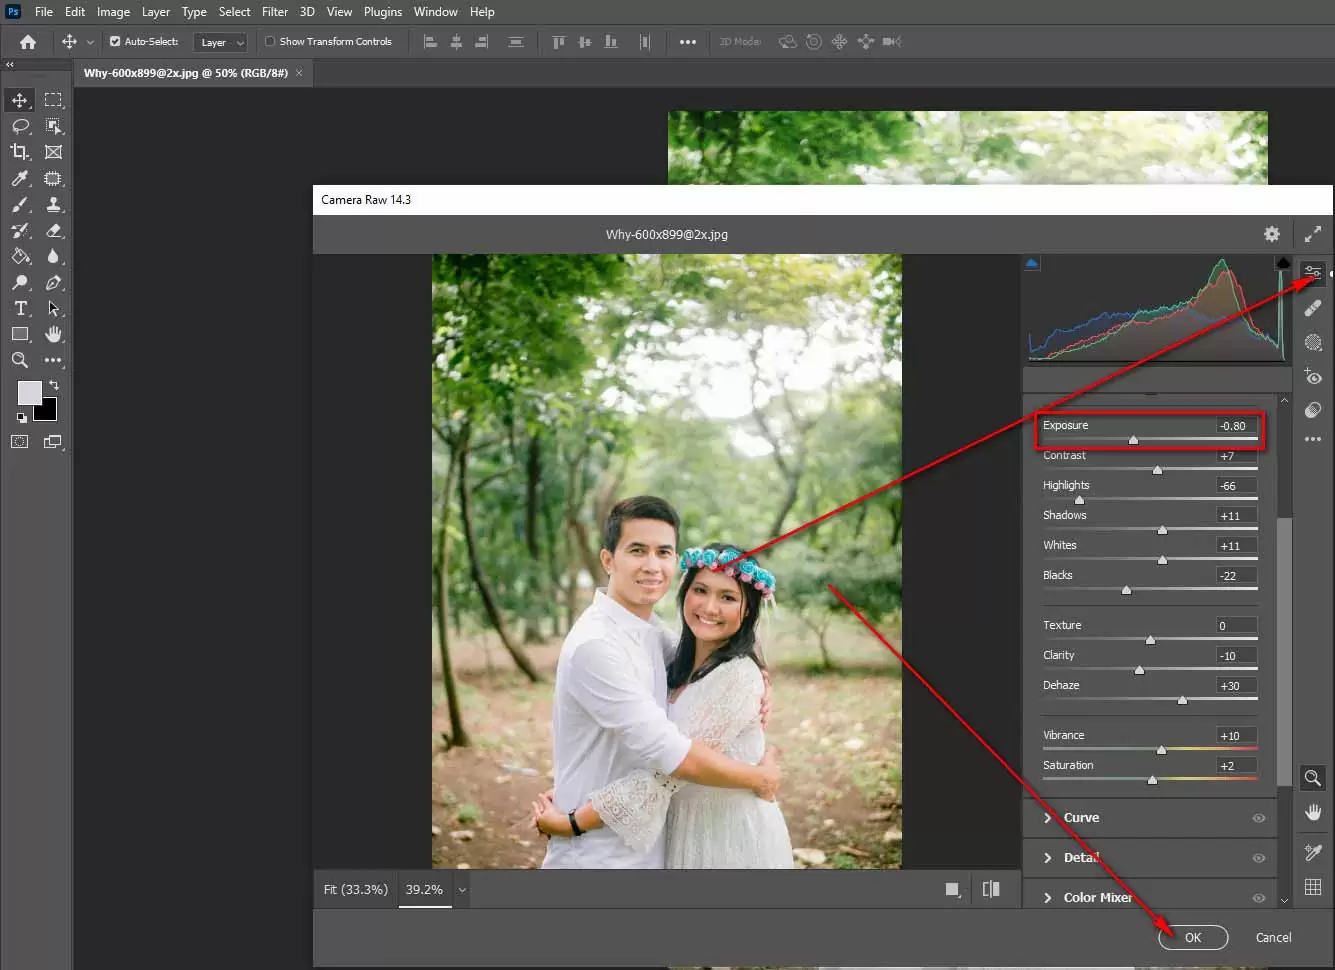
Step 7: Play with the highlight settings as well. Increasing it can work for this tutorial. See what works for you.
Step 8: After changing the exposure and highlight settings, the over-exposure area should look good and improve from the original one. If you are not satisfied, you can work on the Whites, Blacks, and Shadows to look for the perfect one.
With this, our first method is complete and now, without delay, let’s go to the next one.
Use Highlight Adjustment to Fix Overexposed Photos
The use of highlight adjustment to fix overexposed photos is the standard method for this issue. Even most photoshop experts tend to do it right at first in their regular professional image editing tasks. Follow the steps below.
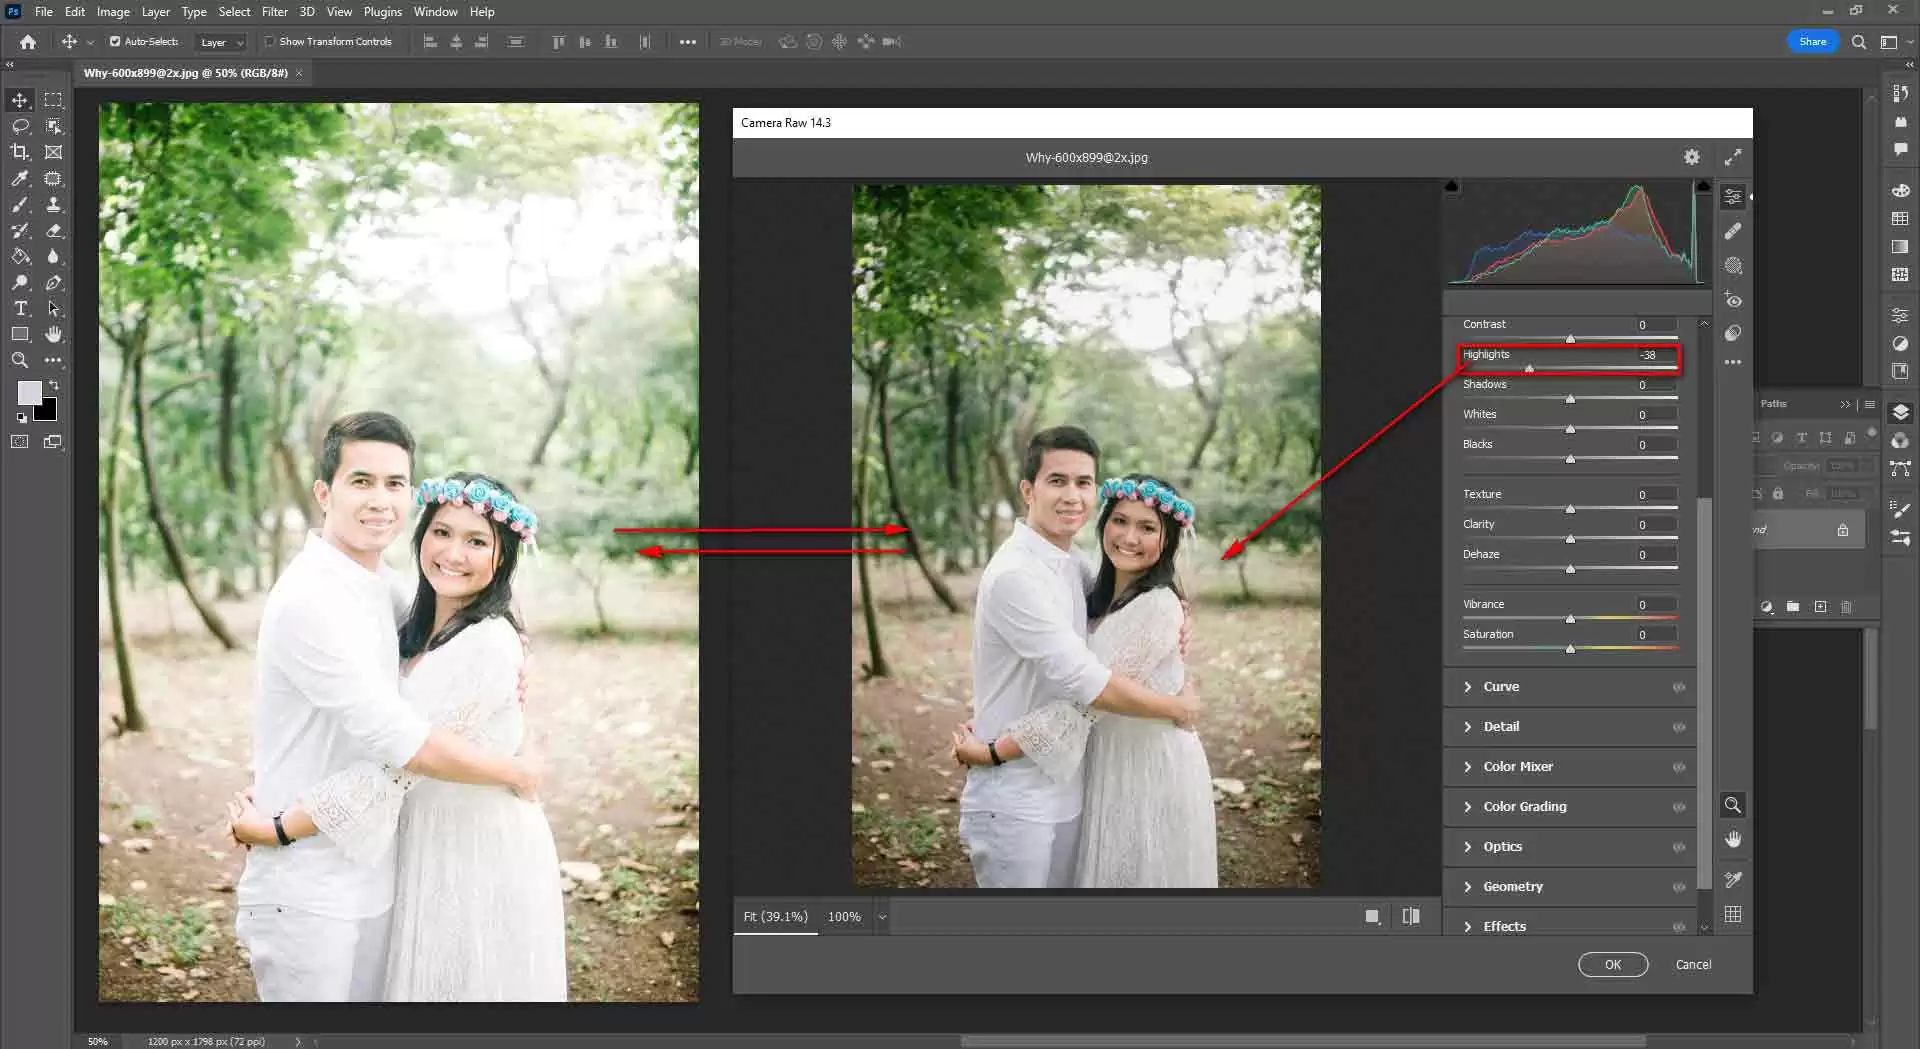
Step 1: Like the previous method, we will start with inserting the image that we want to fix. Navigate to the menu bar and select the File menu. Select the Insert option, then the picture you want to insert. Alternatively, you may just drag and drop the image into Photoshop.
Step 2: You can skip this step if you like, but I recommend that you do. Navigate to the Filter menu and choose it.. Select the Smart Filter option to create the image into an intelligent image and enable us to re-edit it in the future if needed.
Step 3: Go to the Image menu from the top and select the Adjustment option. Select the Shadows/Highlights option from the adjustment submenu.
Step 4: You’ll see a dialog box with sliders for shadows and highlights. To fix the overexposed image, the first thing we will do is increase the highlight a bit. Experiment with different settings to determine what works best for your image.
Step 5: If the dark areas look dark, reduce the shadow slider and set it where you want it.
With this step, we should be able to fix our overexposed image and get our perfectly captured photo back using the Highlight Adjustment settings.
Use Adjustment Layers to Fix Overexposed Photos
So we have come to our final method to fix an overexposed photo in photoshop. We will use the Adjustment Layer settings to bring back our image in this method.
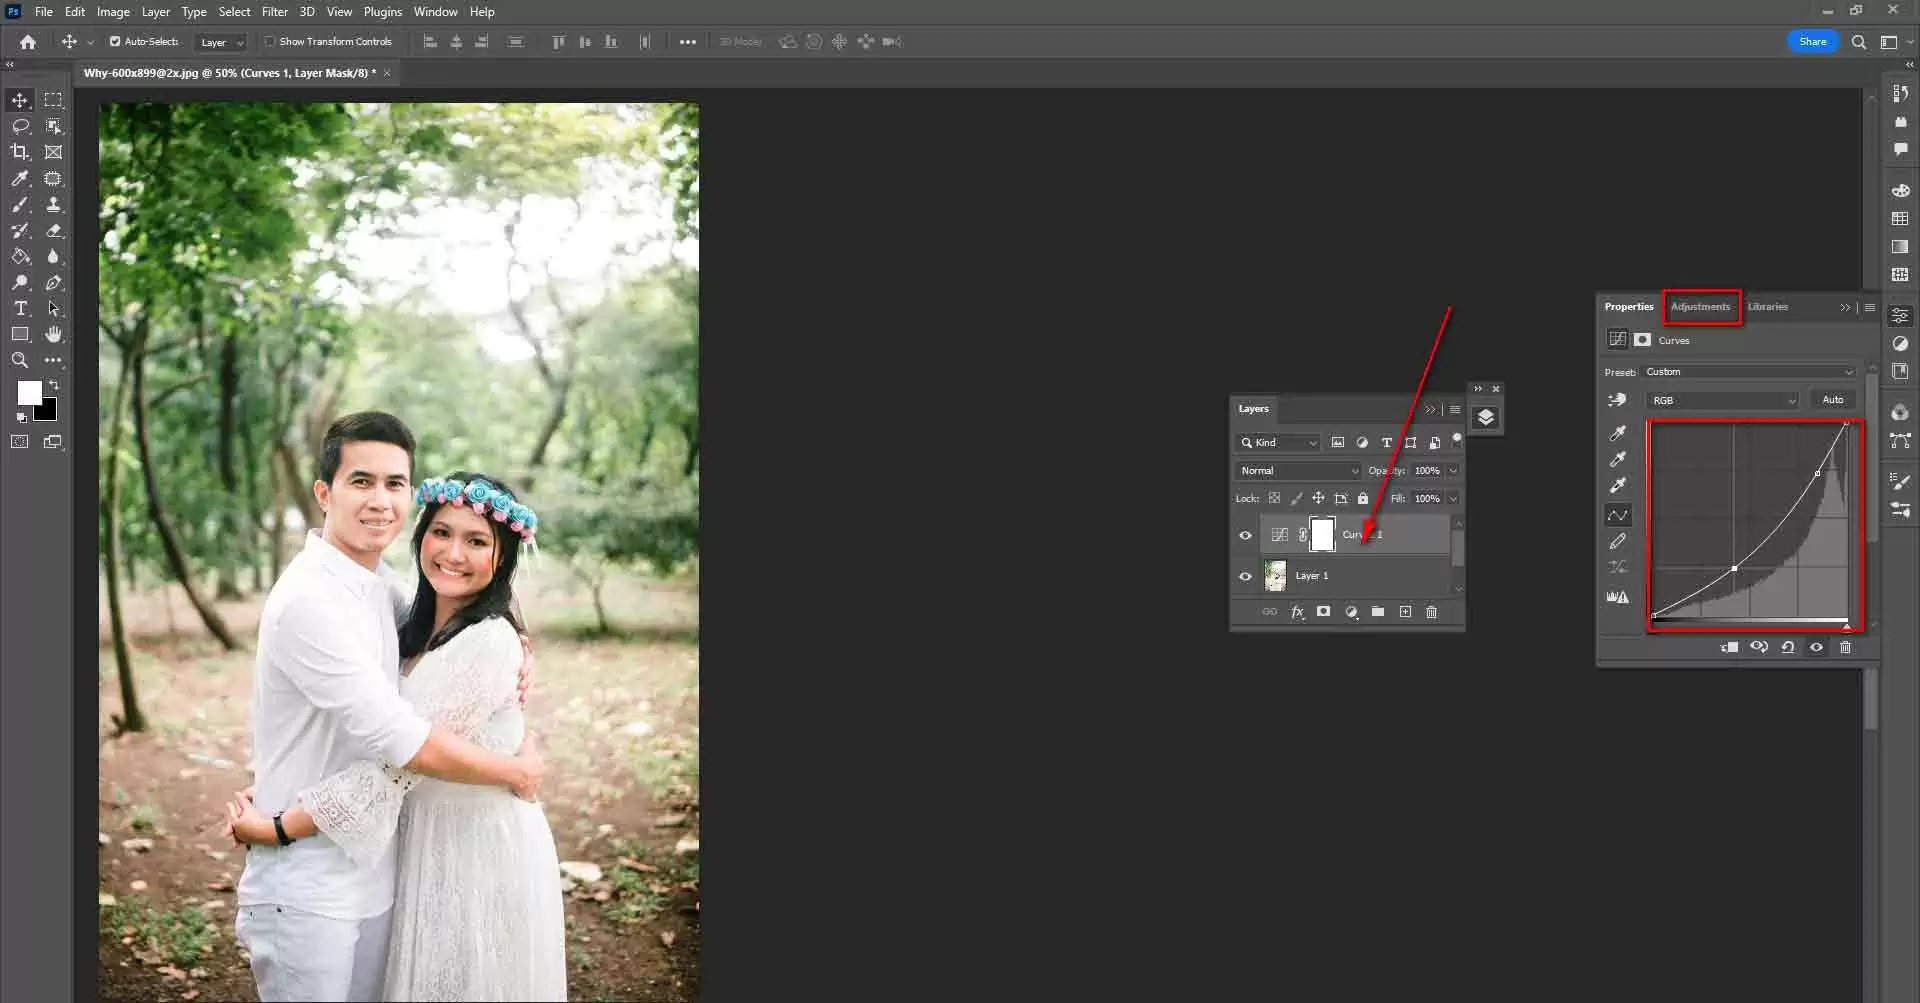
Because we will be adding Curves, Levels, Exposure, and Brightness/ Contrast adjustment layers to our image, this is one of the simplest approaches to solve our problem. It enables us to work separately on the elements in our photo. So let us see the steps of this method go like this,
Step 1: Like the previous two methods, we will start with inserting our image. Follow step 1 of the previous method to do that.
Step 2: For this method, we will work on a duplicate layer instead of the original layer to avoid any mistakes. Click on the Original layer to select it, and then CTRL + J on a window, and on a Mac, press CMD + J to create a duplicate layer.
Step 3: Click on the New Adjustment Layer button below the Layer Panel. Select the Exposure option from there and play with it until you see a slightly improved version of your image from the original one.
Step 4: Again, click on the same button and now select Brightness/Control from the sub-menu. After changing the Exposure, if you feel that your image looks dark, this option will fix it. Play with sliders and find the best fit again.
Step 5: Now select the Curves option in the same sub-menu. Try changing it a bit but don’t make any drastic changes with the curve. I suggest you reduce from the level you get at first and try around it until you are satisfied.
Step 6: As we have worked with many adjustment layer settings, we will create a group with all the different layers to keep them in one. To create a Group with the Layers, hold CTRL/CMD select them, and hit the G button on the keyboard.
With this, we are done with our editing. You can click on the eye icon right beside the grouped layer to see the previous version and the latest one. Now save the image however you like.
At The End
I hope this was a fun photoshop tutorial for all of us, and we learned how to fix an overexposed photo in photoshop. And I also hope that after reading this article, you can save your precious images from being ruined just because of some excessive light or your bad luck.


