How to Make a Fire Effect in Photoshop
Do you have any idea regarding the fire effect in Photoshop? By using Adobe Photoshop premier pro easily you can add any fire effect to any text or image. So guys if you want to add a touch of fire to your text Photoshop is a great space to go. In this article, we will tell you a step-by-step guide on how to make a fire effect in Photoshop.
Table of Contents
Let me describe to you the steps:
- Open Adobe Photoshop:
At first set the background color to black and the foreground color to orange.
-
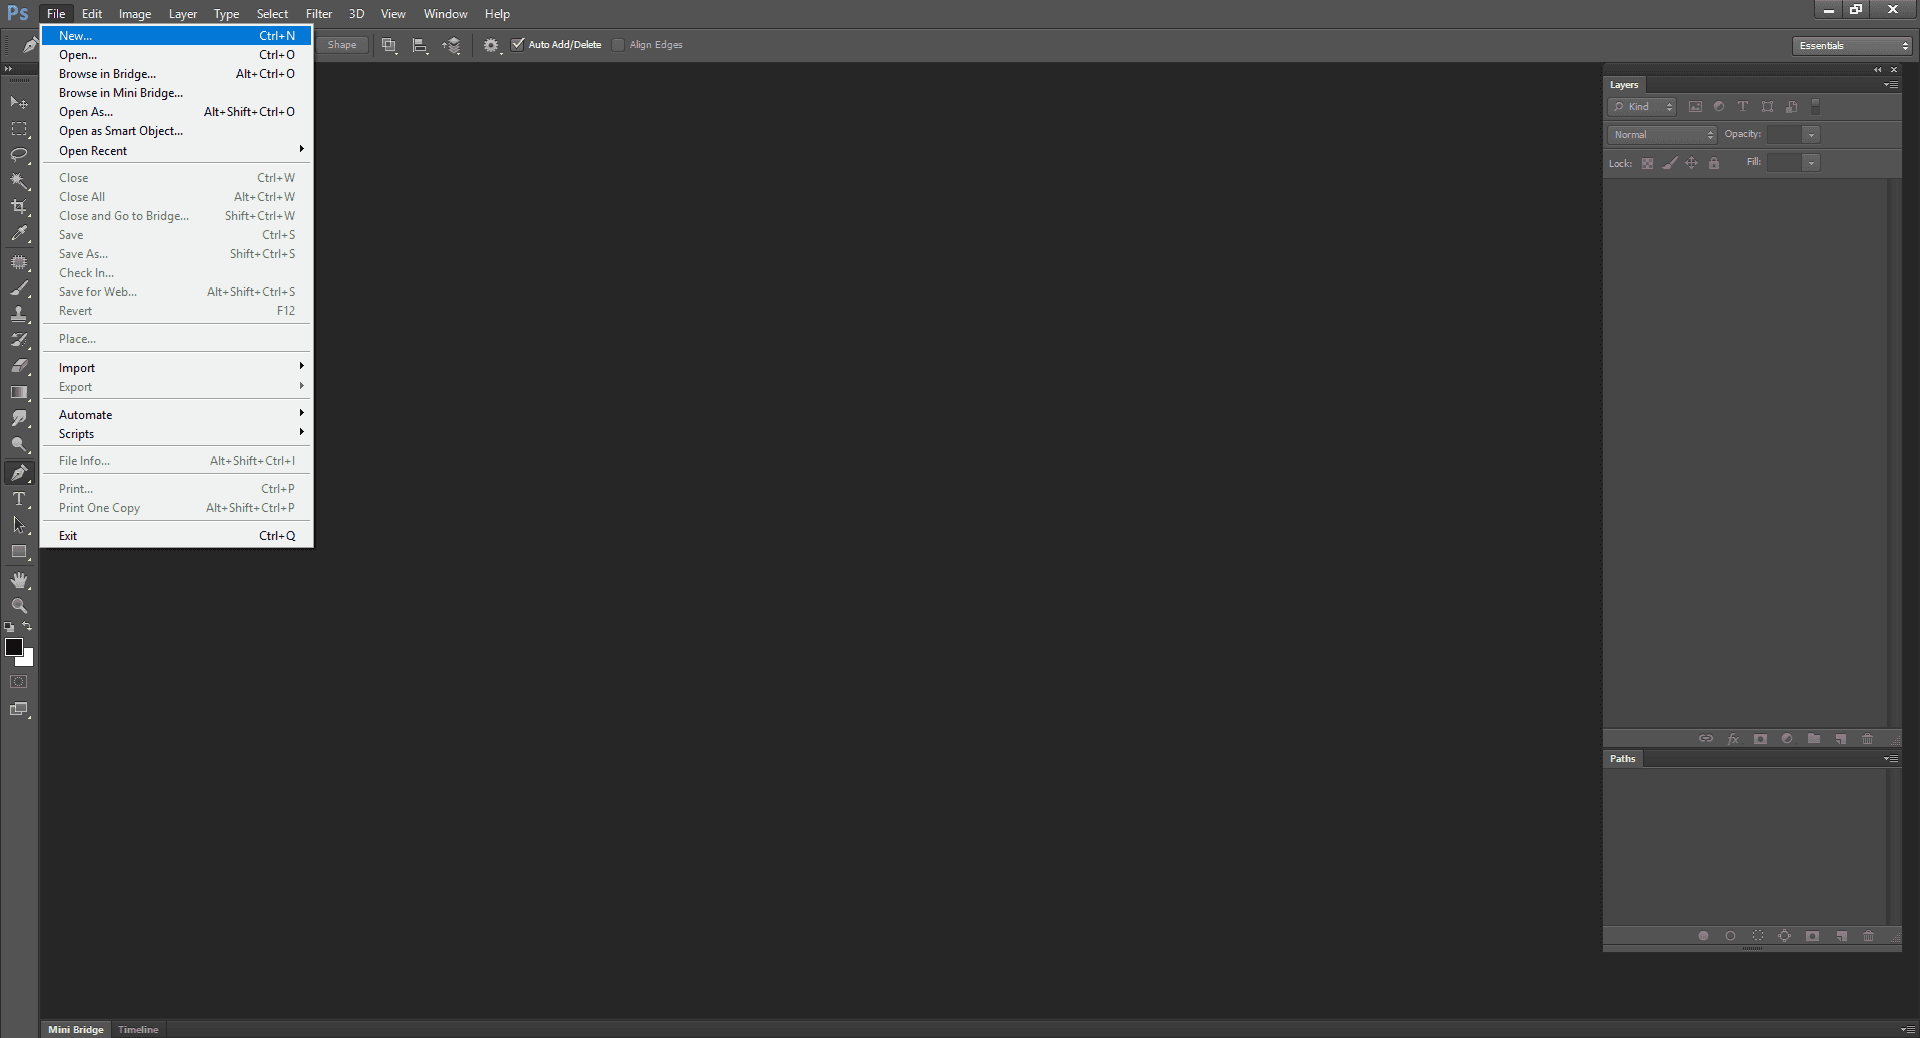
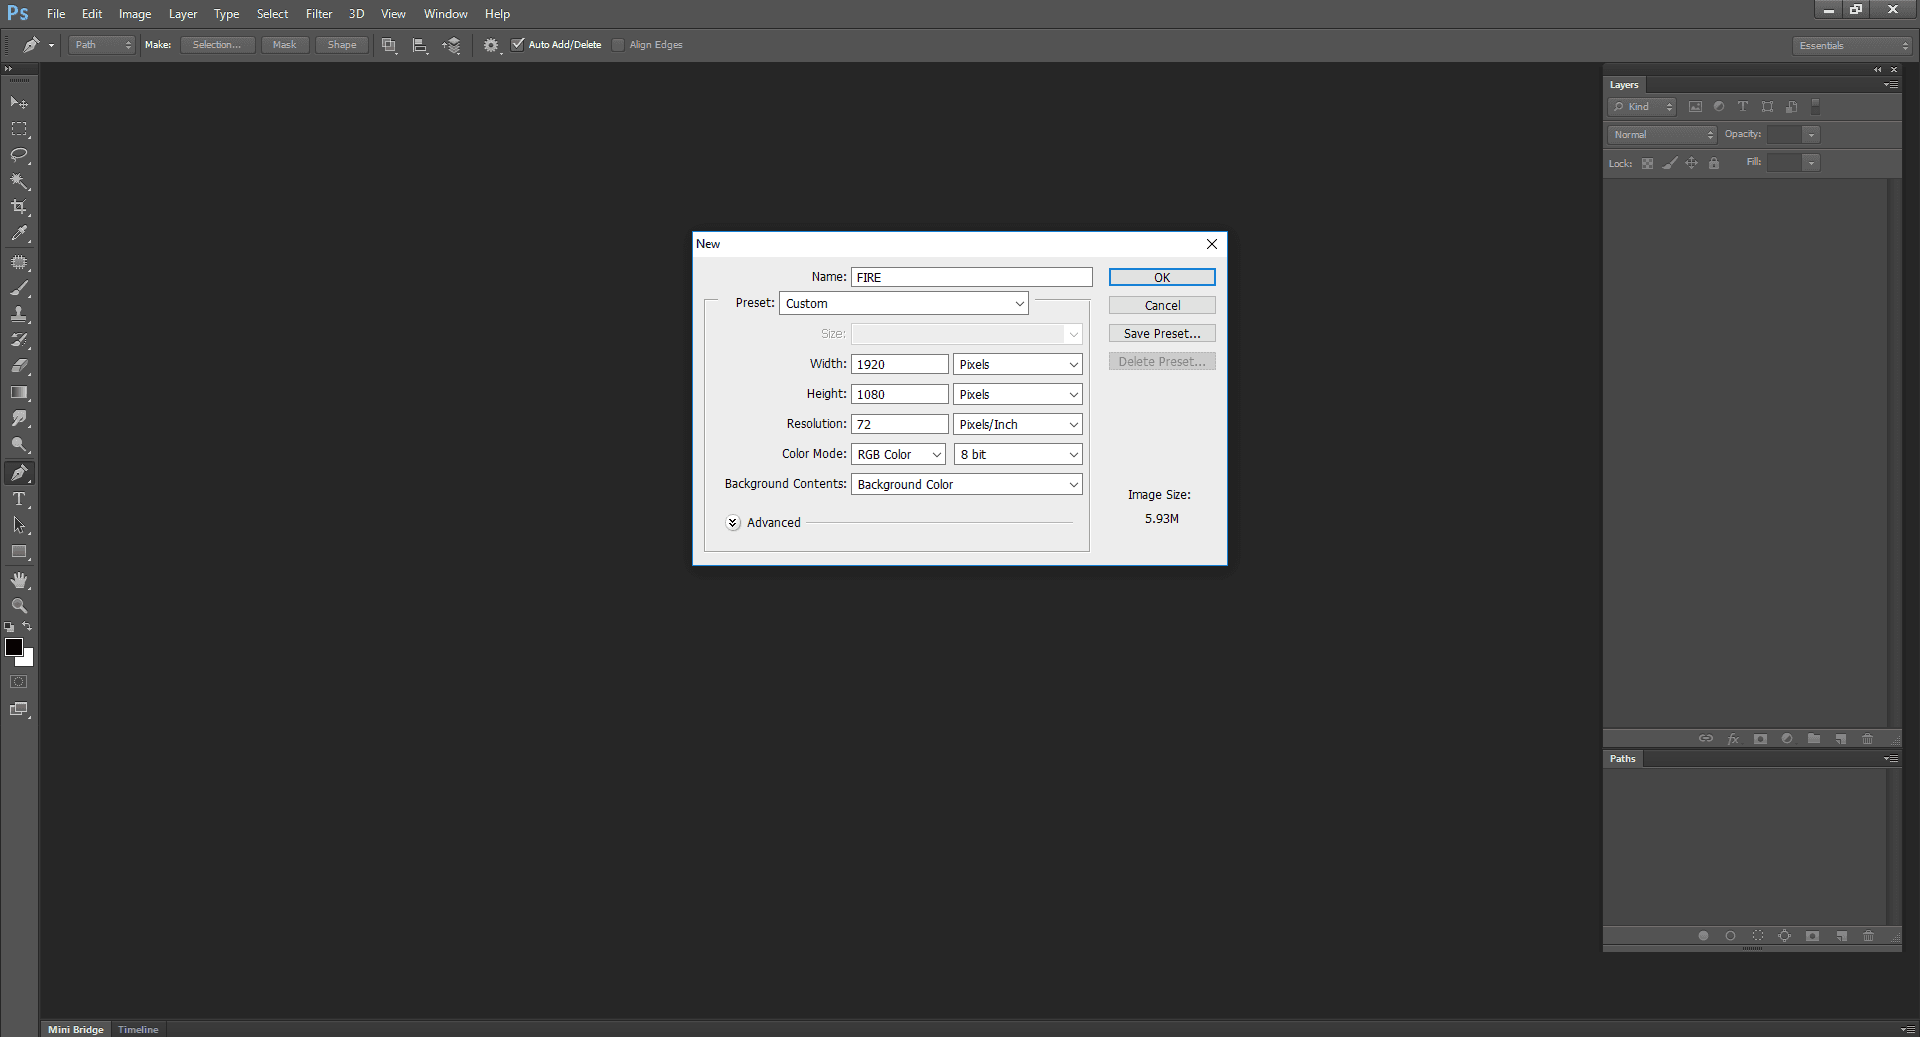
Create a new document
Set it whatever size as you wish and in the background, contents select a color and then click ok.
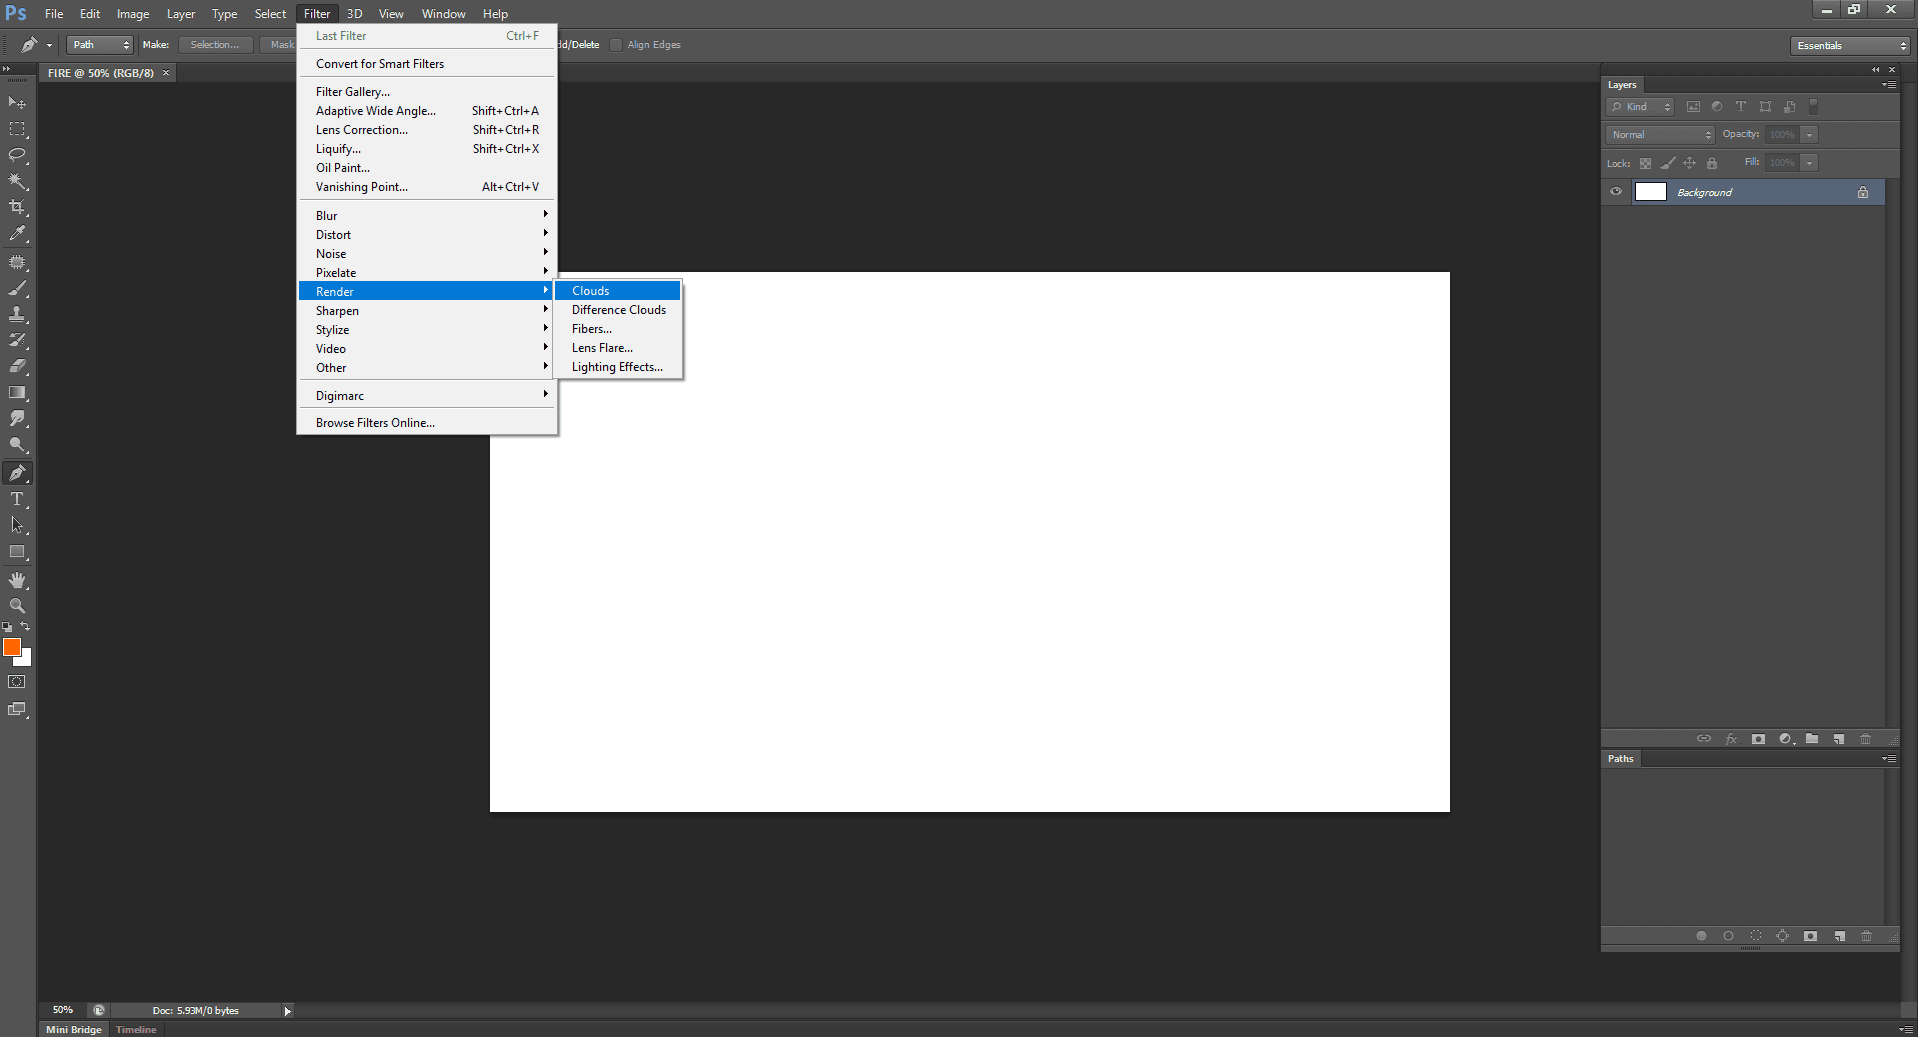
- Render cloud:
From the filter menu select -> Render -> clouds
-
It’s time to save your fire
Now the filter will render the Gaussian cloud with the help of foreground and background color. Different colors will create an interesting effect.
-
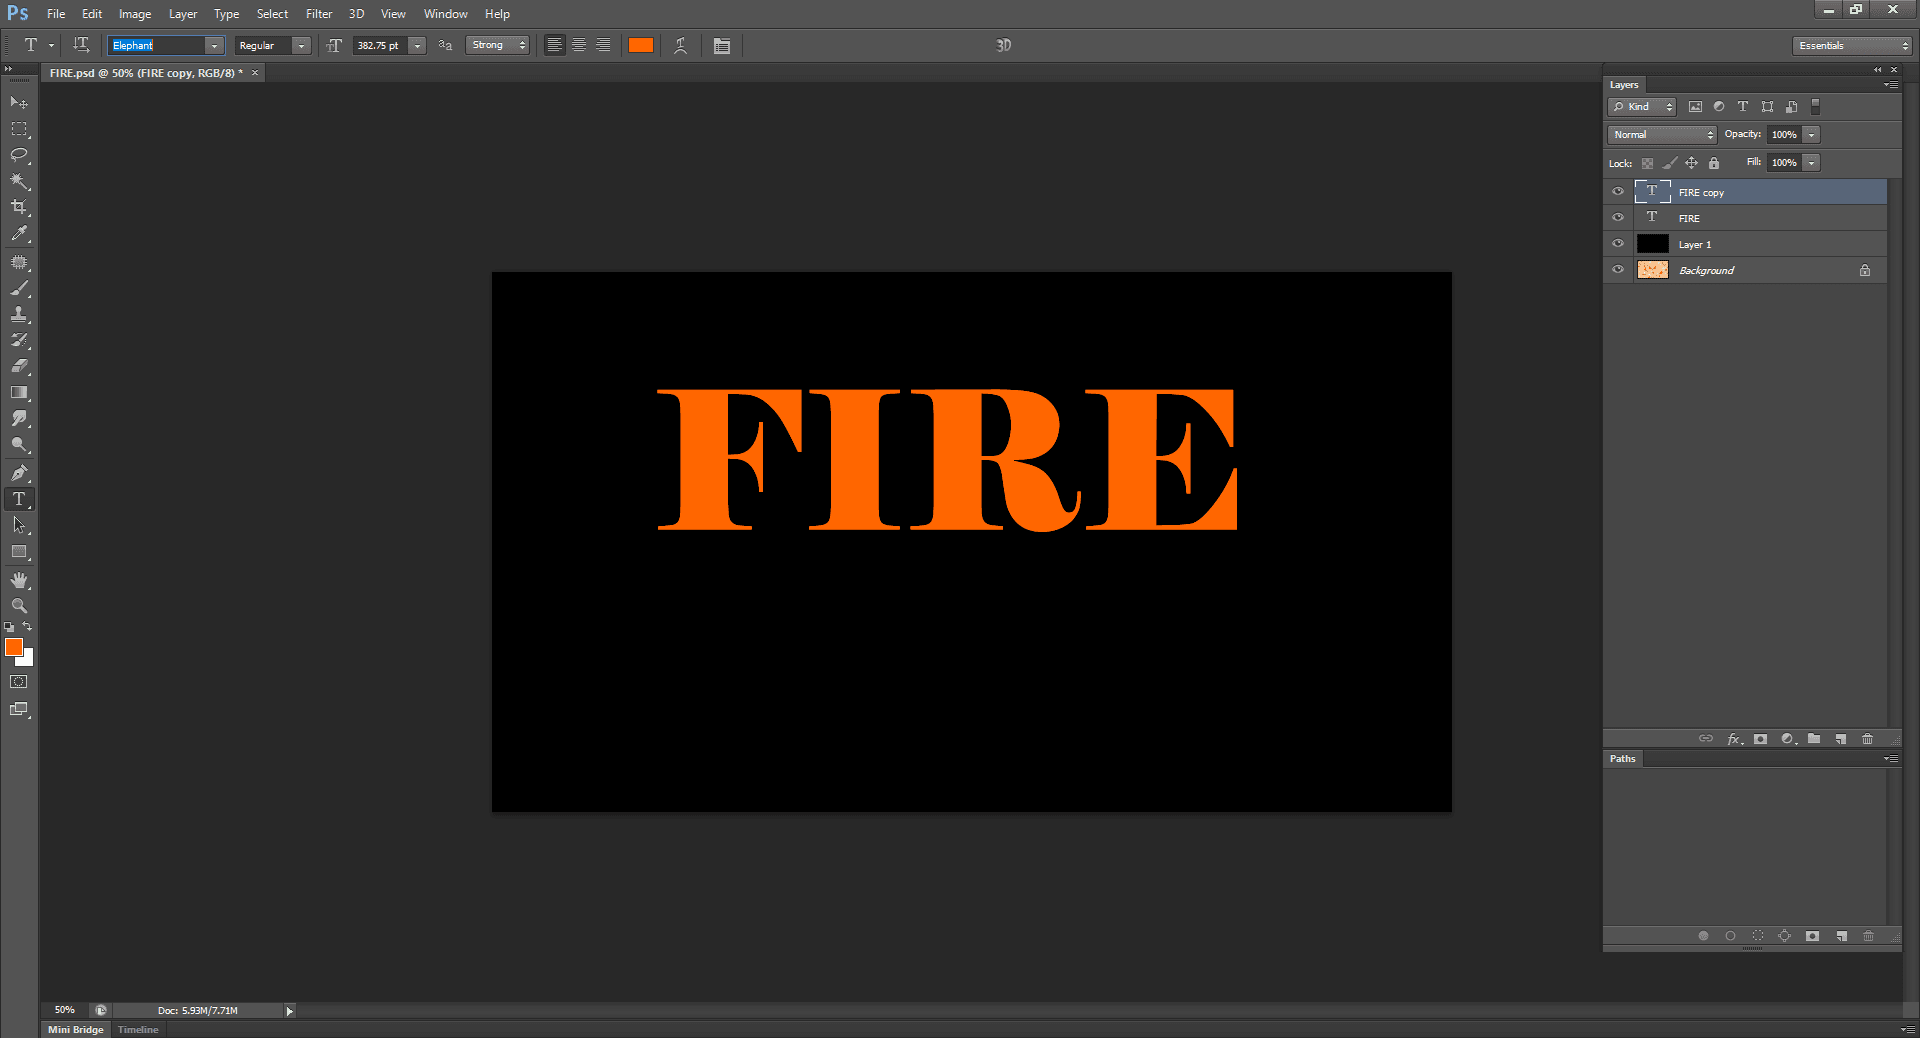
Now create a document with a text layer
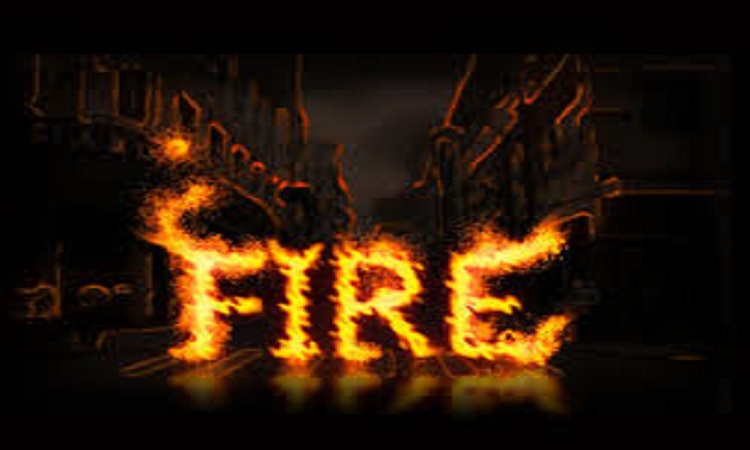
For an instance, use a normal background that contains the word “FIRE”. IF you have found that you have an existing document, keep an original backup copy.
-
It’s time to duplicate the text
Now drag the original text layer into a new layer. Drag it into the bottom of the layer window.

-
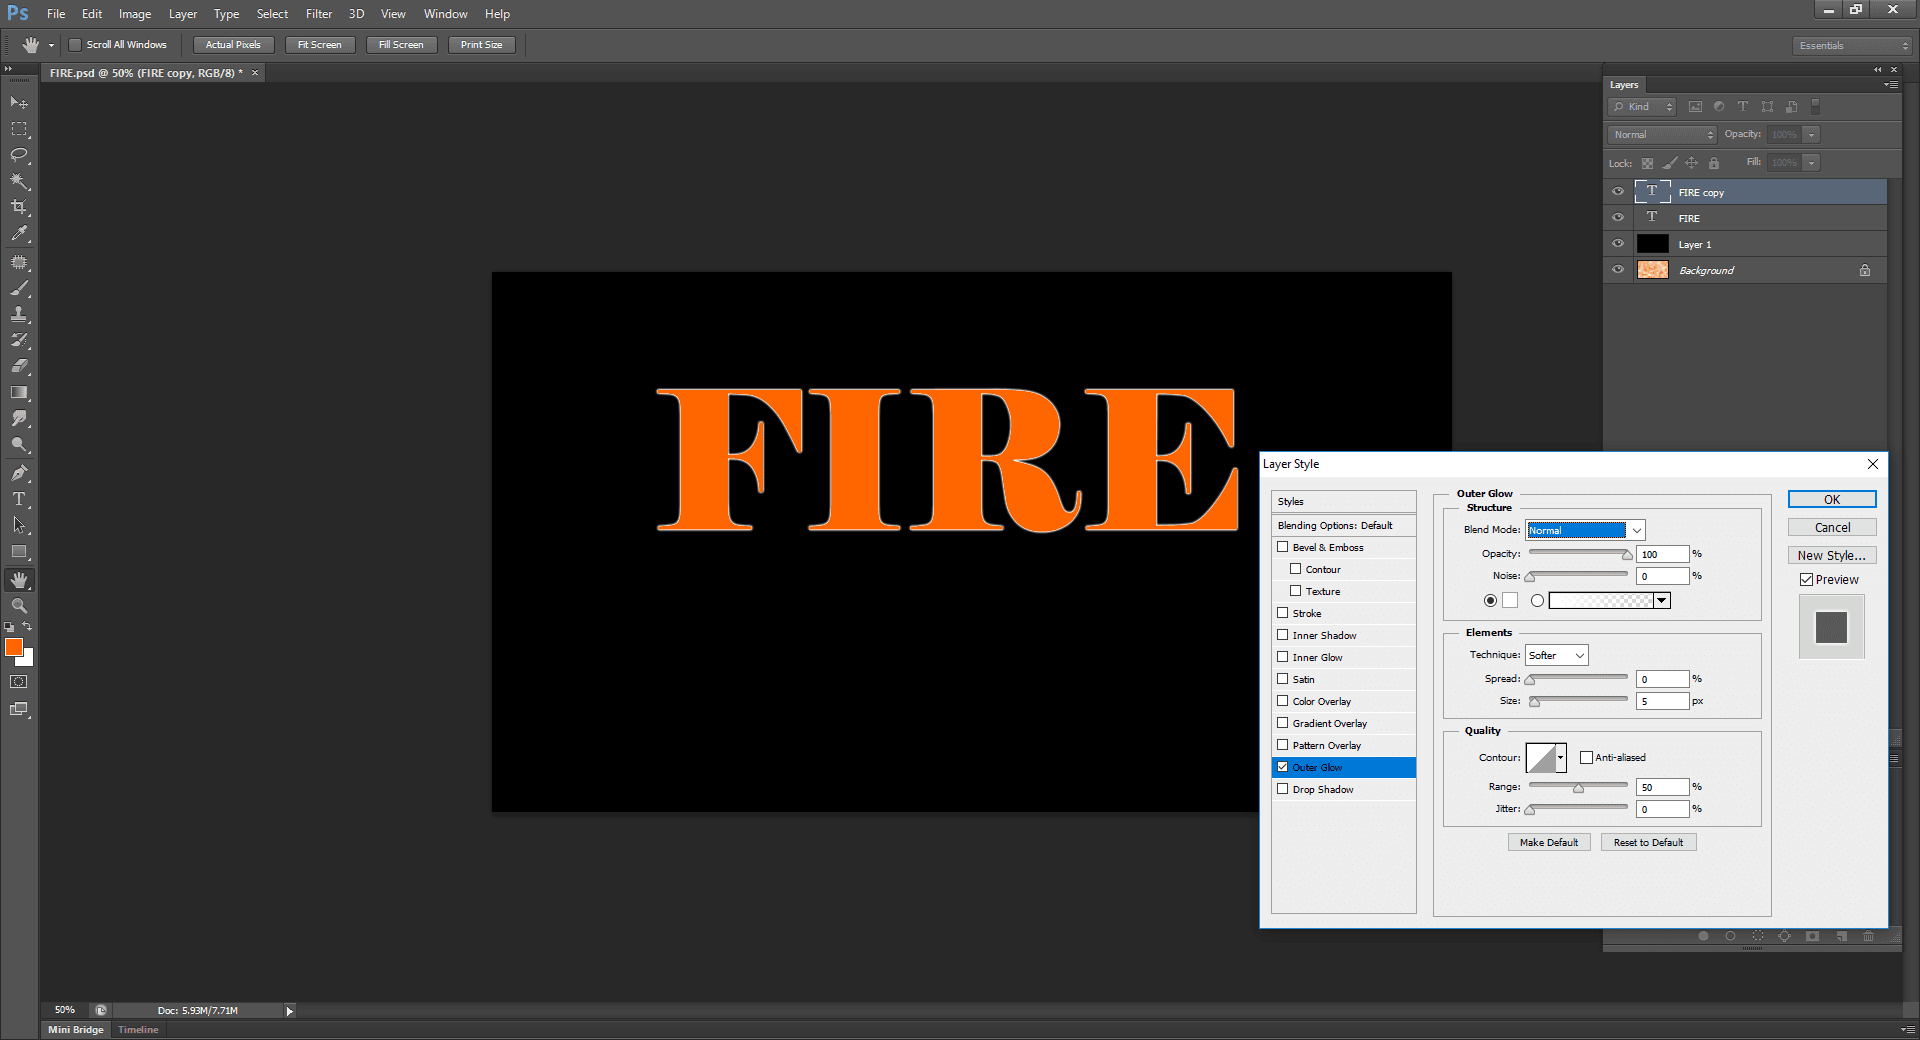
You need to add the outer glow
So you need to click the Fx menu at the bottom of the layers menu and then select the outer glow. You need to change the glow color from yellow to white. Opacity =100% is ok.
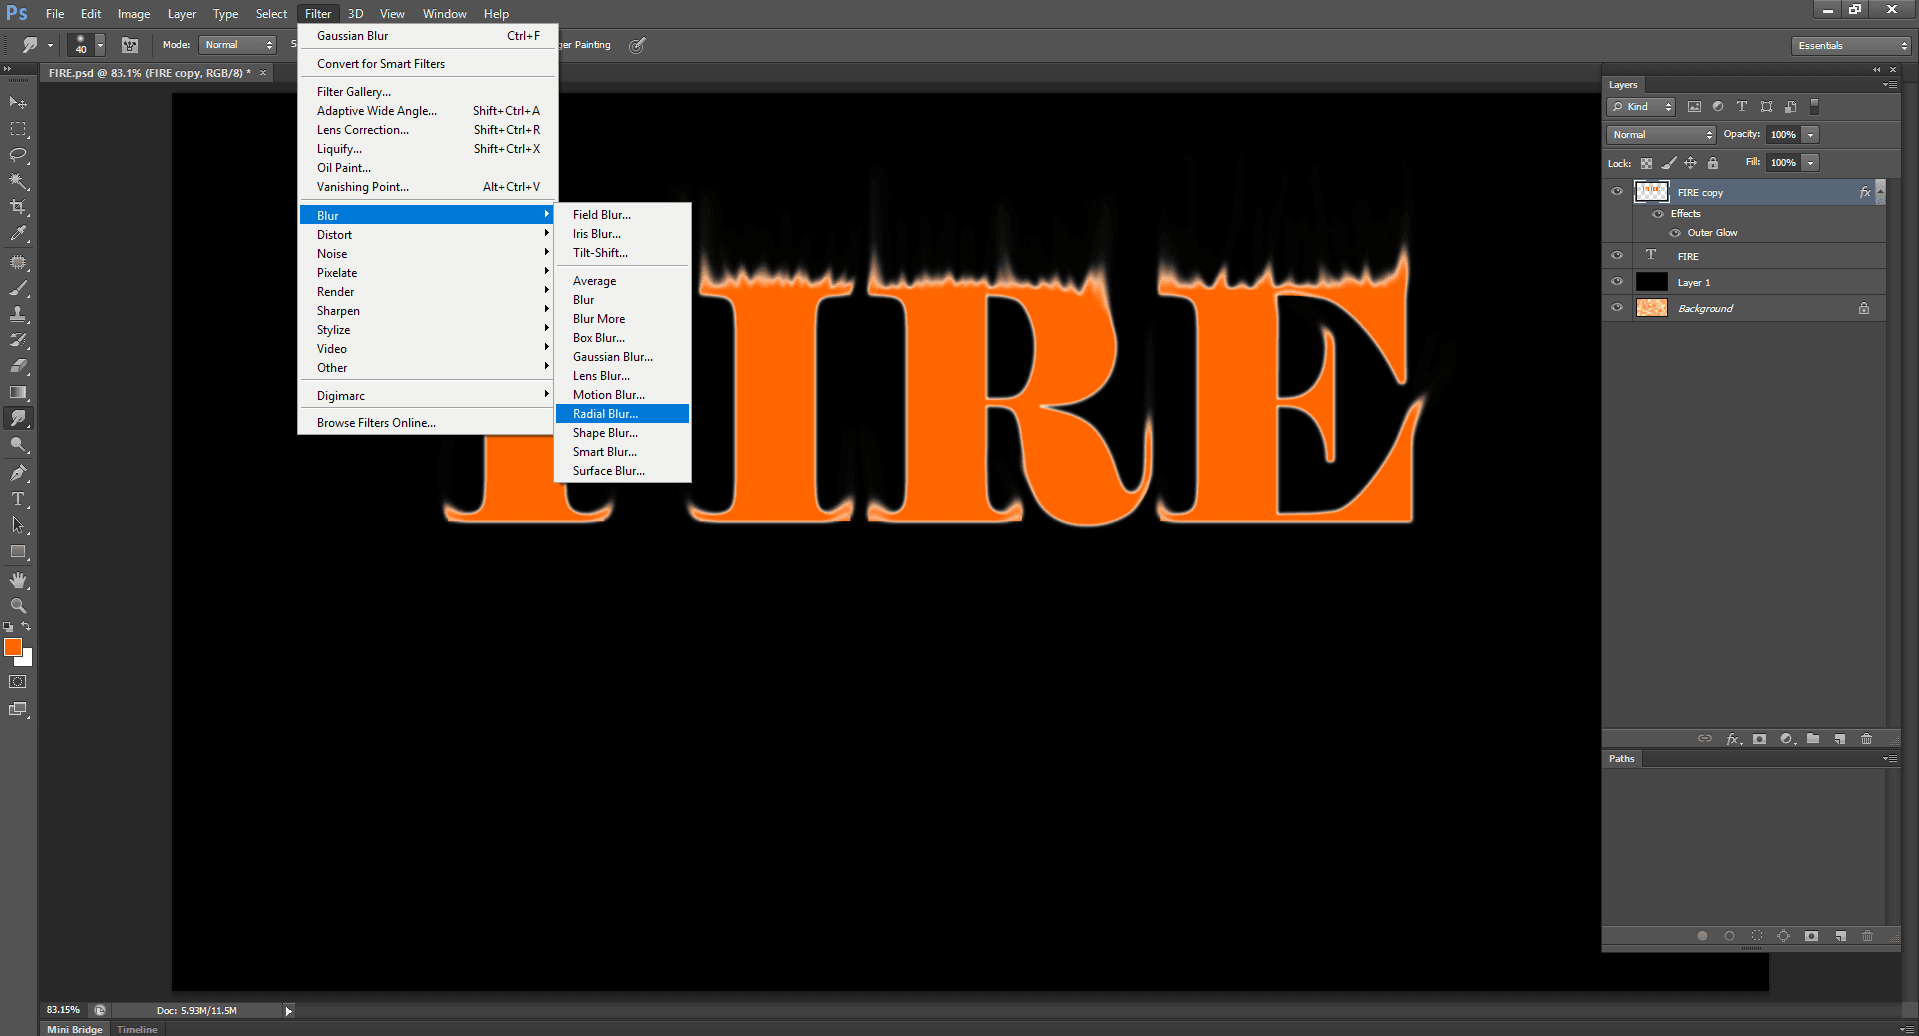
- Apply Gaussian Blur
Select Filter-> Blur-> Gaussian Blur

Now Photoshop will give you a warning message that the user will not be able to edit the real text if you processed it. Ok, the blur so that it looks like this shape.
-
Smudge tool
Now click on the smudge tool which is below the gradient tool. Click on the brush set at the top of the Window. With these settings, you are going to draw the fire image.

-
Create the flames
Here the short, quick strokes will give you the appropriate result. Suppose you are using a brush then vary the thickness by pressure. When done duplicate the smudged layer.
-
Now you need to apply the radial blur
From the filter, menu select blur then select radial blur.
-
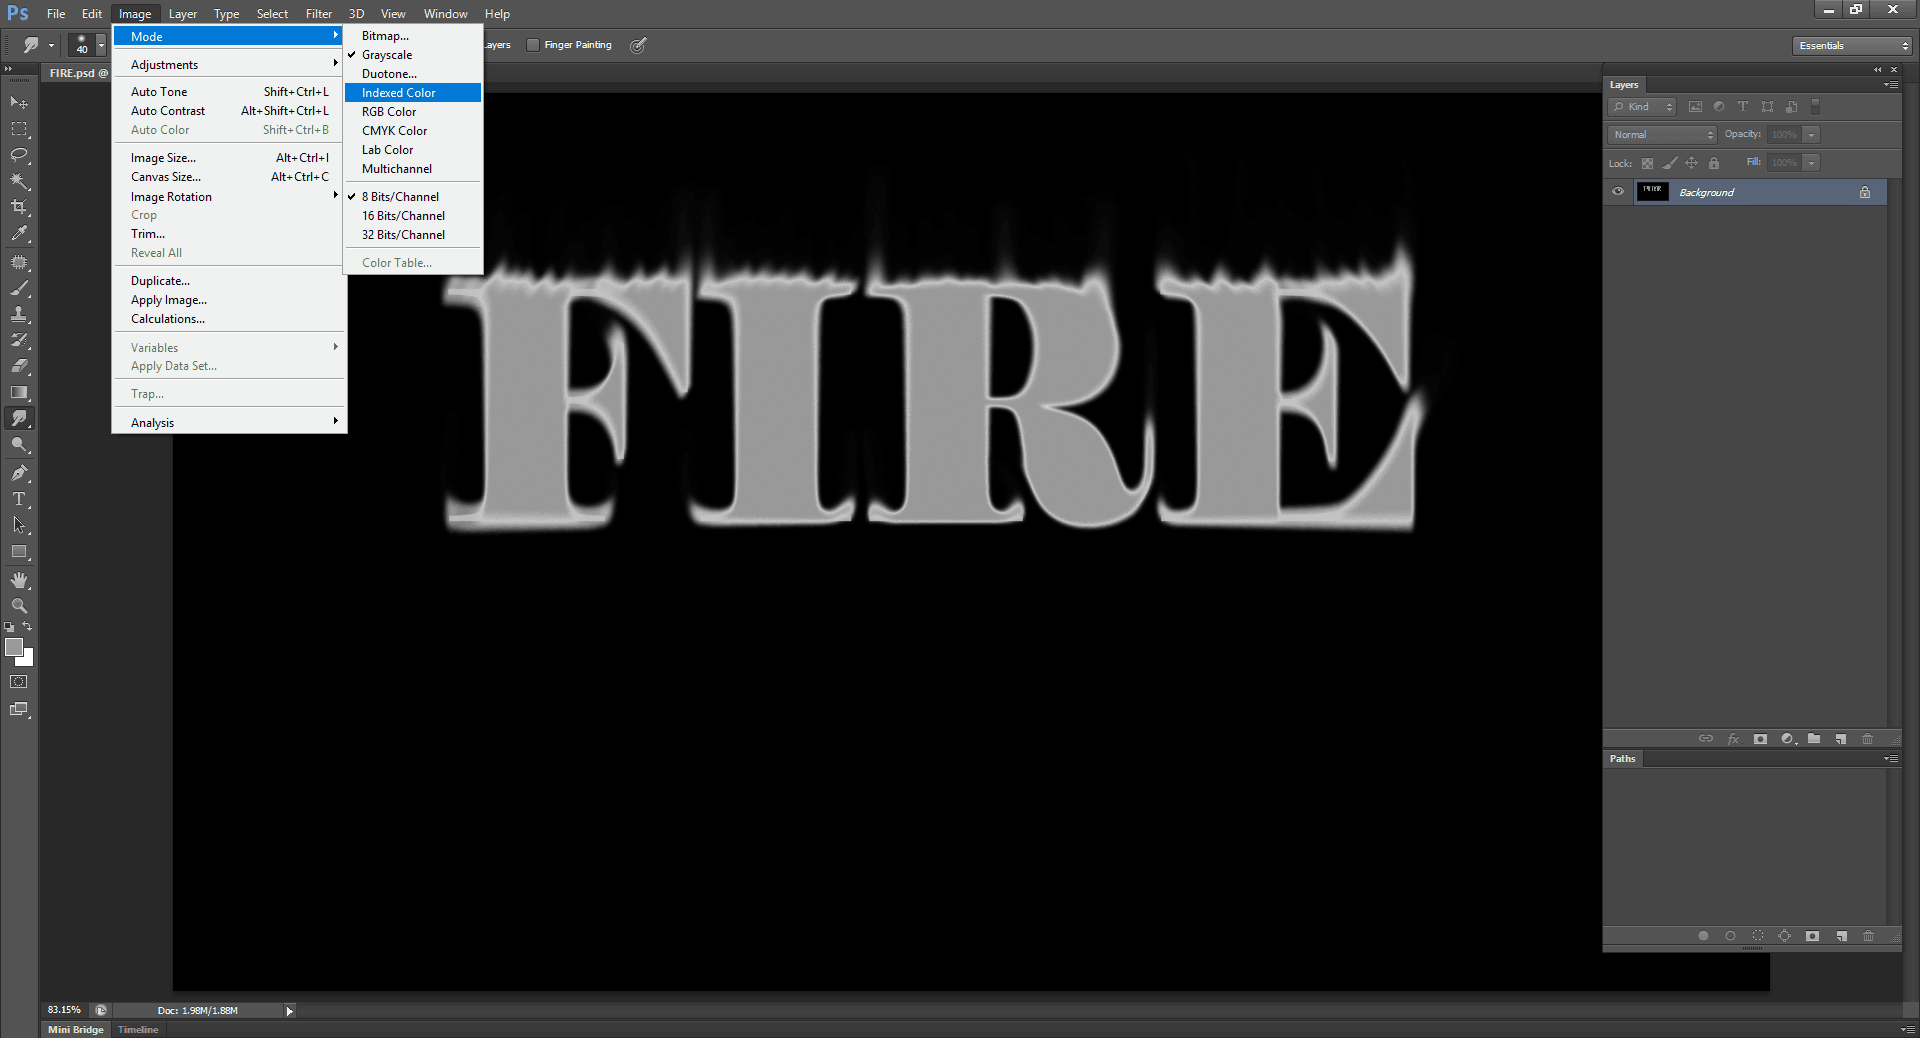
Make your image grayscale:
From the image, menu select a mode then select grayscale.
-
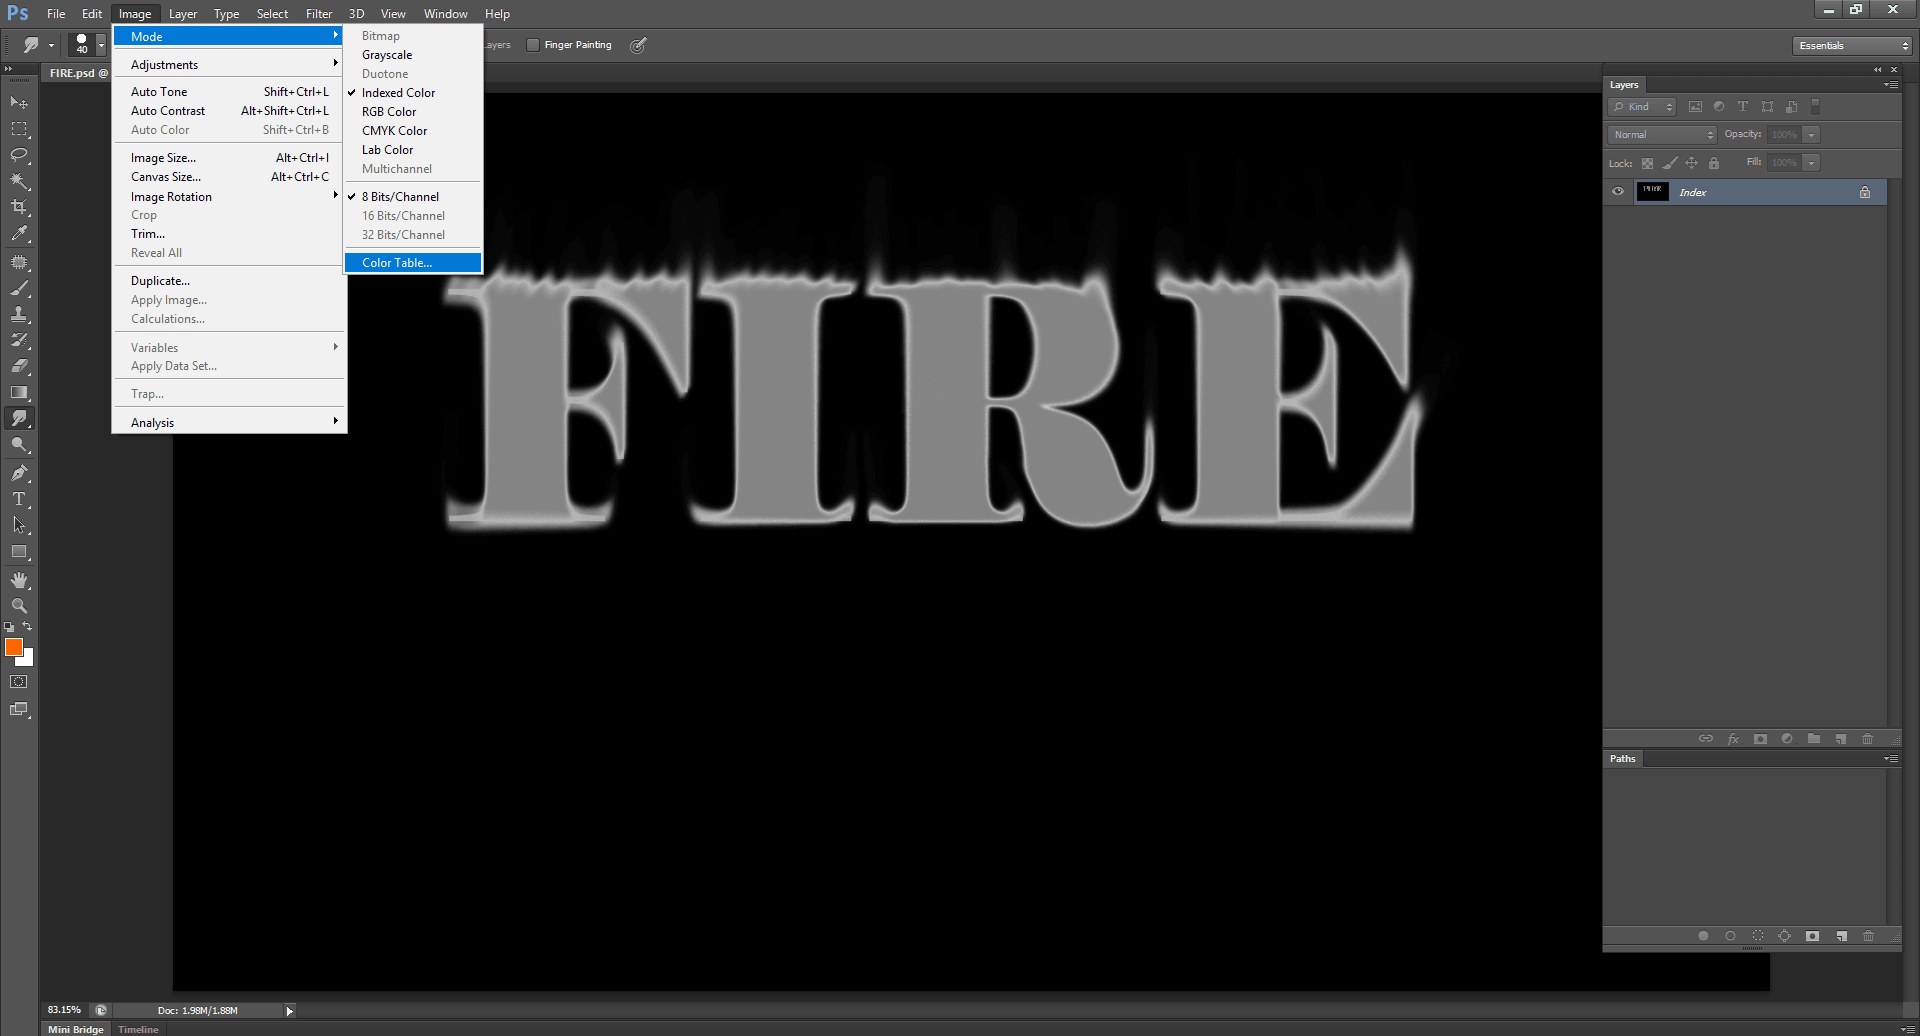
Then Convert it to Indexed color
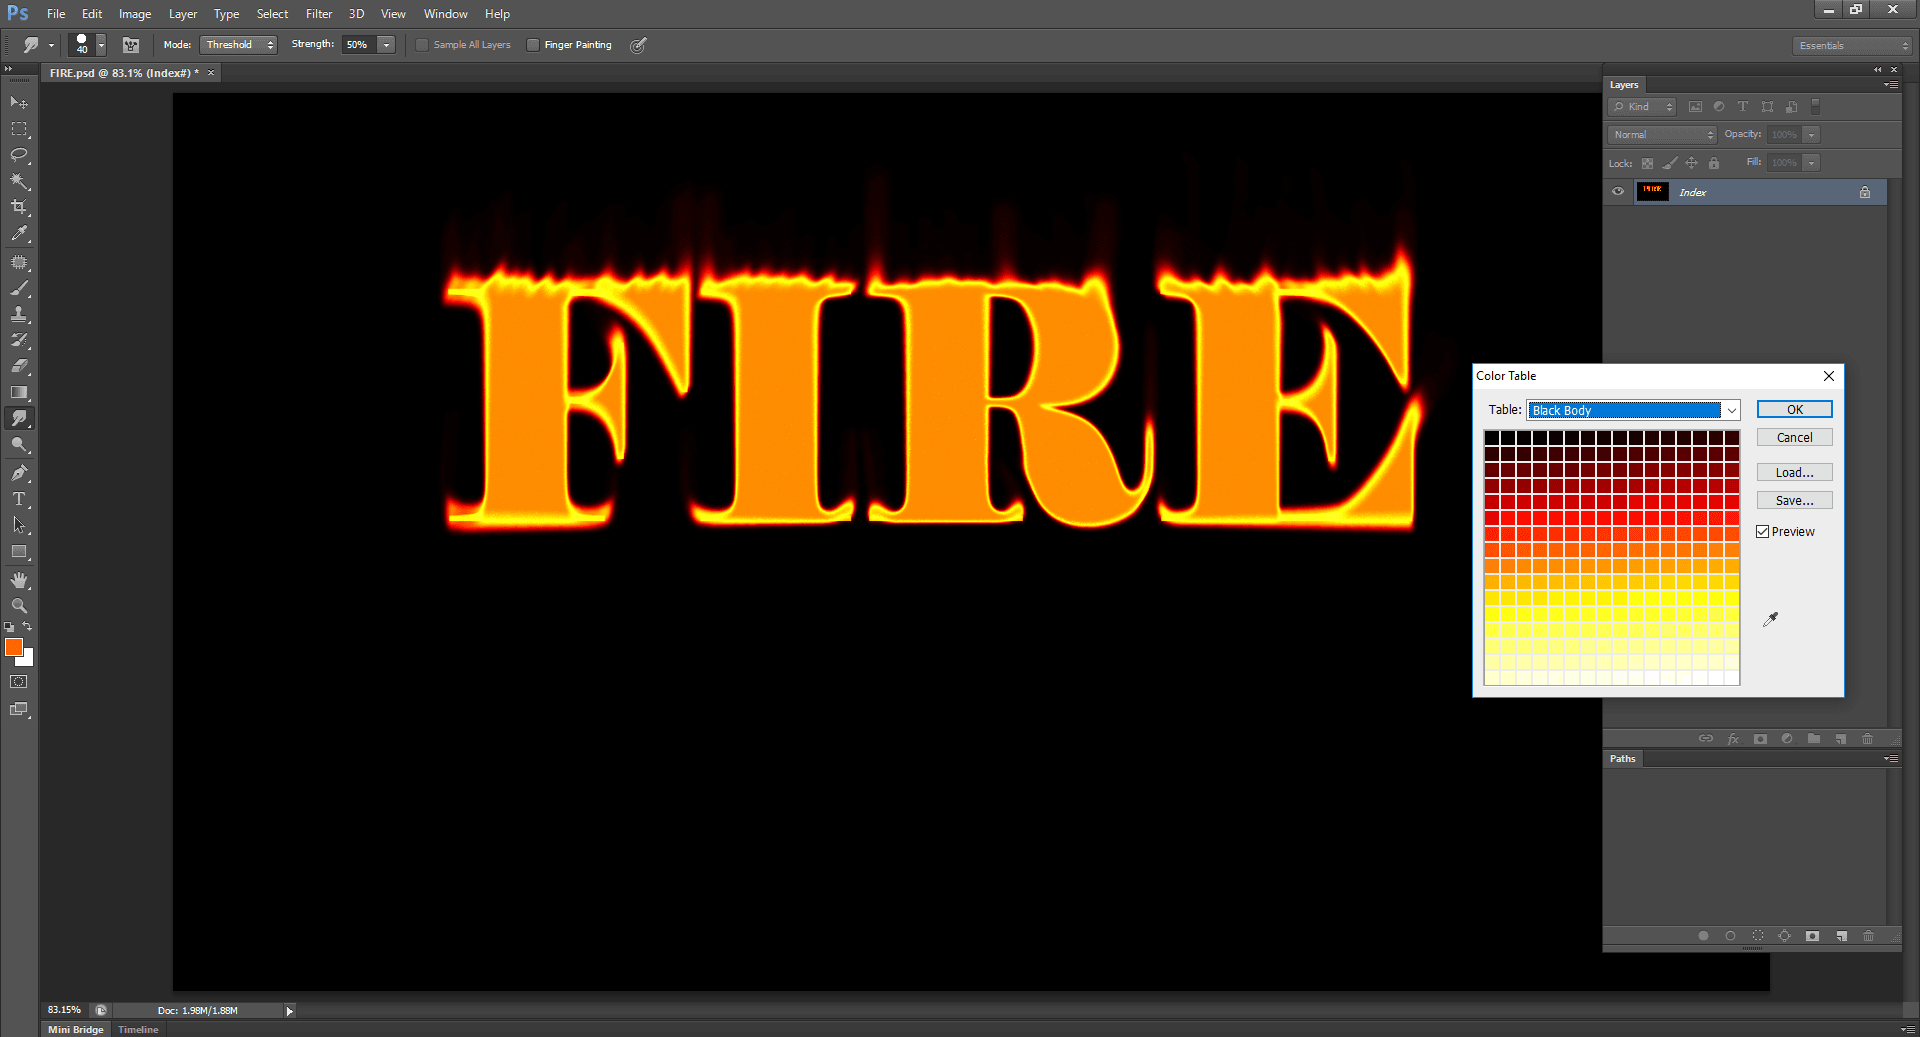
From the image menu, you need to select the mode and then select the indexed color. You can choose your favorite color from the color table.
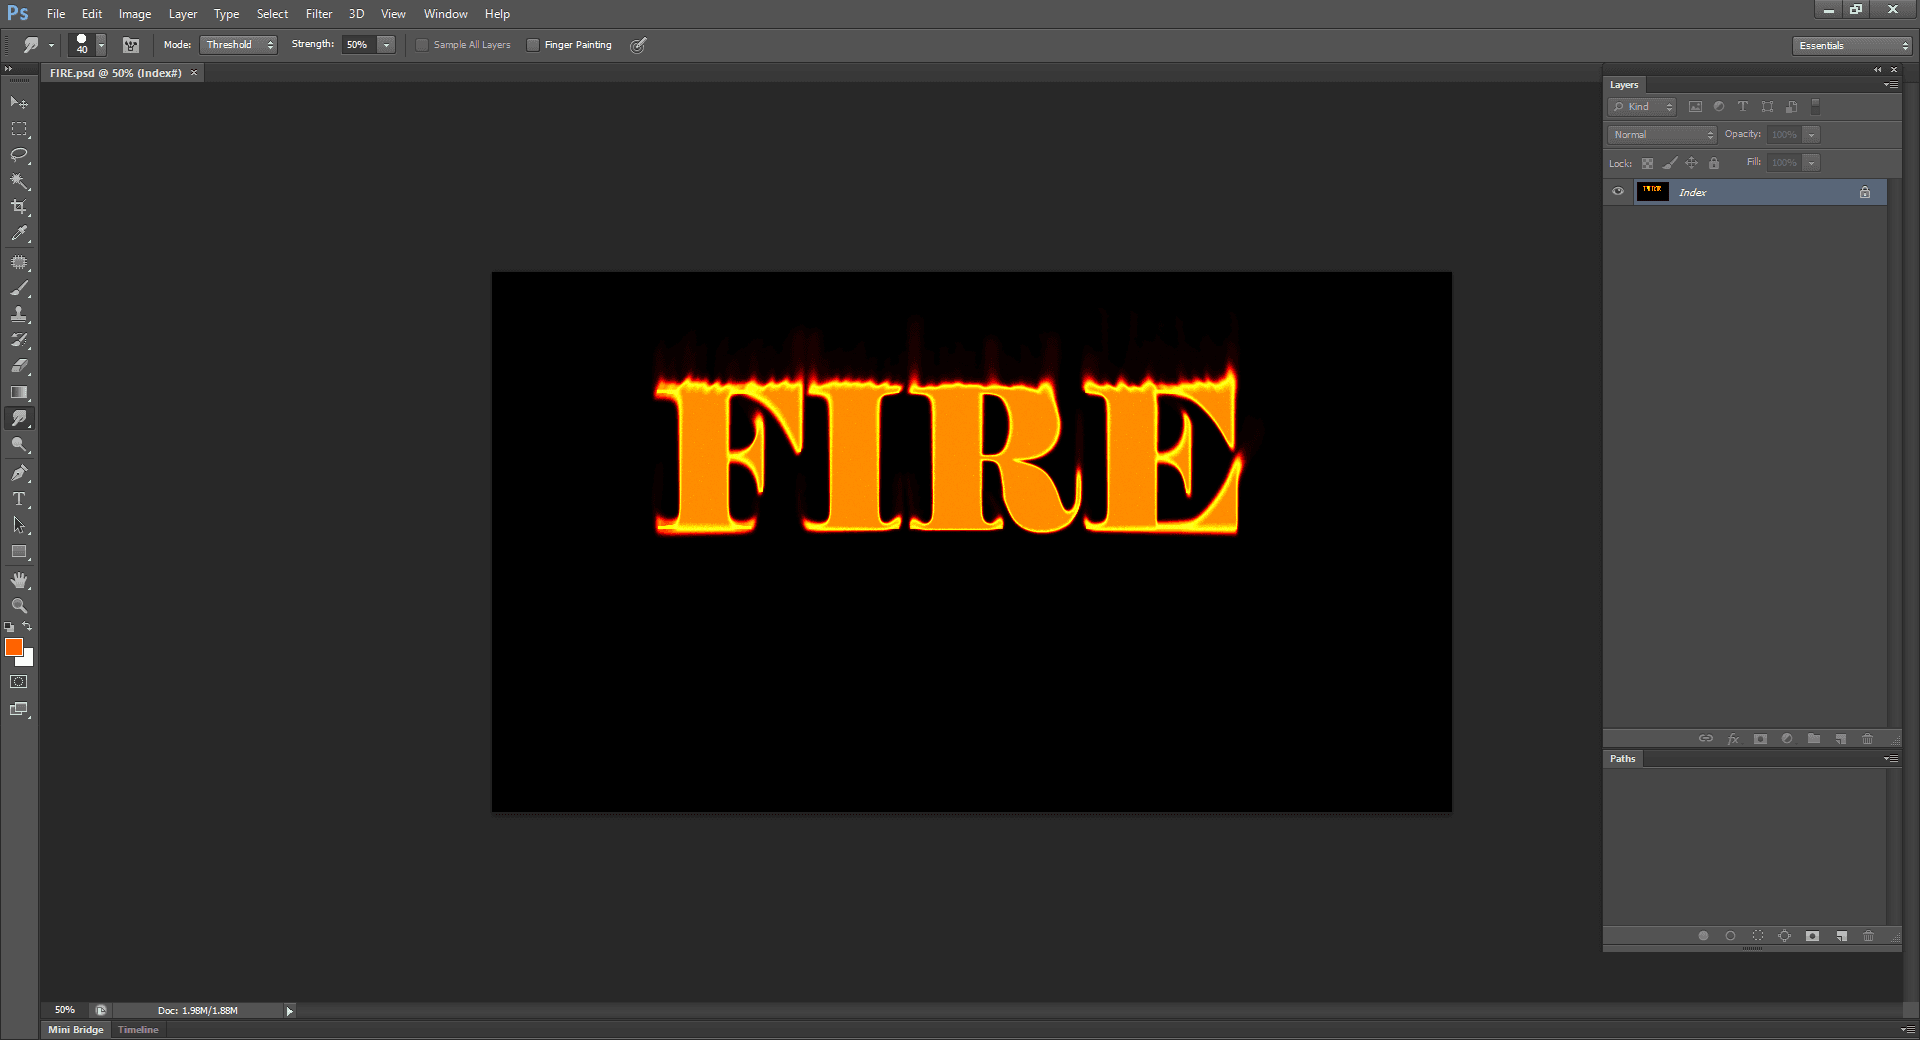
From the menu at the top of the color table window, you can select the black body.
Learn the Photo editor app for android.
For any clipping path service visit our site Clipping Path Graphics.
Our best services are
- Background Removal Service
- Photo Restoration service
- Color Correction service
- raster to vector conversion service
- Jewelry photo editing service
Now a big congratulation to you
Yes! You have done it. Enjoy the fire effect. I think this article will help you a lot on the topic of how to make a fire effect in Photoshop. Be with us & have a great time!